iPhone 15 Top Speaker
Before You Begin
 Warning
Read Battery Safety and follow workspace and battery handling guidelines before you begin.
Remove the following parts before you begin:
Tools
6.1-inch repair tray
ESD-safe tweezers
JCIS bit
Nylon probe (black stick)
Torque driver (gray, 0.55 kgf cm)

Removal
Important
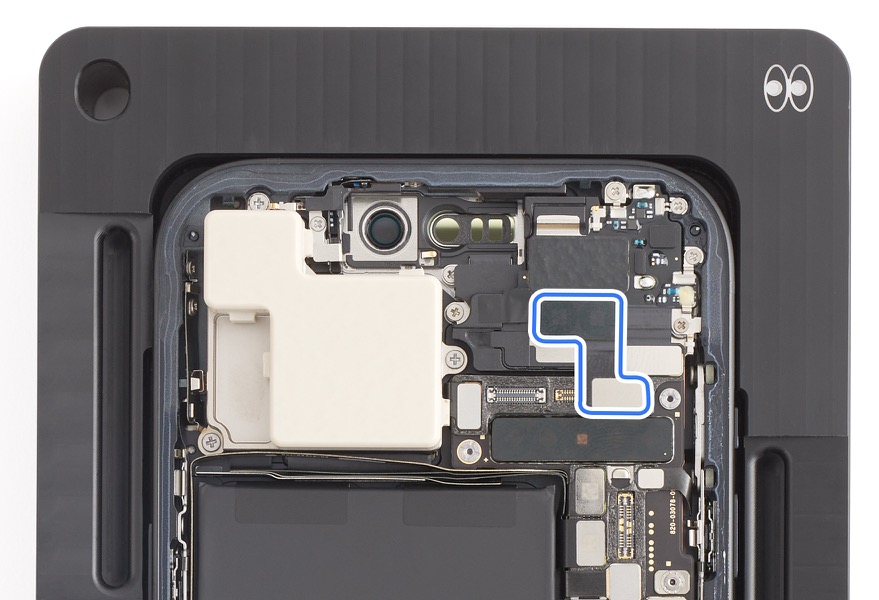
If the iPhone has an mmWave antenna as shown, continue to step 1. If it doesn't, skip to step 2.

Lift the end of the back glass 2 antenna flex cable and the top speaker flex cable off the connectors. Remove the antenna to access a top speaker screw and save the antenna for reassembly.
Use a torque driver and the JCIS bit to remove the five crosshead screws from the top speaker.

Remove the top speaker from the enclosure.


Reassembly
Position the top speaker in the enclosure.

Press the end of the top speaker flex cable to the connector.

Use the gray torque driver and the JCIS bit to install the following five crosshead screws into the top speaker.
Two crosshead screws (923-09823) (1)
Two crosshead screws (923-09812) (2)
One crosshead screw (923-09814) (3)

Press the end of the back glass antenna flex cable to the connector.
 Caution: If the back glass antenna is lost or damaged, repeat top speaker removal steps 2 and 3. Then complete back glass reassembly step 4 with a new back glass antenna.
If the iPhone doesn’t have an mmWave antenna, reinstall the piece of foam.
Important: If the foam is lost or damaged, replace it.
Reinstall the following parts to complete reassembly: