iPhone 15 TrueDepth Camera
Before You Begin
 Warning
Read Battery Safety and follow workspace and battery handling guidelines before you begin.
The TrueDepth camera includes one or more lasers. Disassembly of the TrueDepth camera, damage to the TrueDepth camera, or failure to use genuine Apple parts could expose you to hazardous infrared laser emissions, possibly resulting in injuries to eyes or skin.
Remove the following part before you begin:
Tools
6.1-inch repair tray
ESD-safe tweezers
Micro stix bit
Nitrile or lint-free gloves
Nylon probe (black stick)
Torque driver (green, 0.45 kgf cm)

 Caution
Avoid touching the grounding springs on the TrueDepth camera.
Important
If you replace this part, it is required to run Repair Assistant in order to enable security features. Repair Assistant will be available on the device after you’ve completed all reassembly steps.
Removal
Caution
It is recommended to put on the gloves to prevent contamination of the camera lenses.
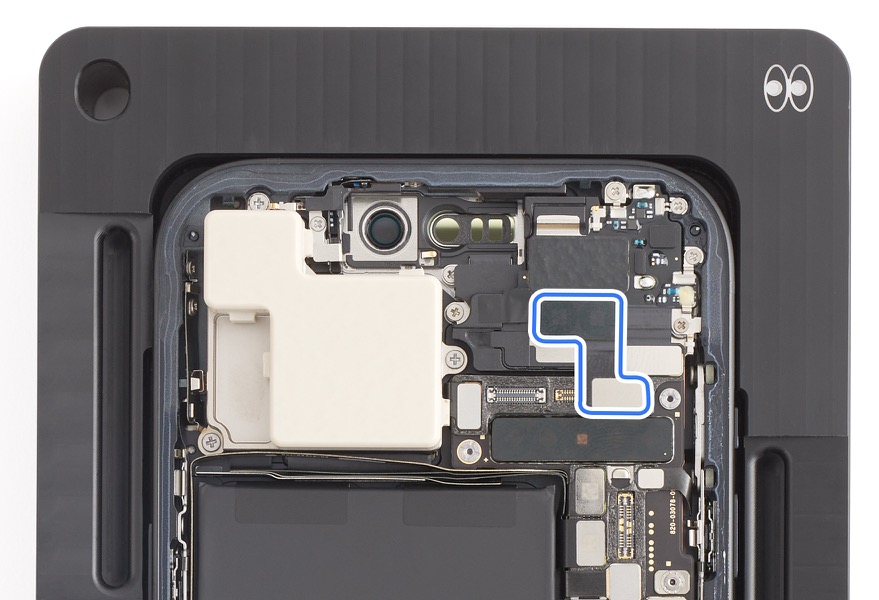
Use a torque driver and the Micro stix bit to remove the two trilobe screws from the TrueDepth camera connector cowling. Set aside the screws. Remove the TrueDepth camera connector cowling and save it for reassembly.

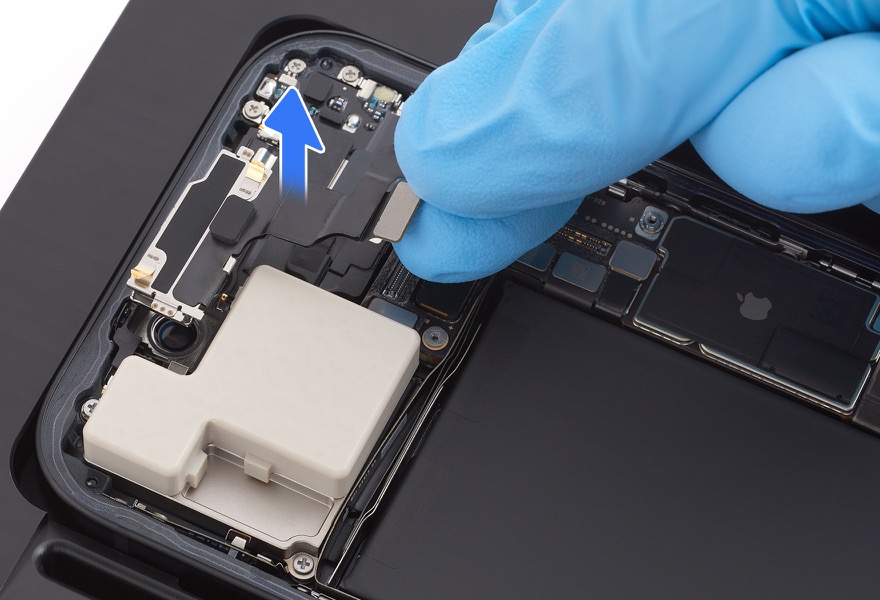
Lift the end of the back glass 2 antenna flex cable from the connector and lift the ends of the two TrueDepth camera flex cables from the connectors. Gently hold the flex cables together and lift the TrueDepth camera out of the enclosure.

Reassembly
Put on the gloves to prevent contamination of the camera lenses.
Inspect the TrueDepth camera module. If it’s damaged, replace the TrueDepth camera.
Use ESD-safe tweezers to remove the protective cover from the TrueDepth camera.
Position the TrueDepth camera in the enclosure.
- Caution
Don’t press on the bridge of the TrueDepth camera when positioning it in the enclosure.
Don’t touch the front of the TrueDepth camera assembly after you remove the protective cover.

Press the ends of the two TrueDepth camera flex cables to the connectors.
Press the end of the back glass antenna 2 flex cable to the connector.

Use the green torque driver and Micro stix bit to install two new trilobe screws (923-09819) into the TrueDepth camera connector cowling.

Reinstall the following part to complete reassembly:
Important
After you’ve completed all reassembly steps, Repair Assistant will be available on the device and is required to enable security features. Learn how to initiate Repair Assistant.