Final Cut Pro User Guide
- Welcome
-
- What’s new in Final Cut Pro 10.5
- What’s new in Final Cut Pro 10.4.9
- What’s new in Final Cut Pro 10.4.7
- What’s new in Final Cut Pro 10.4.6
- What’s new in Final Cut Pro 10.4.4
- What’s new in Final Cut Pro 10.4.1
- What’s new in Final Cut Pro 10.4
- What’s new in Final Cut Pro 10.3
- What’s new in Final Cut Pro 10.2
- What’s new in Final Cut Pro 10.1.2
- What’s new in Final Cut Pro 10.1
- What’s new in Final Cut Pro 10.0.6
- What’s new in Final Cut Pro 10.0.3
- What’s new in Final Cut Pro 10.0.1
-
- Intro to effects
-
- Intro to transitions
- How transitions are created
- Add transitions
- Set the default transition
- Delete transitions
- Adjust transitions in the timeline
- Adjust transitions in the inspector and viewer
- Merge jump cuts with the Flow transition
- Adjust transitions with multiple images
- Modify transitions in Motion
-
- Add storylines
- Use the precision editor
- Conform frame sizes and rates
- Use XML to transfer projects
-
- Glossary
- Copyright

Zoom and scroll in the Final Cut Pro timeline
Being able to see and get to any point in your project is critical to efficient editing and storytelling. There are many ways to adjust the view of the timeline.
Zoom in to and out of the timeline using commands
In Final Cut Pro, do any of the following:
Zoom in to the timeline: Choose View > Zoom In, or press Command-Plus Sign (+).
Zoom out of the timeline: Choose View > Zoom Out, or press Command-Minus Sign (–).
Zoom in to and out of the timeline using the Zoom tool
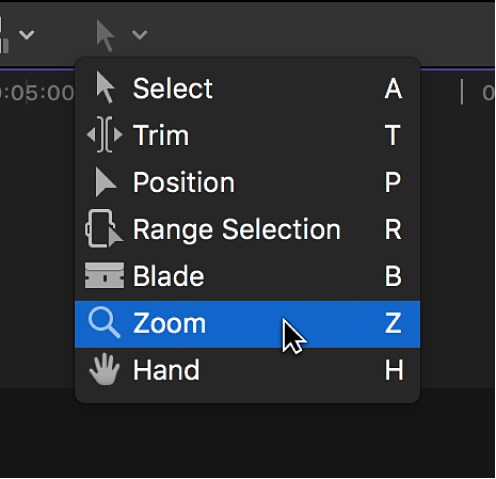
In Final Cut Pro, click the Tools pop-up menu in the top-left corner of the timeline and choose Zoom (or press Z).

The pointer changes to the Zoom tool
 .
.Tip: To switch to the Zoom tool temporarily, hold down the Z key. When you release the Z key, the tool reverts to the previously active tool.
Do any of the following:
Zoom in to the timeline: Click the section of the timeline you want to zoom in to. (You can also drag over an area of the timeline to zoom in to just that area.)
Click multiple times to continue zooming in.
Zoom out of the timeline: Option-click the section of the timeline you want to zoom out of.
Option-click multiple times to continue zooming out.
Fit the timeline contents into the available window size
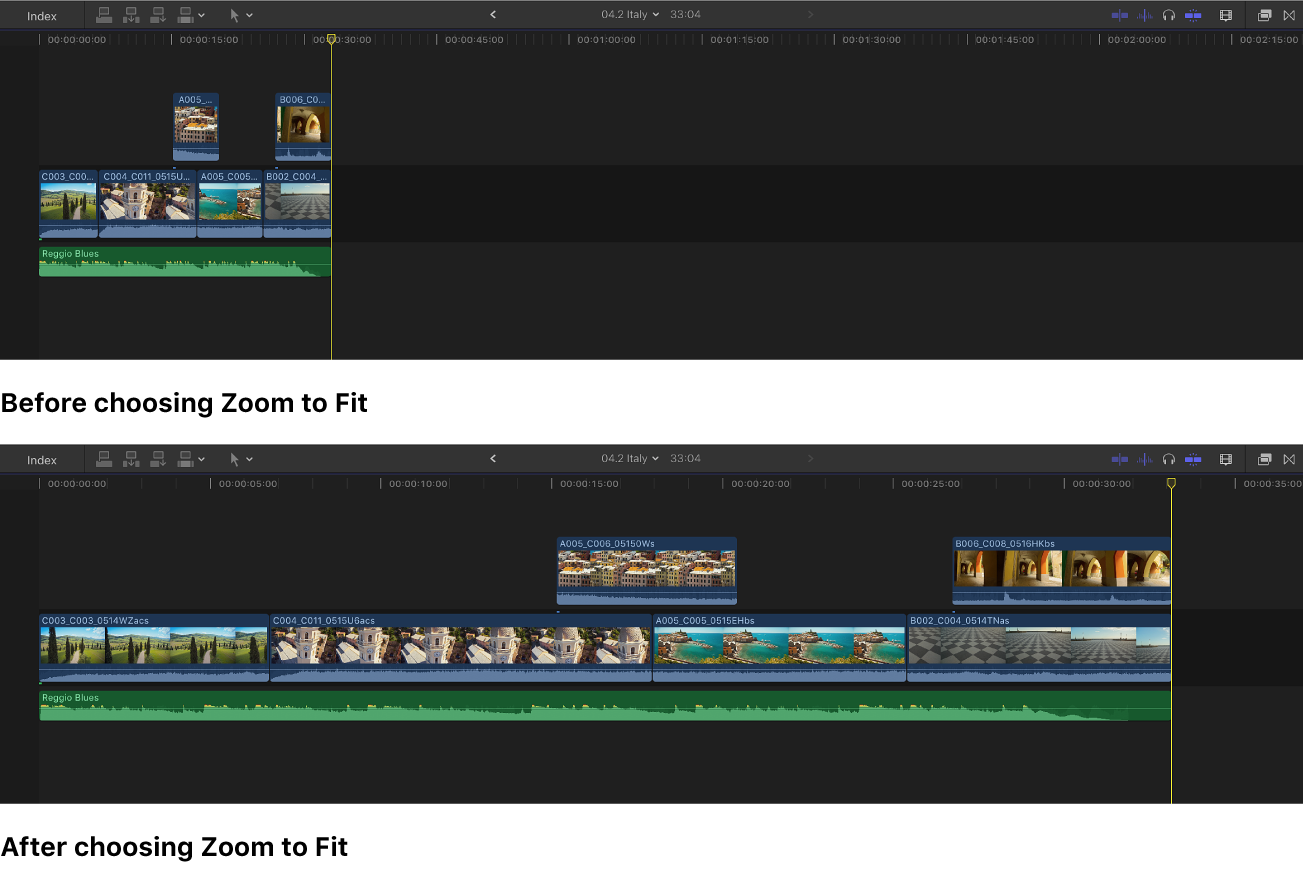
Whether you’re zoomed in to a single clip or zoomed out so far that all the clips in your project appear on the left side of the timeline, you can quickly change the view so that all the clips fill the visible part of the timeline and no scrolling is required.
In Final Cut Pro, choose View > Zoom to Fit (or press Shift–Z).

Zoom in to and out of the timeline using the Zoom slider
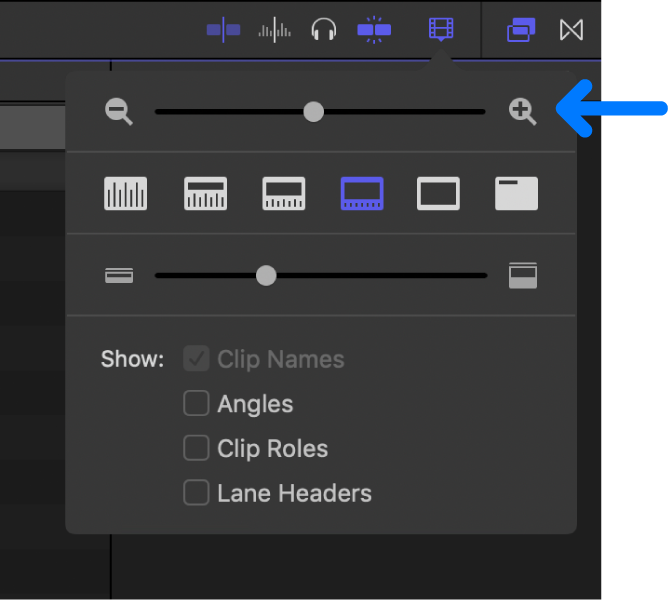
In Final Cut Pro, click the Clip Appearance button in the top-right corner of the timeline.

The clip appearance controls appear.
Do any of the following:
Zoom in to the timeline: Drag the Zoom slider to the right, or press Command-Plus Sign (+).
Zoom out of the timeline: Drag the Zoom slider to the left, or press Command-Minus Sign (–).

Scroll a zoomed-in timeline
In Final Cut Pro, zoom in to the timeline until you see a portion of the project only.
Do one of the following:
Drag the scroll bar at the bottom of the timeline left or right.
Drag the scroll bar at the right side of the timeline up or down.
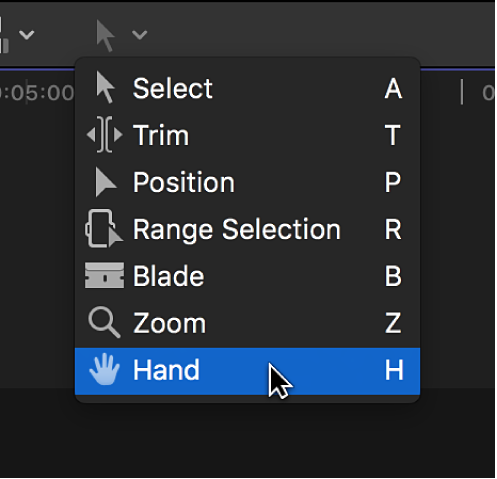
Click the Tools pop-up menu in the top-left corner of the timeline and choose Hand (or press H), then drag in the timeline.

To change how scroll bars appear and behave, choose Apple menu > System Preferences > General, then modify the scroll bar settings.
Tip: To switch to the Hand tool temporarily, hold down the H key. When you release the H key, the tool reverts to the previously active tool.
You can also use a variety of keyboard shortcuts and Multi-Touch gestures to zoom and scroll in the timeline. See Keyboard shortcuts in Final Cut Pro and Multi-Touch trackpad gestures in Final Cut Pro.