Final Cut Pro User Guide for Mac
- Welcome
- What’s new
-
- Intro to effects
-
- Intro to transitions
- How transitions are created
- Add transitions and fades
- Quickly add a transition with a keyboard shortcut
- Set the default duration for transitions
- Delete transitions
- Adjust transitions in the timeline
- Adjust transitions in the inspector and viewer
- Merge jump cuts with the Flow transition
- Adjust transitions with multiple images
- Modify transitions in Motion
-
- Add storylines
- Use the precision editor
- Conform frame sizes and rates
- Use XML to transfer projects
- Glossary
- Copyright

Adjust object tracking in Final Cut Pro for Mac
When you track effects or clips (such as images or titles) to moving objects in video clips, Final Cut Pro analyzes the motion of the objects in the video clips and generates object tracking data in the form of keyframes. See How does object tracking work in Final Cut Pro for Mac?.
You can edit tracking keyframes for one or more motion tracks on a video clip. You can also rename, reset, delete, and duplicate motion tracks.
Edit tracking keyframes in the timeline
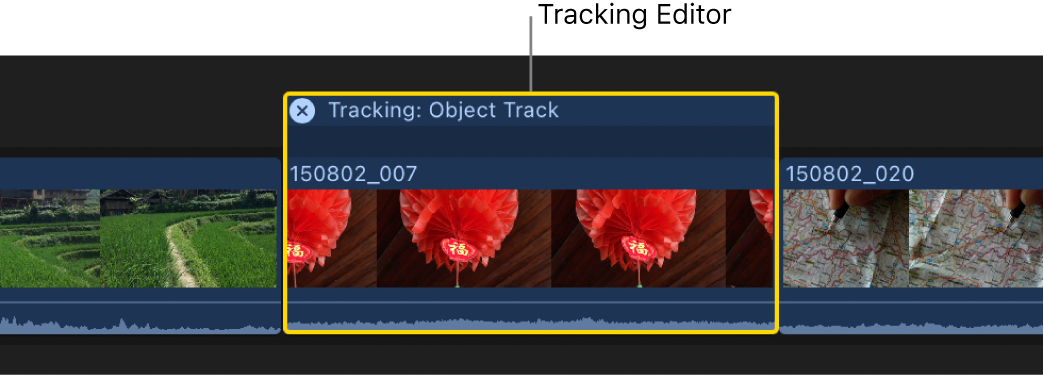
You can use the Tracking Editor in the timeline to add or remove keyframes in a motion track.
Do one of the following:
If the Tracking Editor isn’t already shown, select the clip in the timeline and do one of the following:
Choose Clip > Show Tracking Editor (or press Option-Command-T).
Control-click the clip in the timeline and choose Show Tracking Editor.
The Tracking Editor appears on the clip in the timeline.

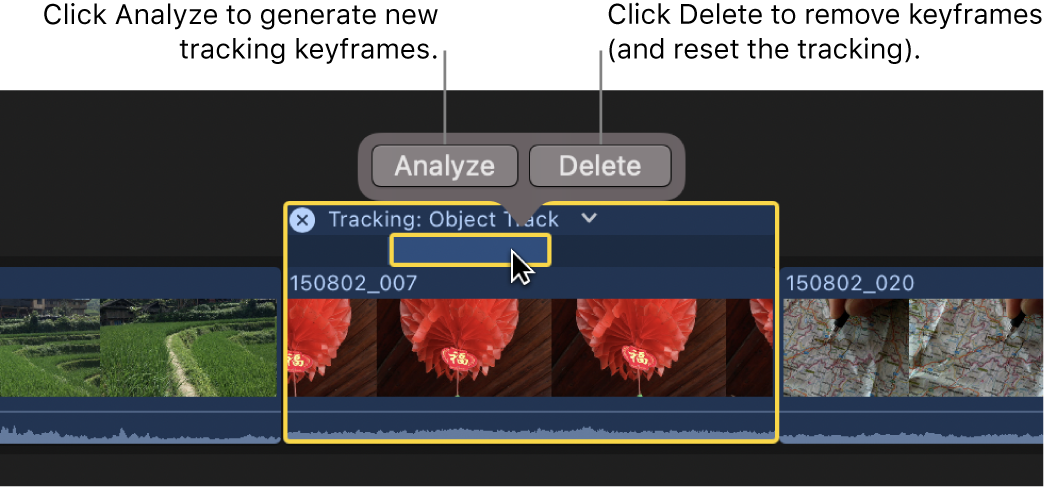
In the Tracking Editor, select a region by doing one of the following:
Select a region of tracking keyframes: Click once on a light blue region.
Select an empty region: Click once on a region with no tracking keyframes.
Select a range: Drag to select the range.
Select a single frame: Double-click the frame.
Do one of the following:
Generate new tracking keyframes: Click Analyze.
Remove keyframes: Click Delete. This resets the motion track but doesn’t delete it.

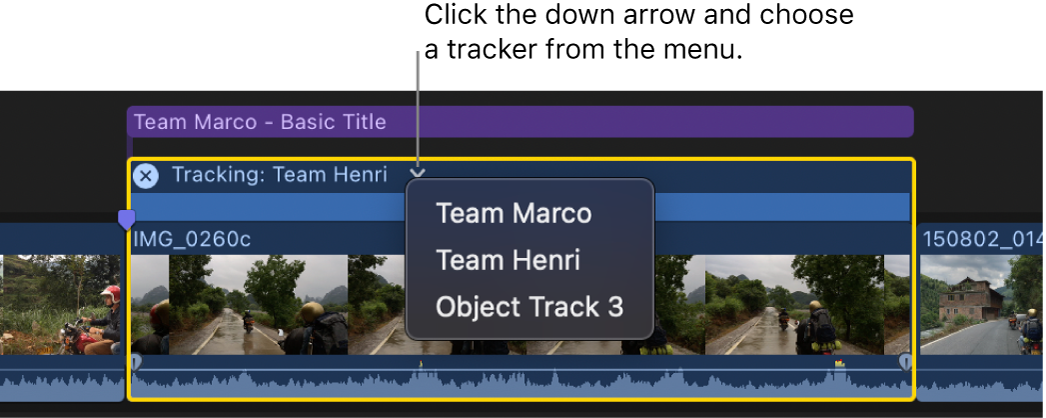
If a clip has multiple trackers, you can choose the tracker to display in the Tracking Editor. Click the down arrow to the right of the track name, then choose a tracker from the pop-up menu.

You can also edit tracking keyframes in the Video inspector, which is similar to editing video effect keyframes. See Edit tracking keyframes in the Video inspector, below.
When filling a gap between existing tracking keyframes, Final Cut Pro interpolates the difference between them (as it does with video animation keyframes).
Edit tracking keyframes in the Video inspector
You can edit tracking keyframes in the Video inspector, which is similar to editing video effect keyframes or editing audio effect keyframes.
In Final Cut Pro, track an effect or an image (or other clip) to a moving object in a video clip.
See Track an effect to a moving object in Final Cut Pro for Mac or Track an image or other clip to a moving object in Final Cut Pro for Mac.
Select the clip in the timeline, then position the playhead on the clip so that the frame you want to change appears in the viewer.
Click Analyze to generate tracking keyframes.
See Edit tracking keyframes in the timeline, above.
Open the Video inspector, then scroll to the tracker you want to change in the Trackers section.
Click the tracker name to select the tracker.
Do any of the following:
Show onscreen controls in the viewer: Click the Onscreen Controls button.

Navigate between keyframes: Click the left arrow to move the playhead to the previous keyframe. Click the right arrow to move the playhead to the next keyframe.

Add or remove keyframes: Click the Keyframe button.
Important: Before adding any keyframes in this way, make sure the Behavior pop-up menu in the Tracker controls is set to Pin to Tracker, so that keyframes are added to both the motion track and the item (effect shape mask, image, or other clip) tracking the object in the clip. See Offset the position of a tracking effect in Final Cut Pro for Mac.

Note: When you make a change using the onscreen controls, Final Cut Pro adds a keyframe automatically.
You can also click the down arrow on the right end of the tracker and choose one of the following from the Keyframes section of the pop-up menu:
Add: Adds a keyframe at the playhead location.
Delete: Deletes the keyframe at the playhead location.
Previous: Moves the playhead to the previous keyframe.
Next: Moves the playhead to the next keyframe.
Add, rename, reset, delete, or duplicate motion tracks
Select the clip in the Final Cut Pro timeline.
Open the Video inspector, then scroll to the tracker you want to change in the Trackers section.
Do any of the following:
Add a tracker: Click the New Tracker button (+) at the top of the Trackers section.
Rename a tracker: Double-click the name and enter a new name.
Reset, delete, or duplicate a tracker: Click the down arrow on the right end of the tracker and choose one of the following:
Reset Tracker: Removes all keyframes from the tracker. You can also remove keyframes using the Tracking Editor. See Edit tracking keyframes in the timeline, above.
Delete Tracker: Deletes the tracker.
Duplicate Tracker: Makes a copy of the tracker and appends the word “Copy” to the name of the copy.
Download this guide: PDF