Use text styles in Numbers on iPad
Paragraph styles and character styles are sets of attributes — like a font size and colour — that determine how text looks. Using text styles helps you keep text formatting consistent throughout your spreadsheet. For example, when you apply the paragraph style Heading to text, that text matches other headings that use that style.
Paragraph styles apply to all the text in a paragraph, while character styles apply only to a selected word or character. A paragraph style may contain multiple character styles within it.
Every Numbers template includes predesigned text styles. When you replace placeholder text, your content uses that paragraph style. You can add your own text styles, modify existing styles and delete any you don’t want to keep. Any changes you make to styles affect only the spreadsheet where you changed them.
Note: You can’t apply a paragraph style or character style to text in a table cell.
Apply a paragraph style
Select one or more paragraphs, or tap anywhere in a paragraph to apply the style to only that paragraph.
You can only apply a paragraph style to text in a text box or shape.
Tap
 , then tap Text.
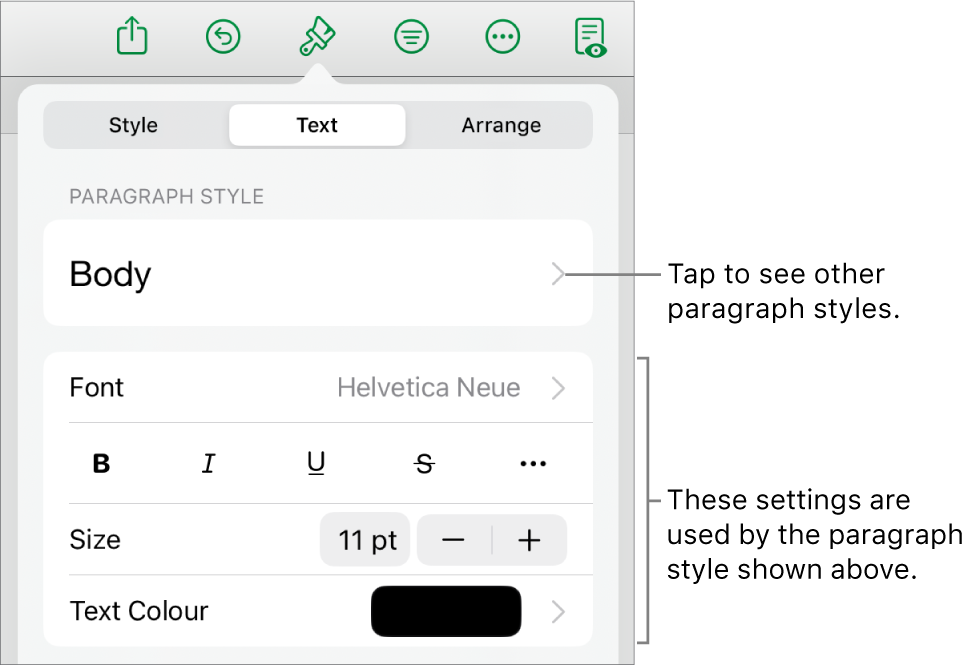
Tap the style name below Paragraph Style, then tap a new paragraph style (scroll to see more).

Apply a character style
Every Numbers template includes character styles that consist of formatting attributes such as bold, an underline or superscript. You can apply character styles to text in text boxes and shapes, but not to text in table cells.
Select the words or characters you want to format, then tap
 .
.If you can’t see text controls, tap Text.
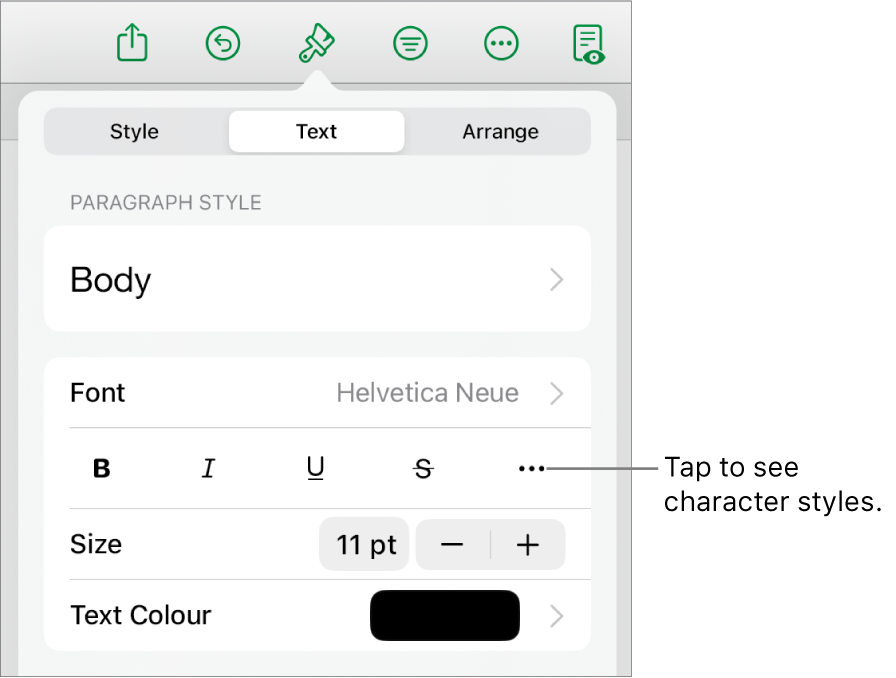
Tap
 above the font size controls.
Tap the character style name (it may say None), then tap a character style.
Tap outside the controls to close them, or to return to the first page of text controls, tap Back and then tap Text.
Create or modify a paragraph style
To add a new style, you first modify the text of a paragraph in your spreadsheet to look the way you want, then create the new style based on that text.
Select the text where you want to create a new style, or tap in text that uses the style you want to change.
Tap
 and change the text appearance (font, font size, colour and so on) however you want.
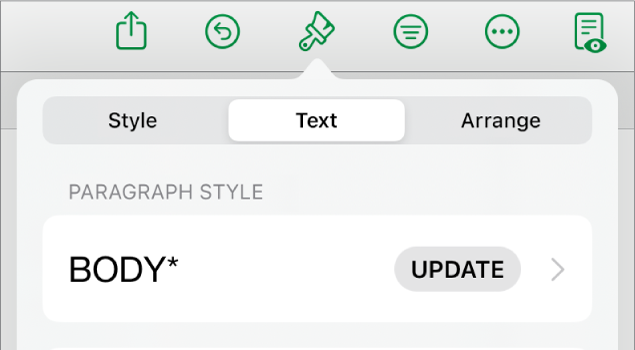
An asterisk and sometimes an Update button appear next to the paragraph style name to indicate that the style has been modified.

Do one of the following:
Create a new paragraph style: Tap the style name (but not the Update button), tap Edit at the top right of the controls, then tap + at the top left of the controls. The new style is selected and appears with a temporary name (you can type a new name for it). Any text that uses the original style isn’t changed.
Apply the changes to the style and keep the same name: Tap Update next to the style name. Any text that uses this style is updated with the changes.
Revert changes to a paragraph style: Tap the style name (but not the Update button), then tap the style name in the Paragraph Style menu (but not the Update button). The Update button is removed and the style is reverted to its original format.
If you don’t like the changes you made, you can close the formatting controls, then tap ![]() multiple times to step back through your changes and reverse them.
multiple times to step back through your changes and reverse them.
Create a character style
You can create your own character styles for text in text boxes and shapes, but not in table cells.
Select the text you want to format, then tap
 .
.Use the text controls to change the text appearance, then (if necessary), tap Text to return to the font controls.
Tap
 above the font size controls.
Under Character Style, tap None*.
An asterisk appears next to a style name when the selected text has a formatting change.
Tap Edit in the top-right corner of the controls, then tap
 in the top-left corner.
The new style is selected in the menu and appears with a temporary name.
Type a name for the new style, then tap Done at the top of the controls.
Tap the spreadsheet to close the Format controls.
Modify a character style
You can modify a character style so that all text that uses the character style is automatically updated to match, or create a new style based on an existing style.
Select the text that uses the style you want to change.
Note: If you want to modify a character style that isn’t being used yet in your spreadsheet, first select some text and apply the style to it (see the task above). Then select that text and continue with the steps below.
Tap
 .
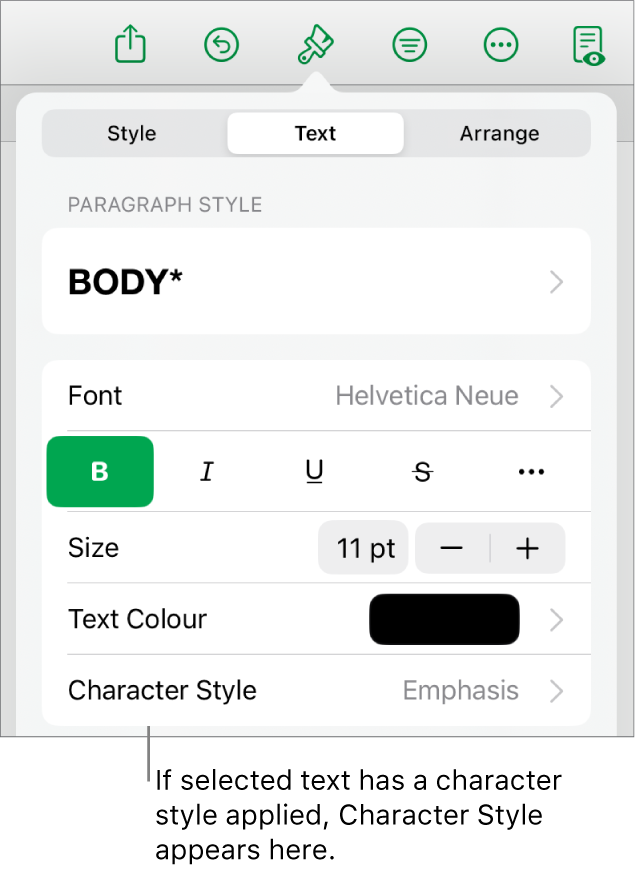
.The character style being used appears below Text Colour in the controls.
Use the text controls to change the text appearance.
An asterisk appears next to the character style name to show that the text has been modified from its original formatting.

Tap the right arrow next to the character style name, then do one of the following:
Apply the changes to the style and keep the same name: Tap Update next to the style name. Any text that uses this style is updated with the changes.
Create a new style with a new name: Tap Edit in the top-right corner of the controls, then tap
 in the top-left corner. Type a name for the new style. Only the currently selected text uses this style until you apply it to other text.
Revert changes to a character style: Swipe left on the style name (you see Clear Overrides on the right). The formatting changes for the selected text are removed and the formatting of the original character style is retained.
Tap Done in the top-right corner of the controls, then tap the sheet to close the Format controls.
Why does the style have an asterisk or Update button next to it?
When you change the appearance of text (its colour or size, for example), an asterisk (*), or an asterisk and an Update button, appear next to the style name to indicate it has overrides.
To deal with an override, you can do one of the following:
Ignore it: Leave the override in place, and keep the edits you made to your text. Other text that uses the style isn’t affected and the asterisk and Update button remain.
Update the style to incorporate the overrides: Tap Update. The style is updated with your changes, all text in your spreadsheet that uses the style is also updated, and the asterisk and Update button are removed.
Remove the override: Tap the style name (but not the Update button). In the style menu, tap the style name. Your text reverts to its original appearance and leaves the style unchanged.
If you select some text in a paragraph that has a paragraph style applied to it, and then change its appearance, you may see only an asterisk next to the character style name and not an Update button for the paragraph style.
Redefine a style
You can modify an existing text style, then redefine the style to use the new formatting.
Select the text you modified, then tap
 .
.Tap the style name that appears (it doesn’t have to be the style you want to redefine).
Swipe left on the style you want to modify, then tap Redefine.
The name of the style doesn’t change.
Delete a style
You can delete a text style that isn’t being used in your spreadsheet. You might want to do this to simplify the menu.
Tap in any text, then tap
 .
.Tap
 above the font size controls.
Alternatively, if a character style name appears below Text Colour, you can tap the character style name.
Tap Edit in the top-right corner of the controls.
Tap the red delete button to the left of the style you want to delete, then tap the Delete button that appears on the right.
If the style was applied to text in the spreadsheet, select a replacement style for the text that uses it, then tap Done.
Tap the spreadsheet to close the controls.