Change the default printer or a printer’s name on your Mac
The default printer is the one selected when the Print dialogue opens.
If you see “No printer selected” in the Print dialogue, add a new printer. The first printer you add becomes the default printer, but you can change the default printer at any time.
Change your default printer
On your Mac, choose Apple menu

Open Printers & Scanners preferences for me

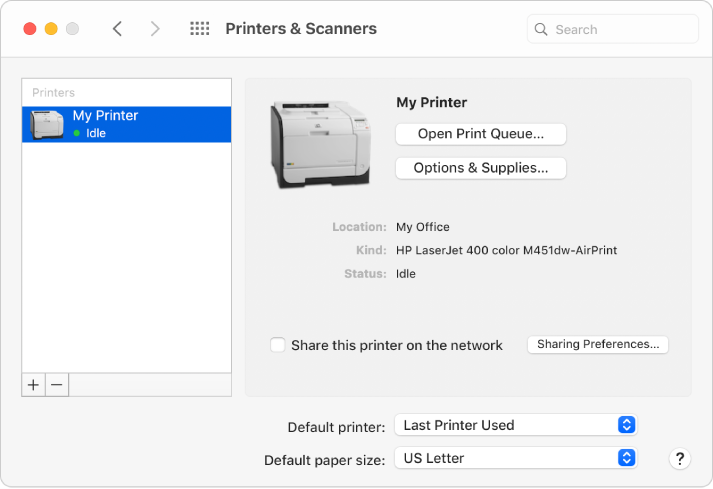
Click the “Default printer” pop-up menu, then choose an option.
If you want the same printer to always be the default printer, choose that printer. The default printer doesn’t change, even after you print to a different printer.
If you want the default printer to be the one you printed to last, choose Last Printer Used. Your macOS computer remembers the printer you used last at your current network location. For example, the printer you used last might change depending on whether you’re at home or at work.
Tip: To quickly select a default printer, Control-click a printer in the Printers list of the Printers & Scanners pane, then choose “Set default printer” from the shortcut menu.
Change a printer’s name and location
You can enter a new name and location for your printer so that other users can find it more easily. This information appears in Printers & Scanners preferences.
On your Mac, choose Apple menu

Select the printer in the list on the left.
Click Options & Supplies, then click General.

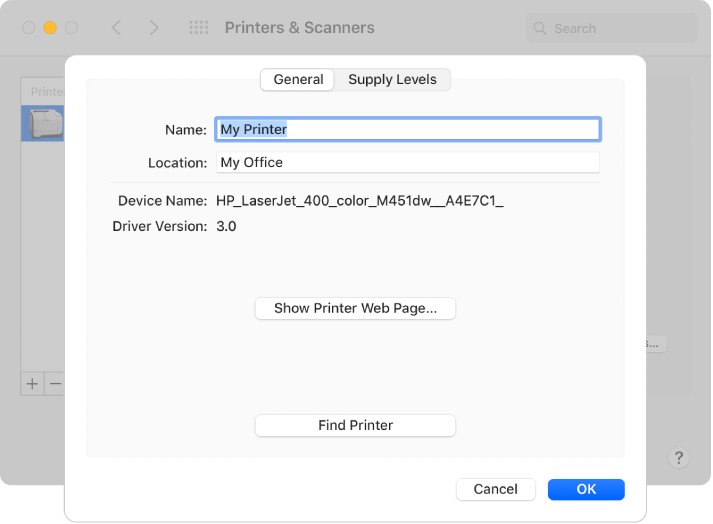
Type the new name and location in the Name and Location fields.
Name: Enter a descriptive name for the printer (for example, Colour Laser Printer).
Location: Enter the printer’s location (for example, “outside my office”).
Show Printer Web Page: Click this button to see web information about your printer. (Not available for all printers.)
Find Printer: If you have multiple printers with similar names and are unsure which printer you’re using, click this button to display a message on the printer’s screen or have the printer make a sound. (Not available for all printers.)
Tip: To quickly rename a printer, Control-click a printer in the Printers list in Printers & Scanners preferences, choose “Rename printer” from the shortcut menu, enter a name and location, then click OK.