Sync multiple MIDI devices to Logic Pro for Mac
In Logic Pro 10.4.5 or later, independently configure MIDI clock settings for up to 16 external MIDI devices.
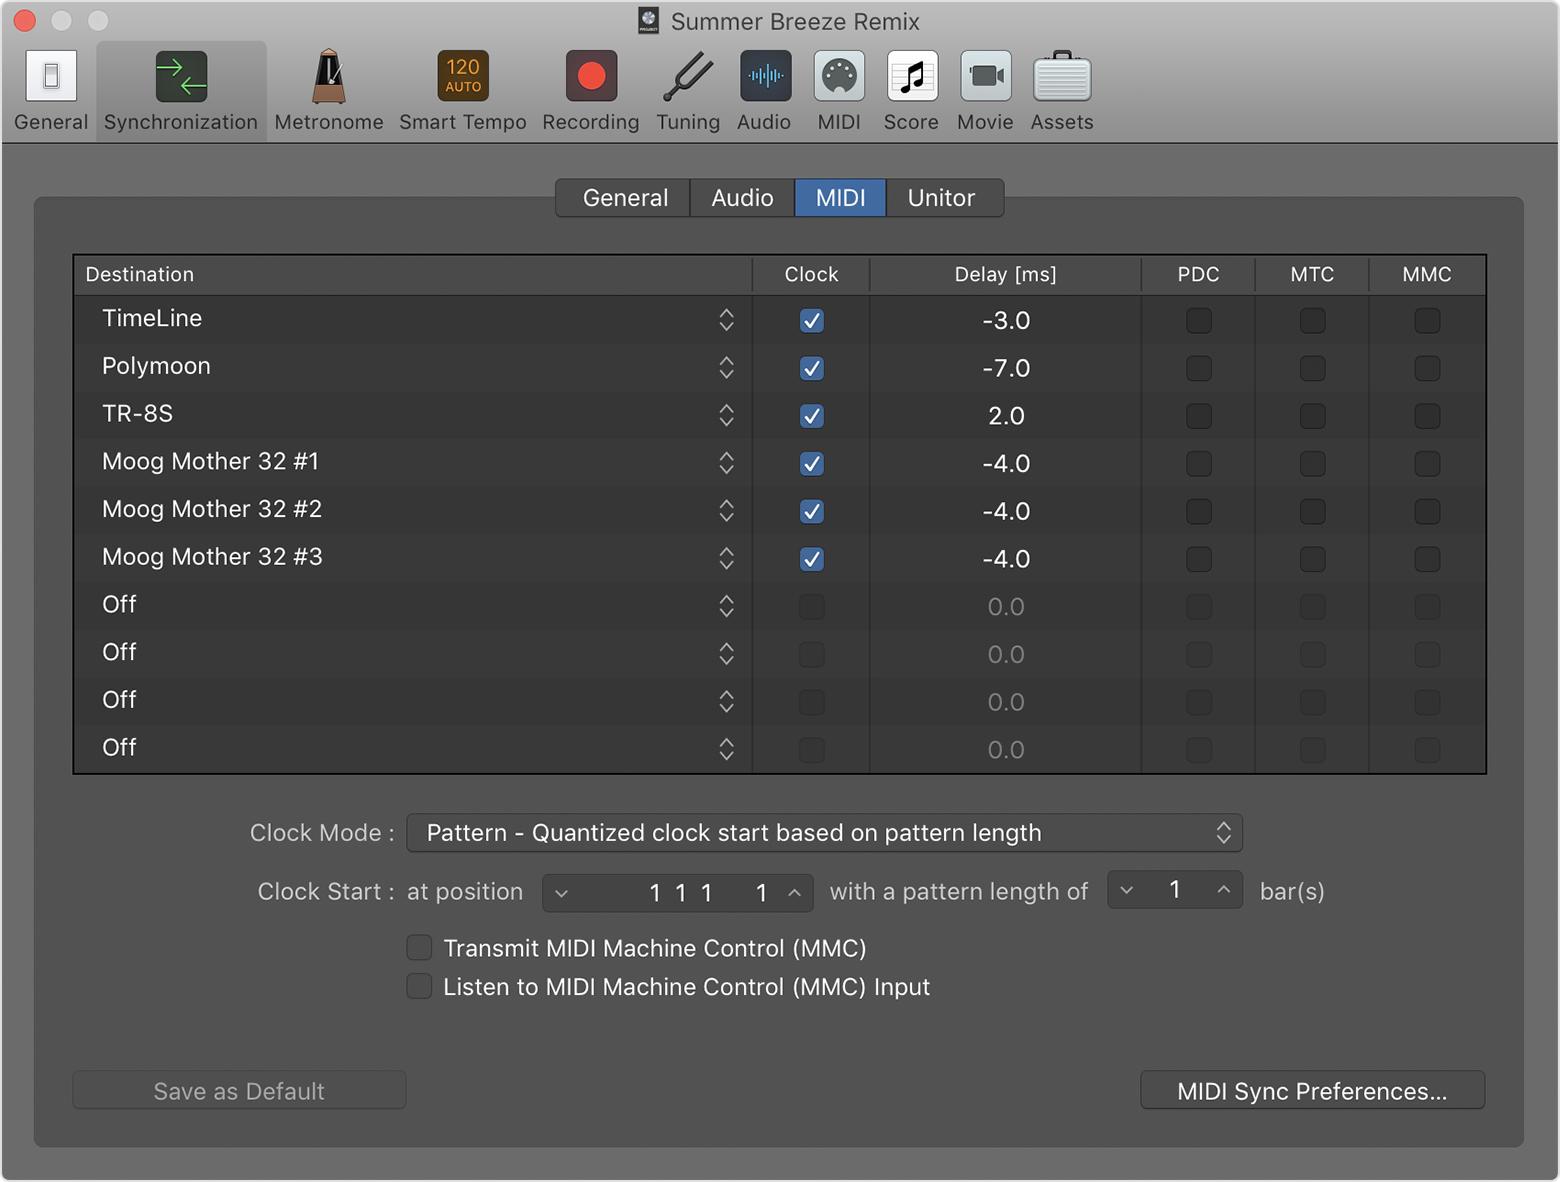
With the MIDI sync settings in Logic, you can control MIDI synchronisation with external devices so that Logic Pro acts as the central transmitting device in your studio. You can send MIDI clock, MIDI Timecode (MTC) and MIDI Machine Control (MMC) to each device independently. You can also turn on plug-in delay compensation for each device, and delay the MIDI clock signal to each device.
Open MIDI sync settings
MIDI synchronisation settings are saved with each project. To open MIDI synchronisation settings, open your project, then choose File > Project Settings > Synchronisation, and then click the MIDI tab.
Sync with MIDI Clock
To sync multiple external MIDI devices such as synthesisers and dedicated sequencers to Logic, use MIDI clock. When using MIDI clock, you can correct for any timing discrepancies between devices by adjusting MIDI clock delay for each MIDI device that you’ve added as a destination.
To add a MIDI device to sync to Logic, click a pop-up menu in the Destination column, then choose a device or port. If a device doesn’t appear, make sure that you’ve connected it properly to your Mac.
Select the Clock tick box for the device.
To adjust MIDI clock delay for the device, drag a value in the "Delay [ms]" field. A negative value means that MIDI clock signal is transmitted earlier. A positive value means that MIDI clock signal is transmitted later.
If your project uses plug-ins, select the PDC tick box for the device to turn on automatic plug-in delay compensation.
Add other MIDI devices, set each device’s MIDI clock delay, PDC and other options.
Set the MIDI clock mode and start location
Once you’ve added destinations and set options, set the MIDI clock mode for your project. The MIDI clock mode determines how and when Logic sends MIDI clock to your destinations. Choose a mode from the Clock Mode pop-up menu that works best for your workflow and the MIDI devices you’re using:
"Pattern" mode sends a Start command to an external device such as a sequencer to start playback of a pattern on the device. Make sure that you enter the number of bars in the pattern in the "Clock Start: with a pattern length of <number of bars> Bar(s)" field, under the MIDI Clock mode pop-up.
"Song - SPP at Play Start and Stop/SPP/Continue at Cycle Jump" mode sends a start command to an external device when you start playback from the beginning of your Logic song. If you don’t start playback from the beginning, a Song Position Pointer (SPP) command and then a Continue command are sent to start playback on the external device.
"Song - SPP at Play Start and Cycle Jump" mode sends an SPP command when you start playback, and every time Cycle mode repeats.
"Song - SPP at Play Start only" mode only sends an SPP command when you begin initial playback.
Once you’ve set the MIDI Clock mode, you can choose where in your Logic song you want MIDI clock output to start. Choose the location (in bars, beats, div and tics) in the "Clock Start: at position" field, under the Clock Mode pop-up.
Sync with MTC
When you need to sync Logic to video or to another digital audio workstation such as Pro Tools, use MTC. You can also send MTC from Logic to separate destinations. Set the destination, select the MTC tick box for the destination, then open MIDI sync preferences and make your adjustments.
Use MMC with Logic
Use MMC to control the transport of an external MMC-capable tape machine such as an ADAT. In this setup, Logic Pro is typically set to send MMC to the external device, while simultaneously syncing to MTC timecode from the external device.
If you want to use the transport controls of the external transmitting device, you don’t need to use MMC. Set Logic to sync to the external device using MTC. You can also use MMC to record-enable tracks on the device receiving MMC.
Information about products not manufactured by Apple, or independent websites not controlled or tested by Apple, is provided without recommendation or endorsement. Apple assumes no responsibility with regard to the selection, performance or use of third-party websites or products. Apple makes no representations regarding third-party website accuracy or reliability. Contact the vendor for additional information.
