Add sections to a document in Pages for iCloud
If you’re working in a word-processing document, you can divide your document into multiple sections, each of which can have different margins, page numbering, headers, and footers.
Add a section
You can start a section anywhere you place the insertion point. If the insertion point is at the start of a paragraph, for instance, the new section begins with that paragraph at the start of a new page.
Click to place the insertion point where you want the new section to start.
Click the Insert button
 in the toolbar, then choose Section Break.
The insertion point moves to the start of the new section on the next page.
If you plan to customize the page numbers, headers, or footers for this section, click the Section tab at the top of the Document sidebar, then deselect the “Match previous section” checkbox.
Add and format a new section
You can make any page (except the first page of a document or section) the start of a new section. You can also add a section after the current section.
Click anywhere on the page that you want to start the new section, or anywhere in a section to add a section after it.
Click the Section tab at the top of the Document sidebar on the right.
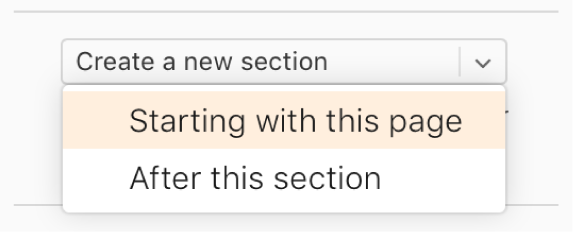
Click the “Create a new section” pop-up menu, then choose where to start the section.

If you want to start the section with the current page and "Starting with this page” is dimmed, make sure the insertion point isn’t on the first page of the section.
If this document is set up to use facing pages, click the “Section starts on” pop-up menu, then choose an option to determine where the section content starts:
Next: Starts the section on either a left or right page, whichever comes next in the document. If you don’t want your document to include blank pages, choose Next.
Right: Starts the section on the first right page. If the next page in your document would be a left-side page, a blank page is inserted before the start of the section on the right.
Left: Starts the section on the first left page. If the next page in your document would be a right-side page, a blank page is inserted before the start of the section on the left.
Choose header and footer options for the new section below Headers & Footers:
Hide on first page of section: Show headers and footers on all but the first page of the section.
Left and right pages are different: For documents that have facing pages, use different headers and footers for left and right pages.
Match previous section: Deselect to use different page numbers, headers, or footers for this section.
Choose how page numbers appear:
Format: Click the pop-up menu and choose a number format.
Continue from previous section: Select if you want page numbers to continue without a break from the previous section.
Start at: Select if you want this section to have its own page numbering, then enter the page number you want this section to start with.
To see where you’ve added sections to a document, open the document in Pages for Mac, iPhone, or iPad, and view the page thumbnails.