Set up your Mac Pro
When you set up your new Mac Pro, you can customize certain settings, set up features like Touch ID, and transfer data from another computer, like a Mac or Windows PC. If you have an iPhone or iPad, you can quickly set up your Mac using some of your existing settings and transfer files, photos, passwords, and other content in iCloud. You can also choose to set up your Mac as new, without transferring any data or settings from another device.
Setup Assistant walks you through the settings needed to start using your Mac Pro. In this guide, you can find additional guidance to walk you through the setup process.
When setup is complete, see When you’re done setting up your Mac for possible next steps.
Note: Setup Assistant makes setting up your Mac easy and shouldn’t take too long to complete. If you choose to transfer data, however, plan to set aside additional time.

Connect accessories to your Mac
If you haven’t already connected a display, a keyboard, and mouse or trackpad to your Mac Pro, you’ll need to do so now in order to complete the setup process.
Connect a display to your Mac Pro. Consult the documentation that came with your display to find out what port and cable you need to use. For more information, see Connect a display to Mac Pro.
Connect a keyboard and mouse or trackpad to your Mac Pro. At the beginning of setup, you can connect and pair a mouse or trackpad and keyboard with your Mac Pro.
Depending on your accessory, you might be able to connect and pair it with your Mac Pro with Bluetooth, or you can use a cable to physically connect the accessory to your Mac. Consult the documentation that came with your accessory to learn how to pair or connect it.
If you have additional questions about connecting a mouse, trackpad, or keyboard during setup, see the Apple Support article If your keyboard or mouse won’t connect during Mac setup.
Tip: Some steps of the Setup Assistant may require you to scroll to select an option. If you have a Magic Mouse or Magic Trackpad and you’re not sure how to scroll on a Mac, just slide two fingers up and down on your trackpad. If you want to adjust gestures later, you can learn how to do so with Magic Mouse or Magic Trackpad.
Start the set up process
First, select a country or region—which sets your language, as well as the format of dates, currencies, temperature, and more. (To change these settings later, open System Settings, click General in the sidebar, then click Language & Region.)
Then go to the next step, and choose how to set up your Mac.
Choose how to set up your Mac
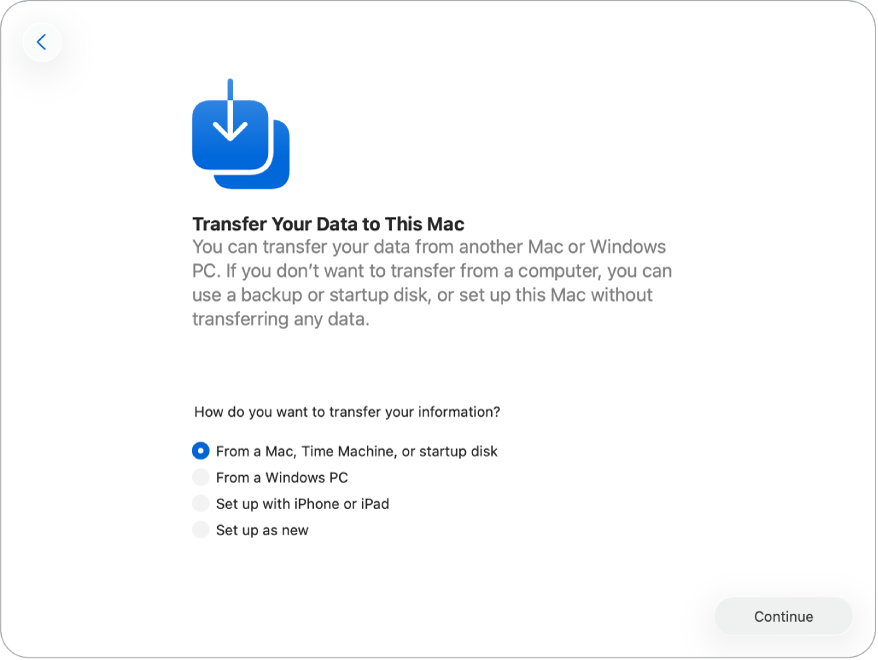
Migrate from another Mac. You can migrate your data from another Mac to your new Mac Pro. You can also transfer information from a Time Machine backup or a startup disk located on your Mac.
To transfer data from another Mac, open Migration Assistant on the Mac that you’re transferring from. Migration Assistant is in the Utilities folder of the Applications folder.
Tip: If the Mac you’re transferring from has macOS Tahoe or later installed, a message on that Mac prompts you to open Migration Assistant.
You can transfer data the following ways:
Wirelessly: To transfer information wirelessly from another Mac to your new Mac Pro, both computers must be near each other and connected to Wi-Fi, and the other Mac must have Bluetooth turned on. Click the Mac you’re transferring data from on the setup screen, and follow the instructions.
Using a cable: Directly connect your Mac Pro to the other Mac with a Thunderbolt or Ethernet cable.
You may need an adapter to connect the cable to your other Mac, depending on its ports. After you connect them, click the Mac you’re transferring from on the setup screen and follow the instructions.
Tip: Using a cable to transfer data is often faster than transferring wirelessly.
From a startup disk or Time Machine backup: Select a Time Machine backup or startup disk, then follow the onscreen instructions.
To learn more about this process, see Transfer to a new Mac with Migration Assistant.
Migrate from a Windows PC. To transfer data from a Windows PC, you must have both your Mac and Windows PC connected to the same Wi-Fi network, and your Windows PC must have Bluetooth turned on. You also need Migration Assistant installed on your Windows PC. To download Migration Assistant, and to learn more about this process, see Transfer from PC to Mac with Migration Assistant.
To start the process, open Migration Assistant on your Windows PC. Then, enter the code from your Mac on your Windows PC and follow the instructions.
Set up your Mac with your iPhone or iPad. To set up your new Mac with an iPhone or iPad, your iPhone must have iOS 18.4 or later, or your iPad must have iPadOS 18.4 or later. Your iPhone or iPad must also have Bluetooth and Wi-Fi turned on.
When the option appears to set up your Mac on your iPhone or iPad, tap it, then follow the onscreen instructions. This process transfers some of your existing settings, and brings over files, photos, passwords and other content stored in iCloud.
Set up your Mac as new. When you set up your Mac as new, you don’t automatically transfer any data from other devices. If you want to transfer data from a Windows PC or Mac later, see Transfer your data to your new Mac.
Customize settings for your Mac and set up accounts
Turn on Accessibility features. View accessibility options for vision, motor, hearing, and cognitive features, or click Not Now. To learn more, see Accessibility on your Mac.
Connect to a Wi-Fi network. Choose your Wi-Fi network and enter the password, if necessary. If youʼre using Ethernet, you can also click Other Network Options and follow the onscreen instructions.
To change the Wi-Fi network later, open System Settings, click Wi-Fi in the sidebar, then choose a network and enter the password, if necessary.
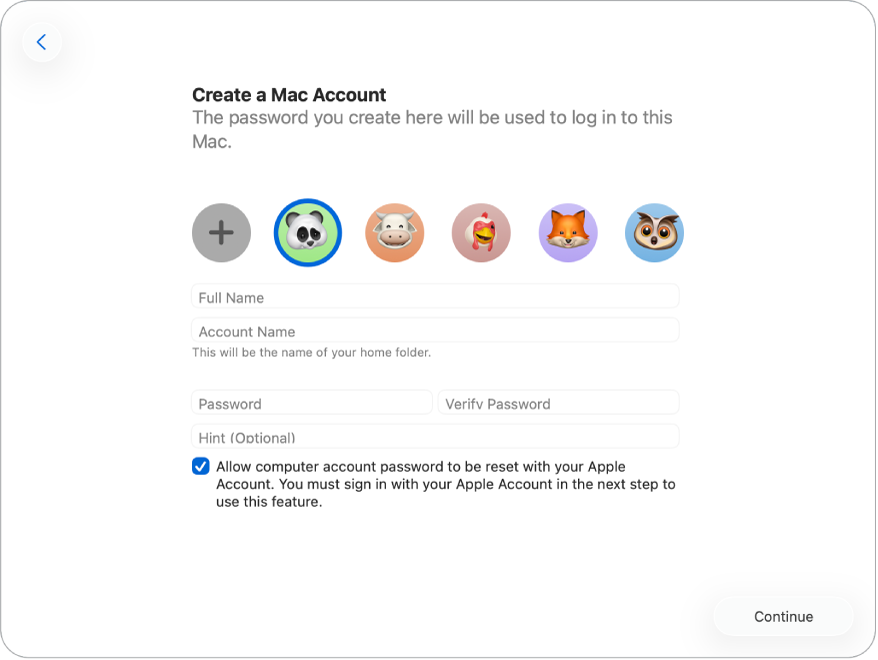
Create a Mac account and password. Enter your name, then create a password, which can later be used to unlock your Mac Pro or approve other actions. You can add an optional hint to help retrieve your computer account’s password if you forget it.
Note: Your computer account is not the same as your Apple Account. However, if you ever forget the password to unlock your Mac, you can use your Apple Account to reset the password for your Mac. To enable this, make sure to select “Allow my Apple Account to reset this password” during setup.
Sign in to your Apple Account. If you already have another Apple device, you likely have an Apple Account. If you don’t have an Apple Account, you can create one now (it’s free). To learn more, see Apple Account on Mac.
Tip: If you chose to set up your Mac with your iPhone or iPad, you’re automatically signed in to your Apple Account, though you still need to read and accept the Terms and Conditions.
On this screen, do any of the following:
If you have an Apple Account: Enter the email address or phone number and password for your Apple Account. You may be sent a verification code as part of the sign-in process, so be sure to keep your other Apple devices nearby.
If you don’t have an Apple Account and want to create one: Click “Create new Apple Account.”
If you forgot your password: Click “Forgot password?”
If you have more than one Apple Account: Click “Use different Apple Accounts for iCloud and Apple media purchases?”
If you don’t want to sign in to or create an Apple Account at this time: Click Set Up Later. After setup, you can sign in to an Apple Account or create a new Apple Account. Open System Settings, then click “Sign in to your Apple Account” in the sidebar.
Note: After you sign in to your Apple Account, read the terms and conditions. To accept, select the checkbox, then click Agree and proceed.
Finish setting up your Mac
When your accounts are set up, you have a few more settings you can customize for your Mac.
If you set up your Mac with an iPhone or iPad—or if you’ve already set up another device with iOS 15, iPadOS 15, or macOS 11 or later and you signed in to your Apple Account when you set up your Mac Pro—you can use Make This Your New Mac, which lets you skip several of the setup steps by using the settings stored in your iCloud account.
Note: If you don’t have an iPhone or iPad with the right software version, you don’t see this step. (Not sure what software version is on your iPhone or iPad? See Find the software version on your iPhone, iPad, or iPod touch.)
Follow the onscreen instructions to customize settings like Location Services, Screen Time, and Appearance. When you’ve finished the setup process, your new Mac Pro is ready to go. See When you’re done setting up your Mac for next steps.