Final Cut Pro User Guide for Mac
- Welcome
- What’s new
-
- Intro to effects
-
- Intro to transitions
- How transitions are created
- Add transitions and fades
- Quickly add a transition with a keyboard shortcut
- Set the default duration for transitions
- Delete transitions
- Adjust transitions in the timeline
- Adjust transitions in the inspector and viewer
- Merge jump cuts with the Flow transition
- Adjust transitions with multiple images
- Modify transitions in Motion
-
- Add storylines
- Use the precision editor
- Conform frame sizes and rates
- Use XML to transfer projects
- Glossary
- Copyright

Intro to sharing projects in Final Cut Pro for Mac
Final Cut Pro provides a variety of preconfigured export settings, called destinations, that you can use to output your project or clip. For example, you can export a project or clip as a file, export it for viewing on Apple devices such as iPhone and iPad, or export it for posting to social media websites. You can also save a frame from your movie or export an image sequence. Each of these options uses a different destination.
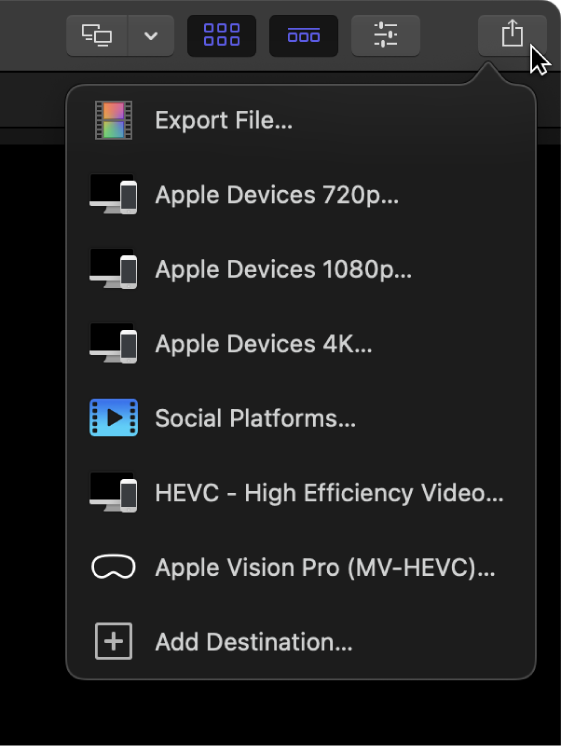
When you first open Final Cut Pro, a default set of destinations appears in the Share menu.

Details about each destination in the default set are listed in the table below.
Destination | Use to | ||||||||||
|---|---|---|---|---|---|---|---|---|---|---|---|
Export File (default) | Export your project as a QuickTime movie file. See Export final mastering files in Final Cut Pro for Mac. | ||||||||||
Apple Devices 720p | Export files for playback on most Apple devices, including iPod touch, iPhone, iPad, and Apple TV. This option creates output files with dimensions up to 720p. Of the three Apple Devices options, this option creates files with the lowest data rates and smallest file sizes. | ||||||||||
Apple Devices 1080p | Export files for playback on many Apple devices, including models of iPod touch, iPhone, iPad, and Apple TV. This option creates output files with dimensions up to 1080p. | ||||||||||
Apple Devices 4K | Export files for playback on recent models of iPhone, iPad, and Apple TV. This option creates output files with dimensions up to 4K. Of the three Apple Devices options, this option creates files with the highest data rates and largest file sizes. | ||||||||||
Social Platforms | Prepare your projects and clips for sharing on the web. See Share on the web in Final Cut Pro for Mac. | ||||||||||
HEVC - High Efficiency Video Coding | Export files with smaller file sizes and better data compression at the same video quality as H.264. HEVC includes optional support for HDR. | ||||||||||
Apple Vision Pro (MV–HEVC) | Export files for playback on Apple Vision Pro. The MV-HEVC format is similar to HEVC, except that it stores the two views (one for each eye) in separate layers. See Share stereo or spatial video in Final Cut Pro for Mac. | ||||||||||
You can easily add destinations or replace the default set of destinations with your own customized destinations. For example, if you want to save a frame from your movie as a Photoshop file, you need to add the Save Current Frame destination to your set and specify that the destination export a Photoshop file. You create and modify destinations in the Destinations pane of Final Cut Pro settings.
You can also create a bundle of destinations to export several types of output at once. See Create share destinations in Final Cut Pro for Mac.
To further customize your output, you can use Compressor, the professional transcoding app. See Share from Final Cut Pro for Mac using Compressor.
Download this guide: PDF