
Add and manage email accounts in Mail on Mac
Use Mail on your Mac to send, receive, and manage email for all of your email accounts in one location on your Mac. Simply add your existing accounts—such as iCloud, Gmail (Google), Exchange, school, work, or other—in Mail.
Tip: If you’re already using an account on your Mac with other apps, such as Contacts or Messages, you can also use that account with Mail. In Mail, choose Mail > Accounts to open Internet Accounts settings, then click the account you want to use and make sure Mail is selected.
Add an email account to Mail
Go to the Mail app
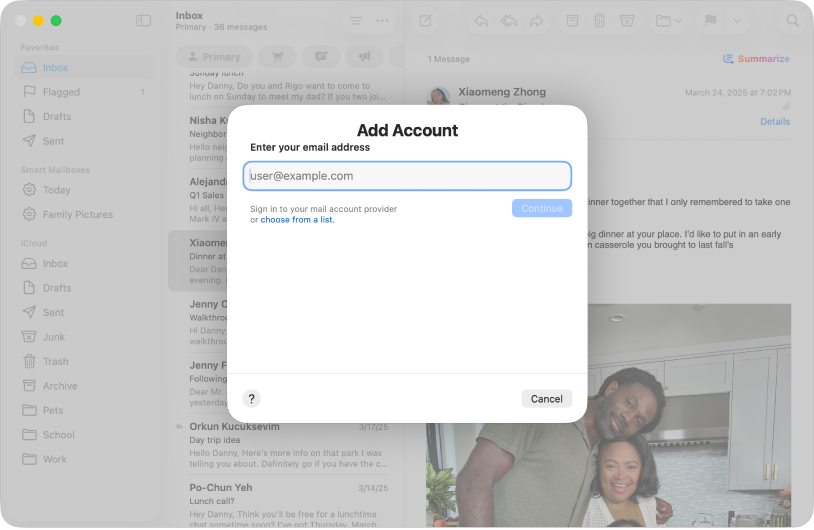
on your Mac.Choose Mail > Add Account.
Enter an email address.
Alternatively, you can click “choose from a list,” then choose the account’s domain.
Click Continue, then follow the instructions to enter the account information.
Remove an email account
When you remove an email account, the account’s messages are removed from your Mac. Copies of messages remain on the account’s mail server and are still available (from webmail, for example).
Important: If you’re unsure whether messages you want to keep are still on the mail server, move or copy them to a mailbox stored on your Mac (the mailbox appears in the On My Mac section in the Mail sidebar) before you remove the account in Mail.
Go to the Mail app
on your Mac. Choose Mail > Settings, then click Accounts.
Select an account, then click
 .
.Note: If the account is used by other apps on your Mac, you’re asked to remove the account in Internet Accounts settings. Choose Apple menu


Temporarily turn off an email account
Go to the Mail app
on your Mac.Choose Mail > Settings, then click Accounts.
Select the account you want to stop using, then deselect the “Enable this account” checkbox.
When you’re ready to use the account again, select the “Enable this account” checkbox.
Use a custom email domain
When you subscribe to iCloud+, you can add up to five custom email domains to your iCloud Mail account. Then, you can send and receive mail in the Mail app ![]() on your Mac, iPhone, iPad, and iPod touch; in your Mail account on iCloud.com; and in the email app on a Windows computer.
on your Mac, iPhone, iPad, and iPod touch; in your Mail account on iCloud.com; and in the email app on a Windows computer.
You need to have a primary iCloud Mail address before you can add a custom email domain on your Mac. See Create a primary email address for iCloud Mail in the iCloud User Guide.
Go to the System Settings app
 on your Mac.
Click [your name] at the top of the sidebar. If you don’t see your name, click “Sign in” to sign in to your Apple Account or to create one.
Click iCloud, go to Saved to iCloud, then click Mail.
Turn on Sync this Mac (if it’s not already on).
Click Options next to Custom Email Domain, then click Continue to sign in to iCloud.com.
Follow the onscreen instructions to add, purchase, or manage your domain.
Note: Make sure you’re signed in with the same Apple Account on each device. If you have devices where you’re not signed in to your Apple Account or that have the Mail feature turned off, your custom email domains and mail aren’t available on those devices.
Tip: If you subscribe to iCloud+, you can send and receive messages from your iCloud account without having to share your real email address. See Send an email using a unique, random email address.