Change your device settings in the Beats app for Android
Use the Beats app for Android to change press-and-hold actions, switch between noise control modes, turn automatic ear detection on or off, set microphone controls, and more. You can also view your Beats charge level, hardware information, firmware version, and serial number, as well as rename or register your Beats.
If you haven’t done so already, add your headphones, earphones, or speaker to the Beats app.
Go to the Beats app

Tap

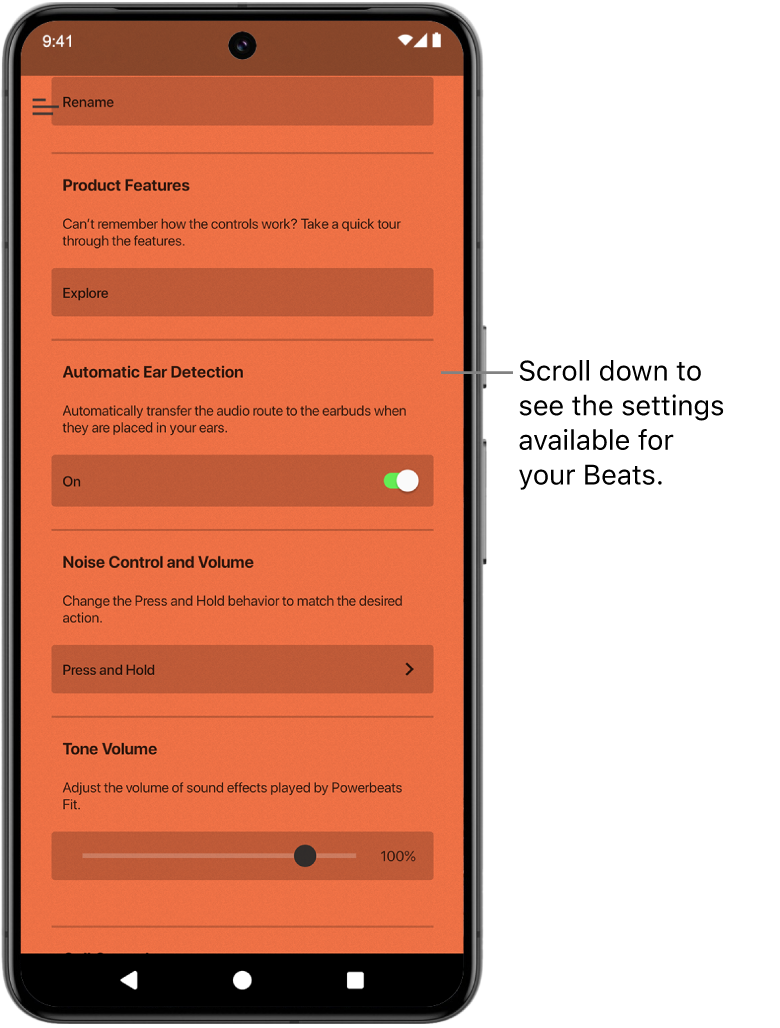
In the device screen, scroll to see the settings available for your Beats.
Adjust your settings (available settings depend on the features of your Beats headphones, earphones, or speakers):
Objective
Action
Monitor your charge level.
Look for the battery percentage just below the image of the headphones, earphones, or speaker. See Check the charge status.
Learn about the features of your Beats.
Tap Explore, then swipe through the different Beats features. When you’re finished, tap

Rename your Beats.
Tap Rename, enter a new name or tap “Generate a Name,” then follow the onscreen instructions. See Rename your Beats earphones, headphones, or speaker.
Note: You can keep tapping “Generate a Name” until you find a name you like.
Switch between noise control modes.
Tap


Turn heart rate monitoring on or off.
While wearing your Powerbeats Pro 2, tap
 to allow your Beats to connect to a supported fitness app or equipment for heart rate monitoring. Scroll down to Heart Rate and tap the Enabled switch to turn the heart rate sensors on or off. See Share Powerbeats Pro 2 heart rate data.
Adjust alert-tone volume.
Drag the Tone Volume slider left or right. See Adjust the volume of audio cues.
Control tones on your earphones case.
Tap to turn the Case Tones switch on or off, or drag the Tone Volume slider left or right.
Change the press-and-hold action to activate voice assistant or noise cancellation.
Tap Press and Hold, tap Left or Right to assign an action to that earbud, then select Noise Control or Voice Assistant. See Change Beats press-and-hold settings.
Allow earbuds to be set to noise cancellation when only one earbud is in your ear.
Tap to turn the Noise Cancellation with One Earbud switch on or off.
Change the press-and-hold action to control volume.
Tap Press and Hold, tap the Volume Control switch to turn it on, tap Left or Right to assign an action to that earbud, then select Volume Up or Volume Down. The opposing control is automatically applied to the other earbud. See Change Beats press-and-hold settings.
Note: When Volume Control is turned on, Noise Cancellation and Transparency (on supported Beats) are not available.
Change the mute/unmute action.
Tap Mute & Unmute, then choose Press Once or Press Twice. See Change Beats microphone settings.
Note: To use mute/unmute when the Beats app is in the background, Optimize Your Beats Product must be turned on in the device screen.
Set the active microphone.
In the Microphone controls, tap Automatic, then tap Automatically Switch Buds, Always Left Bud, or Always Right Bud.
Automatically Switch Buds automatically changes the microphone between the left and right earbuds when you remove an earbud. See Change Beats microphone settings.
Change the end-call action.
Tap End Call, then choose Press Once or Press Twice. See Change Beats end-call settings.
Note: The Answer Call action (Press Once) cannot be changed.
Turn Beats Flex automatic play/pause on or off.
Tap the Automatically Play/Pause switch to turn it on or off. See Turn Beats Flex automatic settings on or off.
Turn Beats Flex automatic call answering on or off.
Tap the Automatically Answer Calls switch to turn it on or off. See Turn Beats Flex automatic settings on or off.
Turn automatic ear detection on or off.
Tap the Automatic Ear Detection switch to turn it on or off. See Turn Beats ear detection on or off.
Check the fit of your ear tips.
On supported Beats, tap Ear Tip Fit Test, then follow the onscreen instructions. See Get the right fit with your Beats earphones.
Update the firmware version on your Beats.
View your product name, serial number, and firmware version.
Scroll down and look at the “Under the Hood” information. See Get information about your Beats.
Note: For certain Beats earphones, tapping the serial number displays the serial number specific to the left earbud; tapping again displays the serial number specific to the right earbud.
Allow the Beats app to run in the background (when your Beats are connected) to use mute/unmute on supported Beats, receive battery notifications, and update firmware.
Tap the Allowed switch (below Optimize Your Beats Product) to turn it on.
Some Beats features may not be available until your Beats firmware is updated. See Update Beats.


To learn more about customizing your Beats settings, see Customize controls on your Beats.