Keynote User Guide for iPad
- Welcome
- What’s new in Keynote 14.0
-
- Intro to Keynote
- Intro to images, charts, and other objects
- Create a presentation
- Choose how to navigate your presentation
- Open a presentation
- Save and name a presentation
- Find a presentation
- Print a presentation
- Customize the toolbar
- Copy text and objects between apps
- Basic touchscreen gestures
- Use Apple Pencil with Keynote
- Create a presentation using VoiceOver
-
- Send a presentation
- Intro to collaboration
- Invite others to collaborate
- Collaborate on a shared presentation
- See the latest activity in a shared presentation
- Change a shared presentation’s settings
- Stop sharing a presentation
- Shared folders and collaboration
- Use Box to collaborate
- Create an animated GIF
- Post your presentation in a blog
- Copyright

Add a border to a slide in Keynote on iPad
To add a border—such as a solid or dotted line—around a slide, you first add a square shape to the slide, then change the shape’s attributes so it behaves like a border. For example, you change the size of the shape, give it no fill (as opposed to a color fill) so that it doesn’t obscure other objects on the slide, and so on.
If you want several slides to use the same border, create a slide layout that includes the border.
Tap
 in the toolbar.
In the Basic category, tap a square or rounded rectangle to add it.
Drag the blue dots that appear around the shape until the outer edges of the shape form the border size you want.
Tap
 , then tap Style.
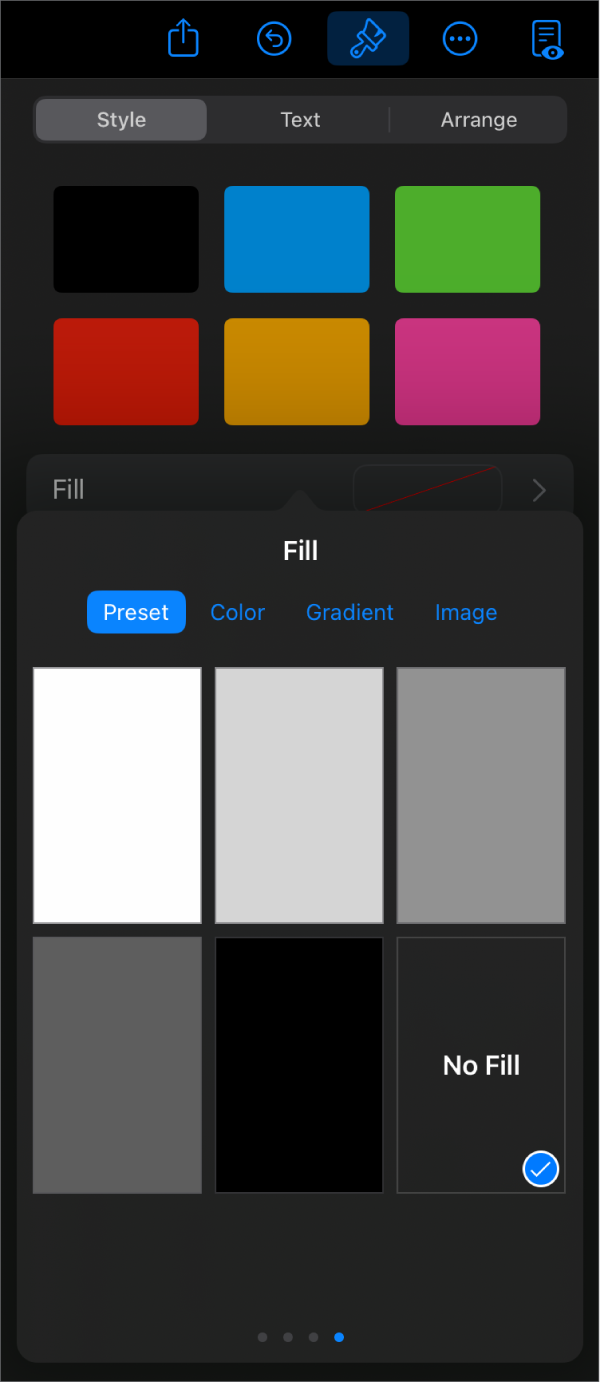
Tap Fill, tap Preset, then swipe left and tap No Fill.

If you want the bordered area to have a background color, tap a fill option. You can make the object more transparent so it doesn’t hide other objects on the slide.
Tap
 to go back to the Style tab.
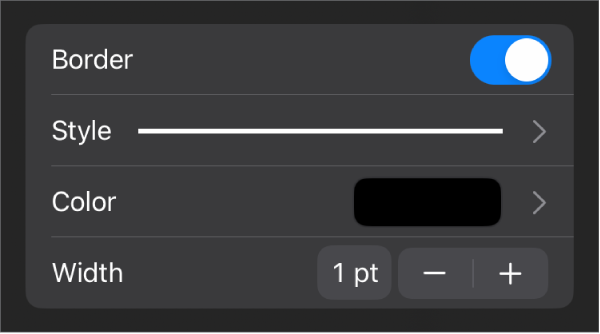
Tap to turn on Border.
To choose a border style, color, and width, use the controls that appear.

To change the transparency, drag the Opacity slider (at the bottom of the controls).
If the shape is filled with a color, its transparency also changes.
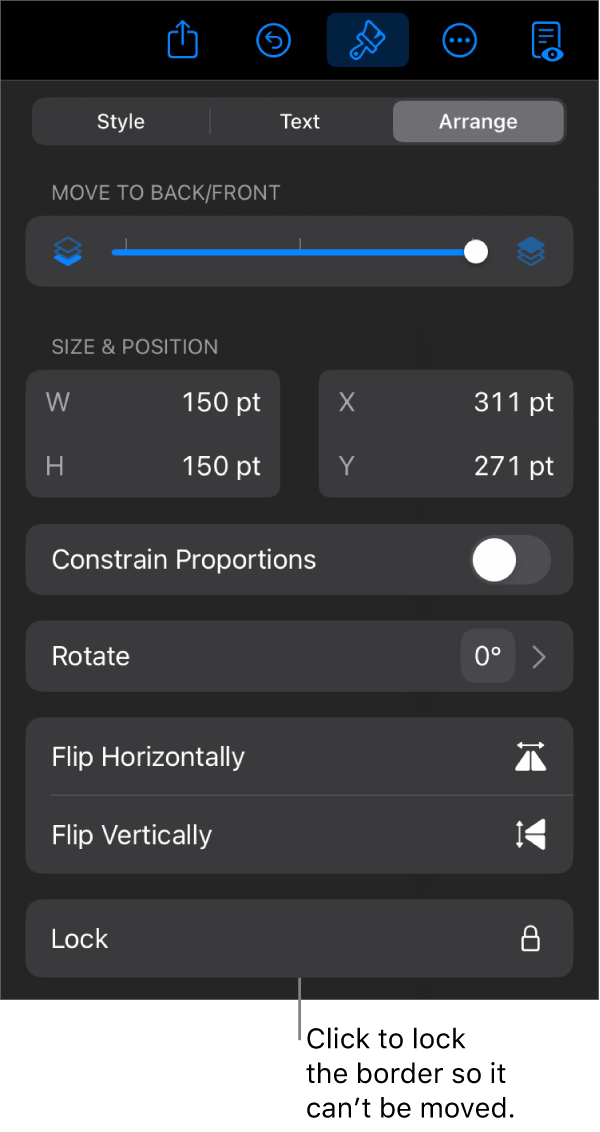
To move the border behind all the objects on the slide, tap Arrange, then drag the slider all the way to the left.
To lock the border so it doesn’t get moved accidentally, tap Arrange (at the top of the controls), then tap Lock.

When you’re finished, tap anywhere on the slide to dismiss the controls.