Final Cut Pro User Guide
- Welcome
-
- What’s new in Final Cut Pro 10.5
- What’s new in Final Cut Pro 10.4.9
- What’s new in Final Cut Pro 10.4.7
- What’s new in Final Cut Pro 10.4.6
- What’s new in Final Cut Pro 10.4.4
- What’s new in Final Cut Pro 10.4.1
- What’s new in Final Cut Pro 10.4
- What’s new in Final Cut Pro 10.3
- What’s new in Final Cut Pro 10.2
- What’s new in Final Cut Pro 10.1.2
- What’s new in Final Cut Pro 10.1
- What’s new in Final Cut Pro 10.0.6
- What’s new in Final Cut Pro 10.0.3
- What’s new in Final Cut Pro 10.0.1
-
- Intro to effects
-
- Intro to transitions
- How transitions are created
- Add transitions
- Set the default transition
- Delete transitions
- Adjust transitions in the timeline
- Adjust transitions in the inspector and viewer
- Merge jump cuts with the Flow transition
- Adjust transitions with multiple images
- Modify transitions in Motion
-
- Add storylines
- Use the precision editor
- Conform frame sizes and rates
- Use XML to transfer projects
-
- Glossary
- Copyright

Add storylines in Final Cut Pro
Storylines are sequences of clips connected to the primary storyline (the main sequence of clips in the timeline). Storylines combine the convenience of connected clips with the precision editing capabilities of the primary storyline.
You can use storylines for the same purposes as connected clips—for example, creating cutaways, compositing titles and other graphics, and adding sound effects and music. The unique advantage of storylines is the ability to edit a sequence of connected clips within the context of the other clips in the timeline. For example, you can add cross dissolve transitions to a series of superimposed titles in a storyline and then adjust the timing of the titles to match clips in the primary storyline.
Like connected clips, storylines can contain both video and audio, or they can be video only or audio only. For more information about connected clips, see Connect clips in Final Cut Pro.
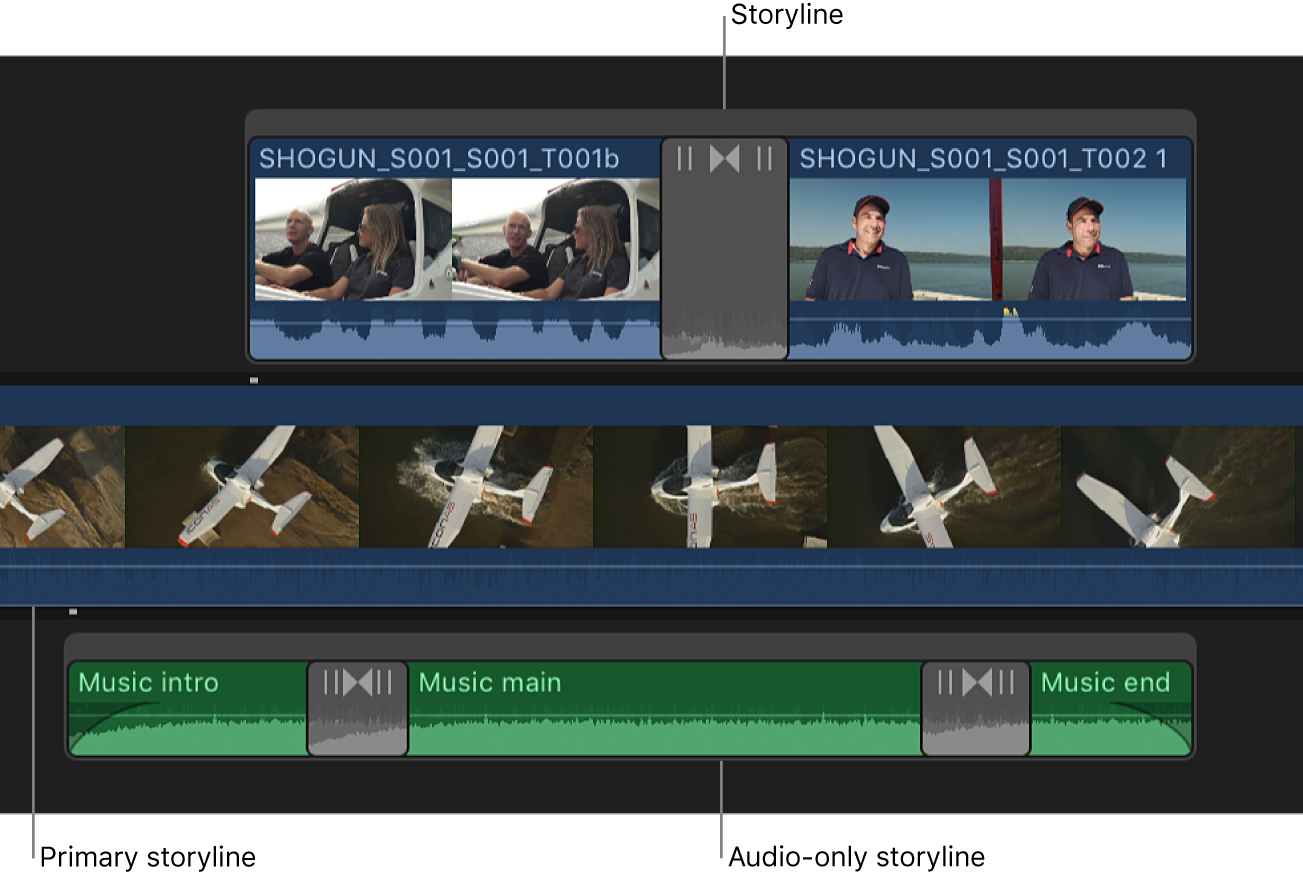
You edit storylines using the same methods you use to edit the primary storyline. You can:
Add clips: Drag clips to the storyline to add them, or use a standard append edit, insert edit, replace edit, or overwrite edit.
Add transitions, titles, effects, and generators: Add effects to a storyline by dragging them or by using any of the standard commands and keyboard shortcuts.
Note: When you apply a transition to a clip connected to the primary storyline, a storyline is automatically created for that clip.
Trim clips: Use any of the standard trim edits in a storyline, including ripple edits, roll edits, slip edits, and slide edits. You can also trim or move clips within storylines by entering timecode values.
Create split edits: Set separate video and audio start and end points in an individual clip to create split edits (L-cuts and J-cuts) in a storyline.
Create or break apart storylines
You can quickly create storylines from existing connected clips.
In the Final Cut Pro timeline, select two or more connected clips.
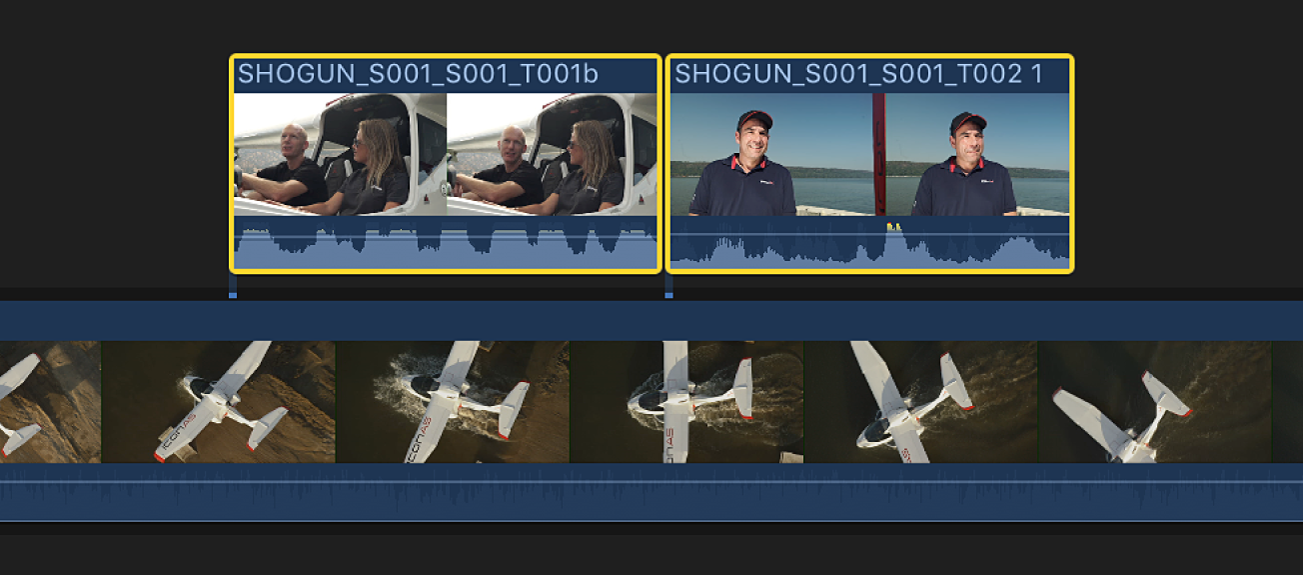
Choose Clip > Create Storyline (or press Command-G).
A gray border appears around the clips, indicating a storyline.
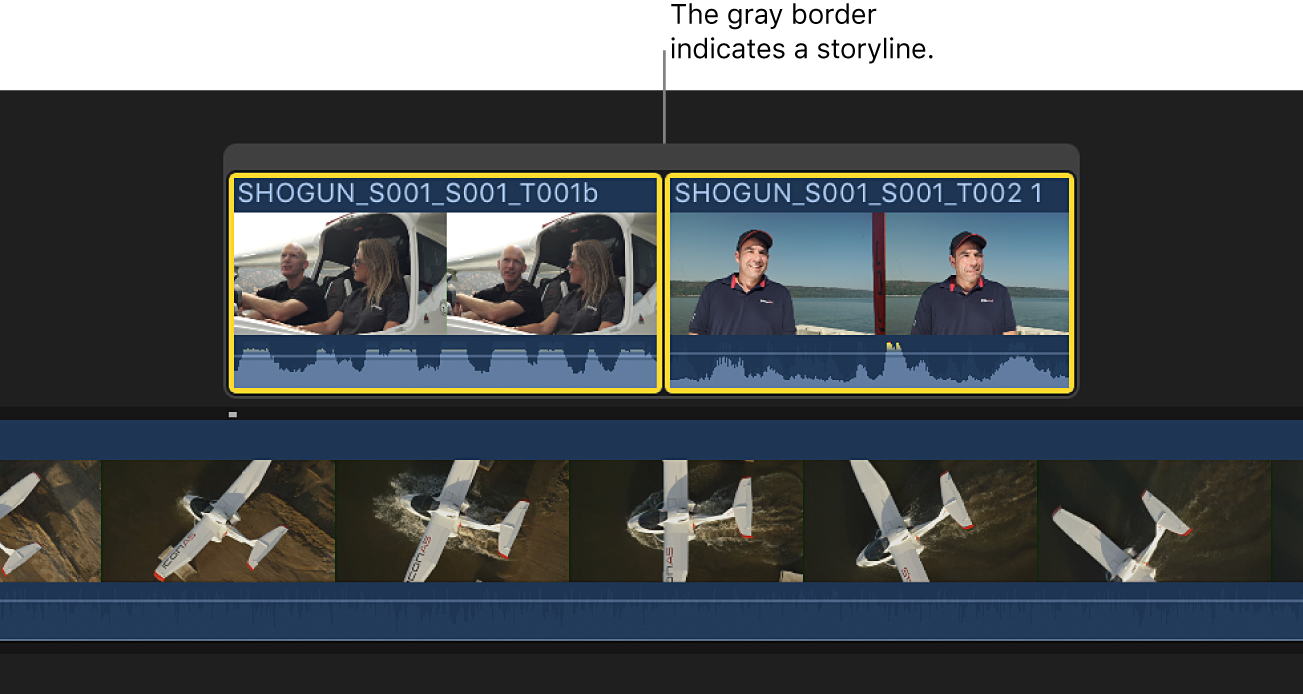
Note: If the original connected clips are not contiguous, Final Cut Pro inserts a gap clip to fill the space between the clips.
You can also create a storyline by holding down the G key as you drag a clip to a connected clip so that their edges touch:
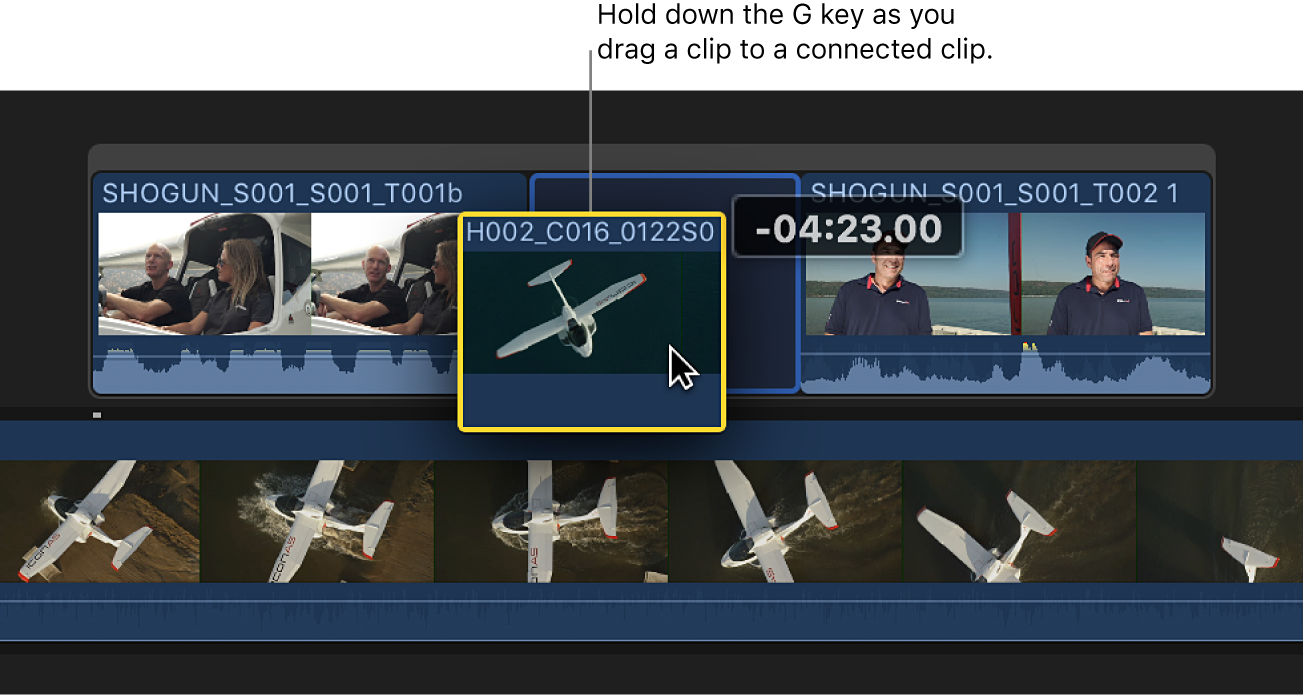
To convert a storyline back to its component clips, do one of the following:
Select the storyline (by clicking the gray border), then choose Clip > Break Apart Clip Items (or press Shift-Command-G).
Drag the storyline into the primary storyline.
Select and move storylines
You can select or move entire storylines as if they were standard clips or compound clips. Storylines have the connection properties of connected clips.
In the Final Cut Pro timeline, do any of the following:
Select a single storyline: Click the gray border at the top of the storyline.
Drag to select one or more storylines: Drag a selection rectangle over the storylines you want to select, making sure to drag over the gray border at the top of a storyline first (if you don’t drag over the top gray border first, you will select individual clips in the storyline instead). When a storyline is selected, the entire storyline is outlined with a yellow border.
Tip: To select entire storylines, drag in a downward motion. To select clips within the storylines, drag in an upward motion.
Move a storyline by dragging it: Click the gray border at the top of the storyline, then drag the storyline left or right to connect it to a different point along the primary storyline.
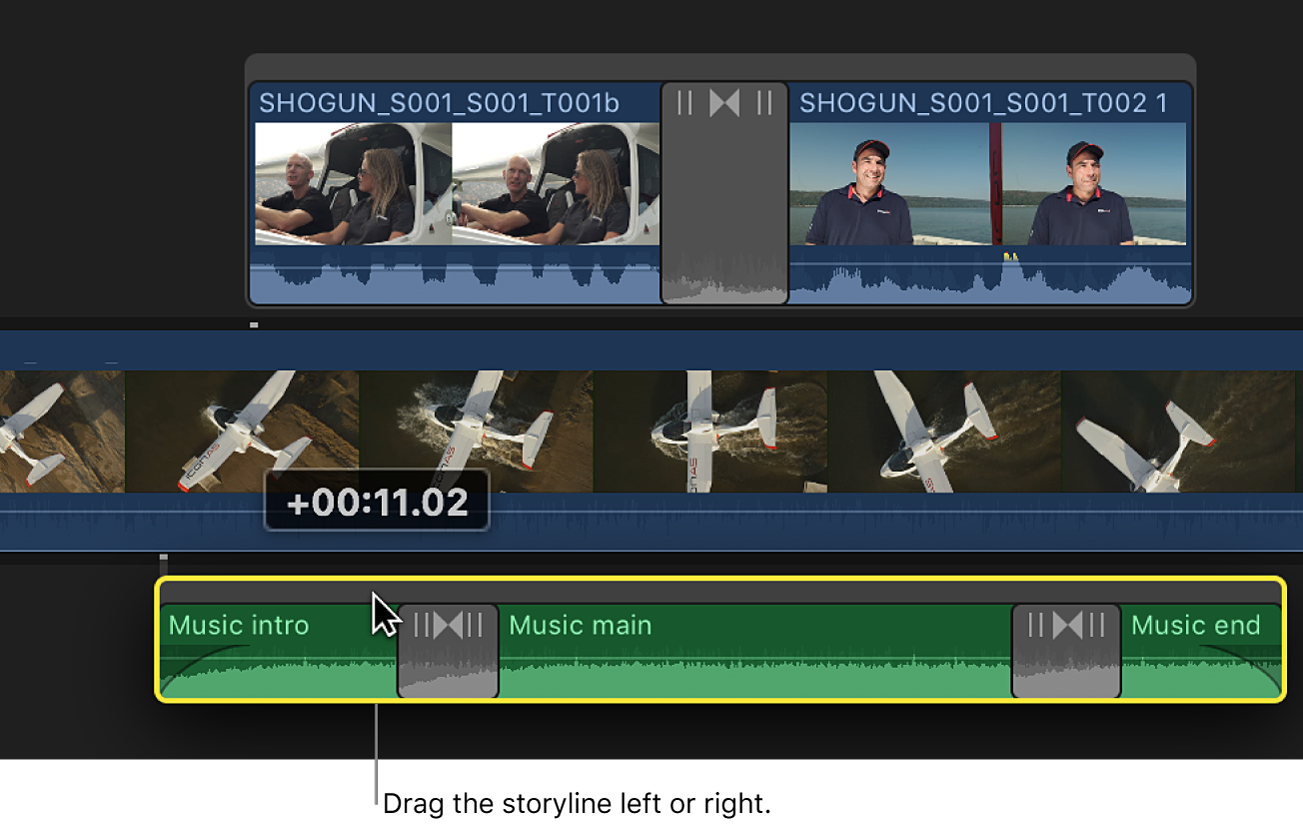
Move a storyline with timecode values or keyboard shortcuts: Use the same techniques you would use with standard clips.