Share to Apple devices in Final Cut Pro for Mac
To export your project to an Apple device such as iPhone, iPad, or iPod touch, or to play your project on a home theater system using Apple TV, you must send the project to the Apple TV app. (If you’re using macOS 10.14 or earlier, you send your project to iTunes.)
You can use the default export settings or customize the settings to suit your needs. For information about customizing settings, see Create share destinations in Final Cut Pro for Mac and Change metadata for shared items in Final Cut Pro for Mac.
In Final Cut Pro, do one of the following:
Select one or more projects or clips in the browser.
Note: You can’t mix projects and clips in a batch share. Your selection must contain only projects or only clips. See Batch sharing in Final Cut Pro for Mac.
Select ranges in one or more clips in the browser.
See Set multiple ranges in the browser in Final Cut Pro for Mac.
Select a range in a project in the timeline.
Note: To share just a portion of a project, you must make a range selection. A clip selection is not sufficient. You can use the I and O keys to set the range start and end points.
If you’re sharing a project that is set to use proxy media for playback, open it in the timeline, then click the View pop-up menu in the top-right corner of the viewer and choose Optimized/Original.
This ensures the highest quality in the exported file. When you choose this setting, Final Cut Pro uses optimized media to create the shared file. If optimized media doesn’t exist, the original media is used. For more information about optimized and proxy media, see Control playback quality in Final Cut Pro for Mac.
Do one of the following:
Choose File > Share, then choose an Apple Devices destination from the submenu.
Click the Share button in the toolbar, then click an Apple Devices destination.

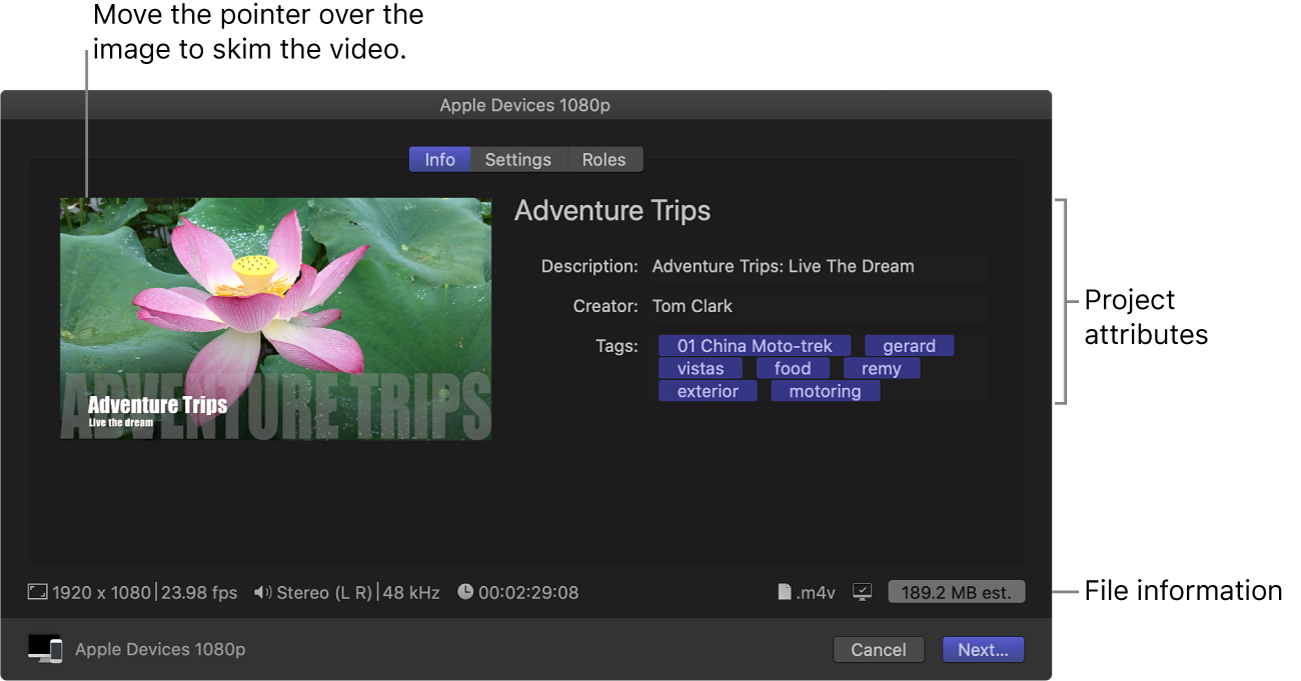
The Info pane of the Share window appears, showing the video image on the left and project information on the right. To skim the video, move the pointer over the image.

Note: If you’re batch sharing (exporting multiple items), the image is replaced by a list of the items you’re exporting.
To modify project or clip attributes, such as the title and description, enter information in the appropriate field.
See Change metadata for shared items in Final Cut Pro for Mac. All of the attributes associated with the project or clip are included in the output file.
Important: By default, the title field lists the project or clip name. Changing the title does not change the project or clip name, which is the name used for the exported file.
To modify the settings for the exported file, such as the format or resolution, click Settings at the top of the Share window, then make your changes.
For detailed descriptions of each setting, see Export File and Apple Devices destinations in Final Cut Pro for Mac.
If you change the destination’s settings, the changes are saved as the default settings for the destination. See Intro to Destinations settings in Final Cut Pro for Mac.
Note: Dolby Vision 8.4 is a format designed to optimize HDR content for Apple devices. See this Apple Support article.
To add the output media file to your Apple TV library, click the Action pop-up menu in the Settings pane, then choose Home Videos in the Add to TV section.
To review the tracks that will be included in the output media file, click Roles at the top of the Share window.
The Roles pane displays the tracks of the output media file and the roles included in each track.
To include captions in the export, click Roles at the top of the Share window, then do one of the following:
Embed captions in the output video file: For each video track or file, click the blue Captions button, then click the Embed CEA-608 pop-up menu and choose a language version.
Export captions as separate files: In the Captions section, select the caption formats you want to export, then click the Timing pop-up menu and choose an option:
Relative: Calculate the caption start time by subtracting the project’s start time.
Absolute: Use each caption’s actual start time, regardless of the project’s start time.
Burn captions in to the output video file: For each video track or file, click the blue Captions button, then click the “Burn in captions” pop-up menu and choose a language version.
For information about adding captions to your project, see Intro to captions in Final Cut Pro for Mac and Create captions in Final Cut Pro for Mac.
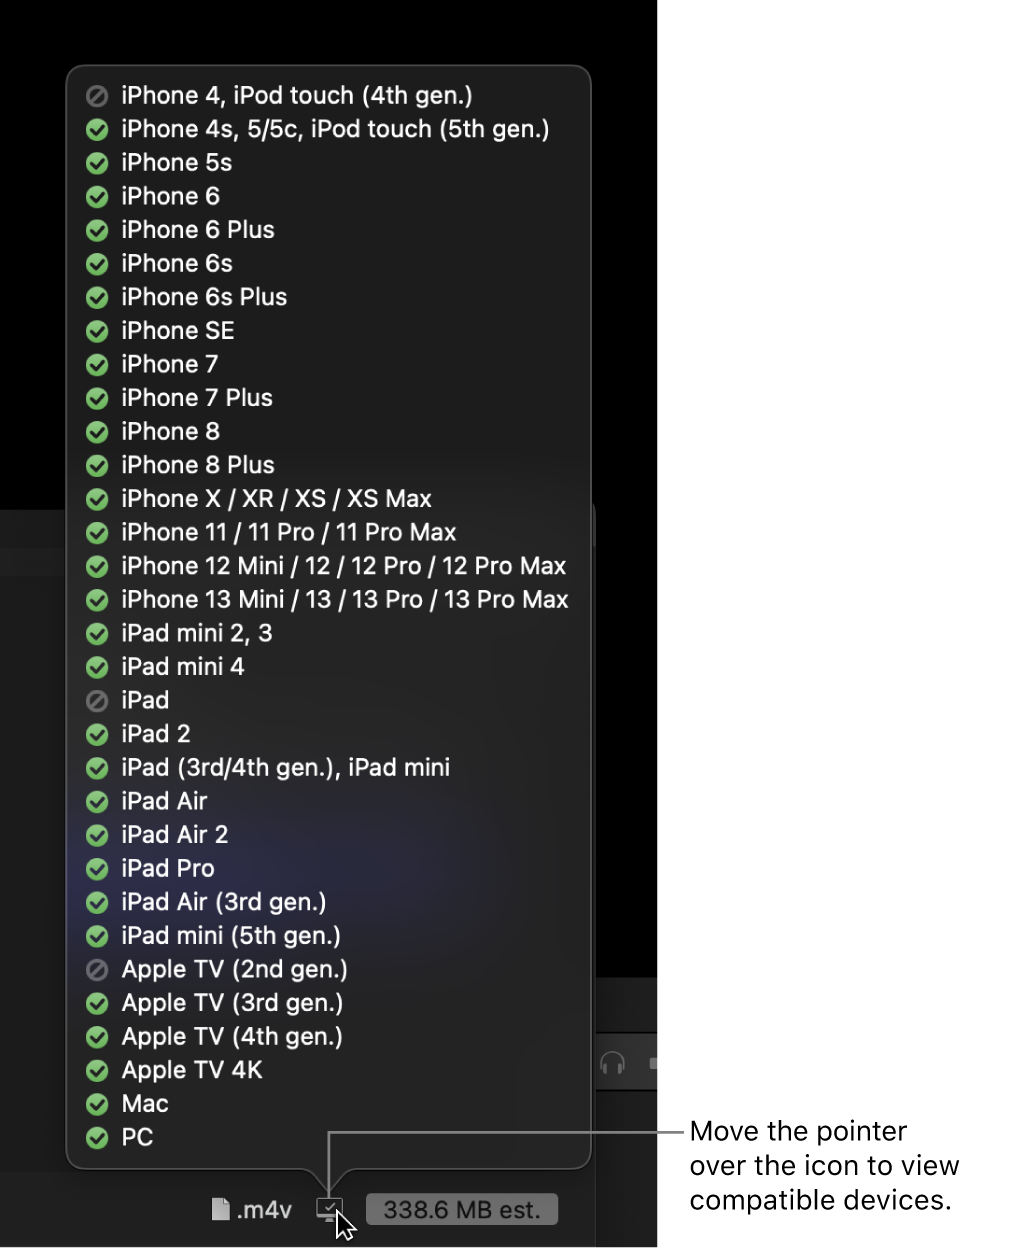
To see a list of devices that will play the exported file, move the pointer over the compatibility icon in the lower-right corner.

Information about the file that will be exported, including the frame size and frame rate, appears at the bottom of the window.
When you’re ready to export your project, clip, or range, click Share.
If you chose to add the output media file to your Apple TV library, the Apple TV app opens (if it wasn’t open), and the exported file appears in the Home Videos category.
You can monitor the progress of the transcode in the Background Tasks window, and you can continue to work in Final Cut Pro while the file is transcoded.
When transcoding is complete, a notification appears. You can view and locate shared projects in the Share inspector. See View the status of shared items in Final Cut Pro for Mac.
Note: If you added chapter markers to your project, chapter marker thumbnails are placed at the appropriate location when sharing to disc (DVD and Blu-ray disc) and MV4, QuickTime, and MP4 formats (for playback using QuickTime Player and Apple devices). See Add chapter markers in Final Cut Pro for Mac.
Download this guide: PDF