
Final Cut Pro multichannel audio editing examples
Below are examples of some multichannel audio editing workflows in Final Cut Pro.
Example: Remove unwanted noise from an audio component
Note: To skim audio for an individual audio component, make sure both clip skimming and audio skimming are turned on. See Skim media in Final Cut Pro.
Select a clip in the Final Cut Pro timeline, then choose Clip > Expand Audio Components (or press Control-Option-S).
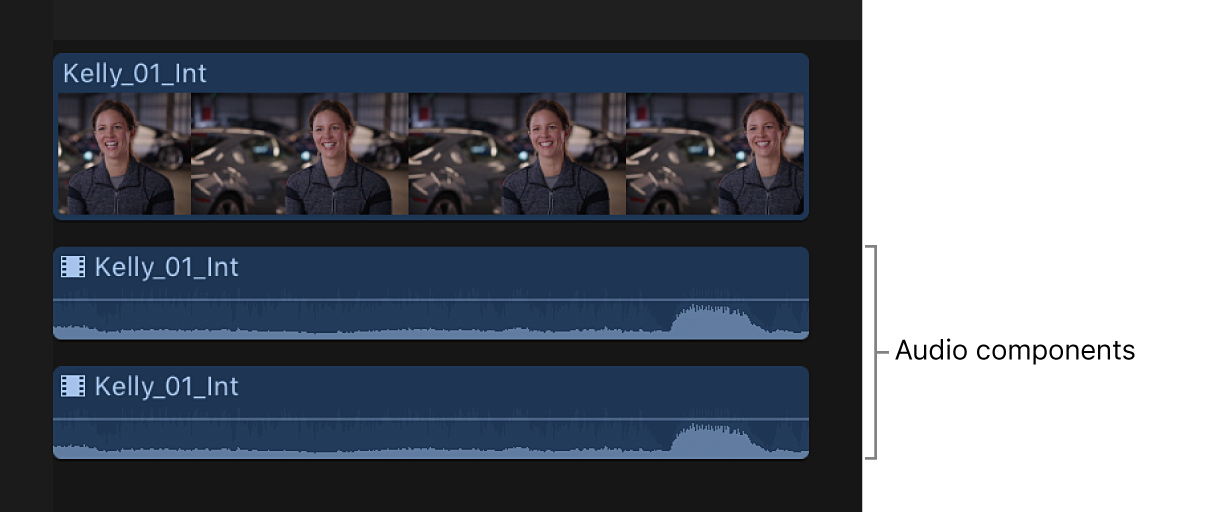
Skim or play back the audio component to find the specific place where the noise occurs.
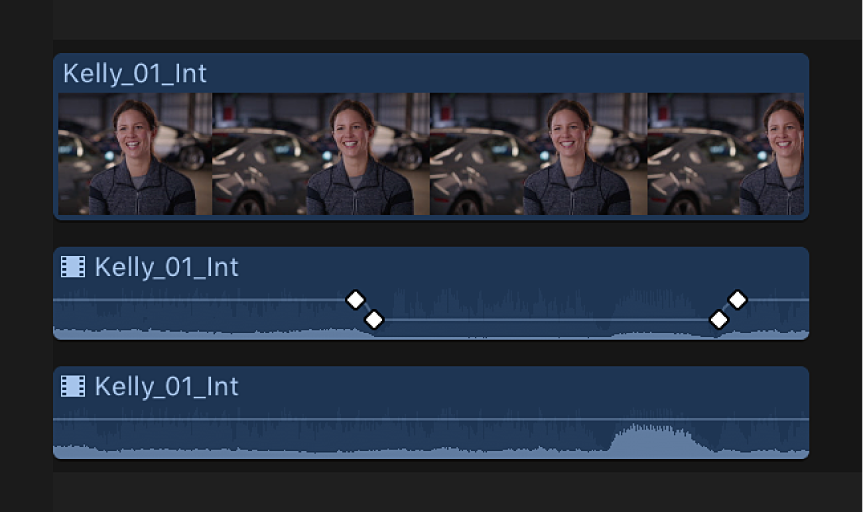
Drag within the component to select the range where the noise occurs.
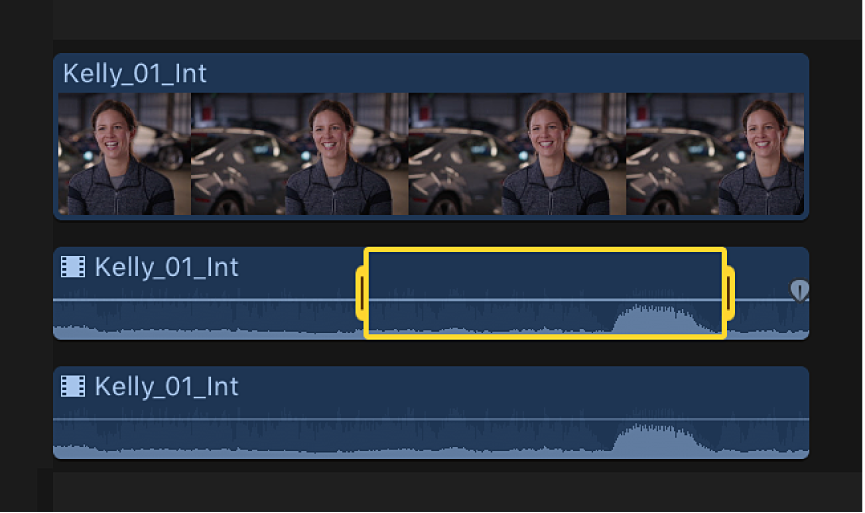
Do one of the following:
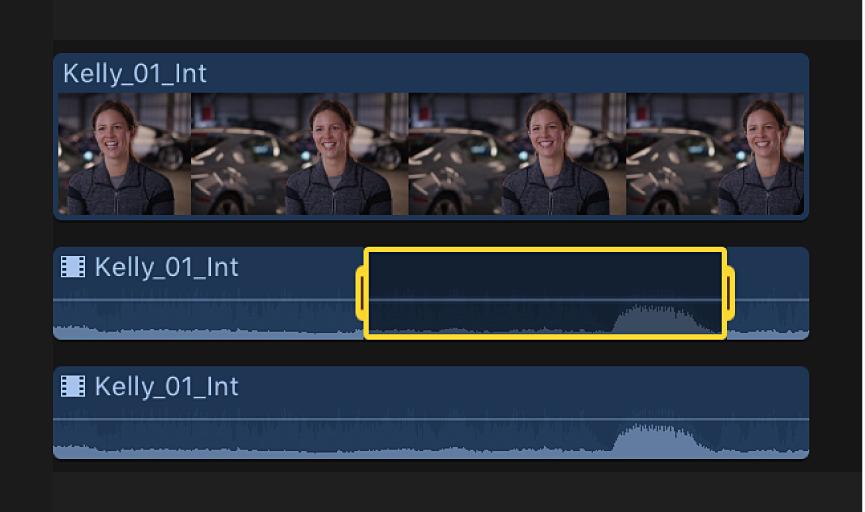
Disable the portion of the component where the noise occurs: Press the V key (or press the Delete key).
Disabling a selected range mutes all sound within the range. To unmute (enable) the range, press the V key (or press Command-Z).
Note: When you disable a range in an audio component, fade handles become available on either side of the disabled range. See Fade audio in and out in Final Cut Pro.
Adjust the volume within the range: Drag the horizontal control up or down, or adjust volume from the Modify menu or the keyboard.
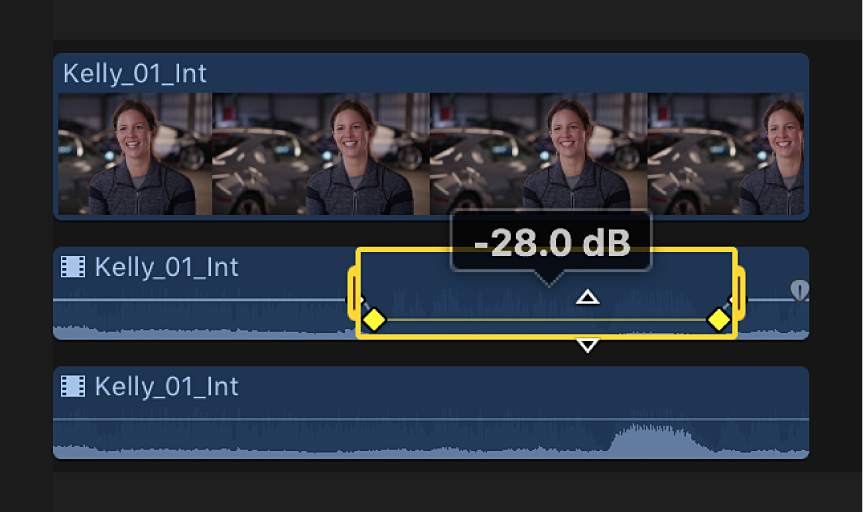
Keyframes are automatically created along the adjustment points within the range.
Play back the clip to listen to your adjustments.
To collapse the audio components after you complete your adjustments, choose Clip > Collapse Audio Components (or press Control-Option-S).
Example: Trim audio within an audio component
Select a clip in the Final Cut Pro timeline, then choose Clip > Expand Audio Components (or press Control-Option-S).

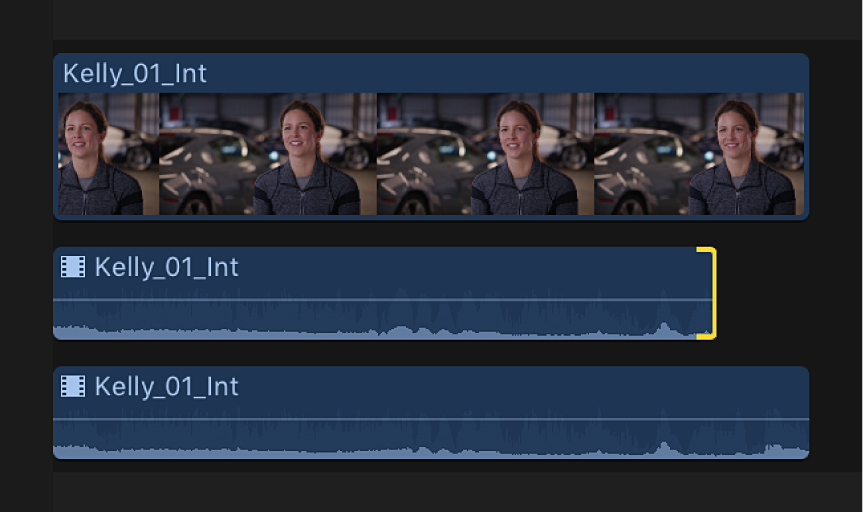
Position the pointer at the edge of the audio component you want to trim.
The pointer changes to the Trim tool
 .
.Drag to trim that section.
To undo your trim, press Command-Z.
Play back the clip to listen to your adjustments.
To collapse the audio components after you complete your adjustments, choose Clip > Collapse Audio Components (or press Control-Option-S).
Example: Trim all audio components at the same time
Select a clip in the Final Cut Pro timeline, then choose Clip > Expand Audio Components (or press Control-Option-S).

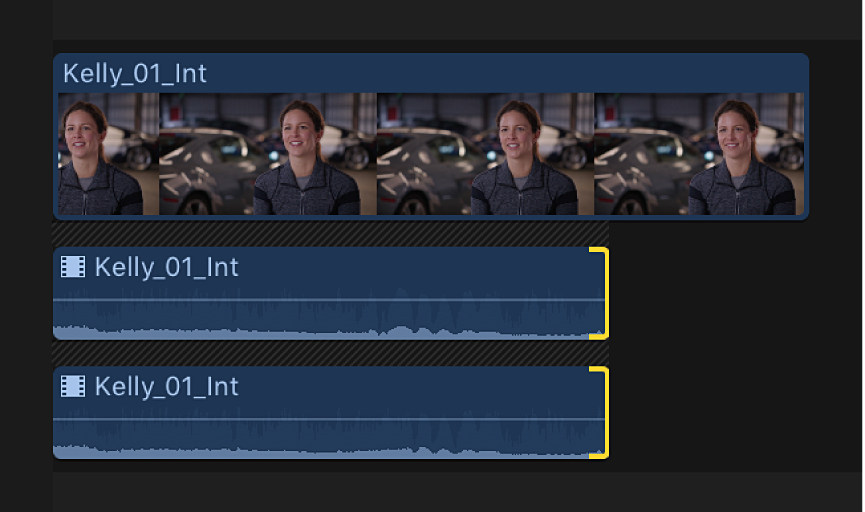
Position the pointer at the edge of one of the expanded audio components.
Hold down the Shift key and drag left or right to trim the edit point for all of the audio components at once.
The video portion of the clip is not affected.
To undo your edit, press Command-Z.
Play back the clip to listen to your adjustments.
To collapse the audio components after you complete your adjustments, choose Clip > Collapse Audio Components (or press Control-Option-S).
Example: Enable or disable audio components in a multicam clip
When you create a multicam clip that contains multiple audio components, you can use the angle viewer or the Audio inspector to add audio components from inactive angles to the active angle. This makes it easy to add audio from different source clips in your multicam clip while maintaining the active video angle. You can also disable audio components from the active angle to eliminate unwanted or unused audio.
Before you start, you can make adjustments to the channel configuration of audio components in your source clips in the browser using the Audio inspector. See Configure audio channels in Final Cut Pro.
In Final Cut Pro, drag a multicam clip from the browser to the timeline.
To open the angle viewer, do one of the following:
Choose View > Show in Viewer > Angles (or press Shift-Command-7).
Click the View pop-up menu in the top-right corner of the viewer and choose Show Angles.
The active angle appears highlighted in yellow.
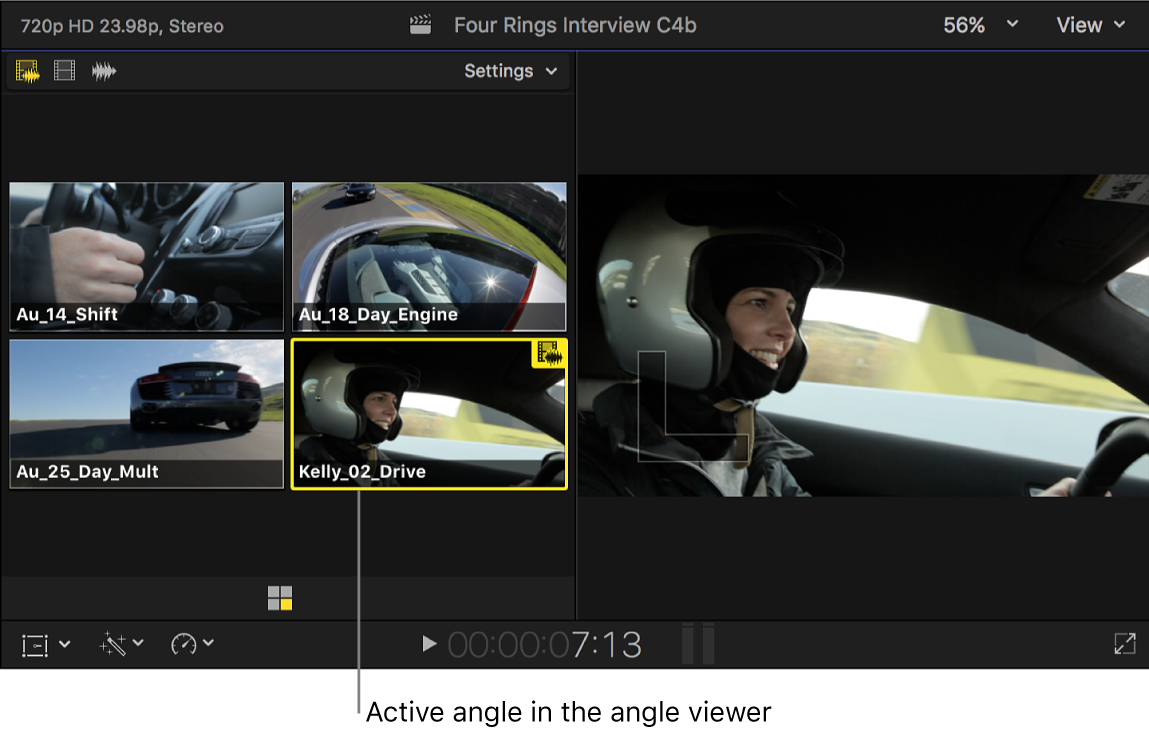
To enable audio-only switching in the angle viewer, click the right switch mode button in the upper-left corner.

If the inspector isn’t already shown, do one of the following:
Choose Window > Show in Workspace > Inspector (or press Command-4).
Click the Inspector button in the toolbar.

Click the Audio button at the top of the inspector.

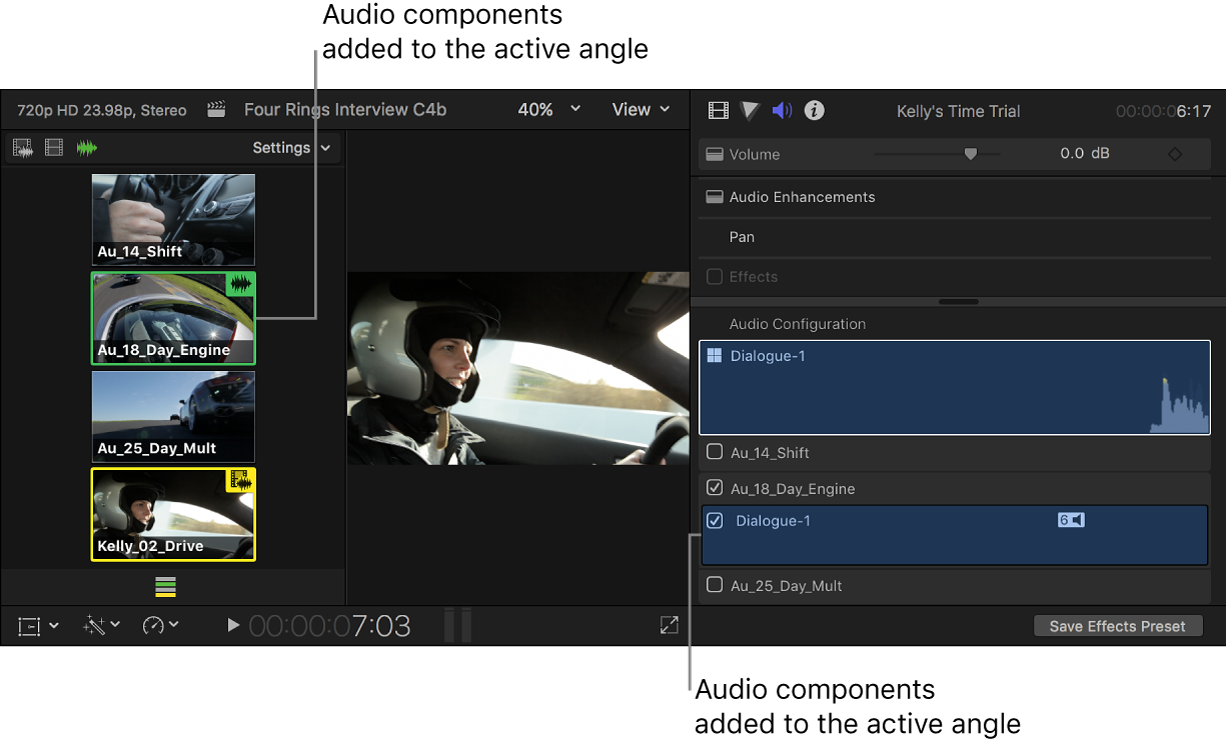
The audio corresponding to the active angle in the angle viewer appears highlighted in the Audio Configuration section of the Audio inspector.
To add audio components from inactive angles, do one of the following:
In the angle viewer: Hold down the Command and Option keys and click an inactive angle or angles.
In the Audio inspector: Select the checkbox next to each audio component you want to add.
In this example, the angle whose audio you added is highlighted in green in the angle viewer, and the audio components you added are highlighted in the Audio inspector.
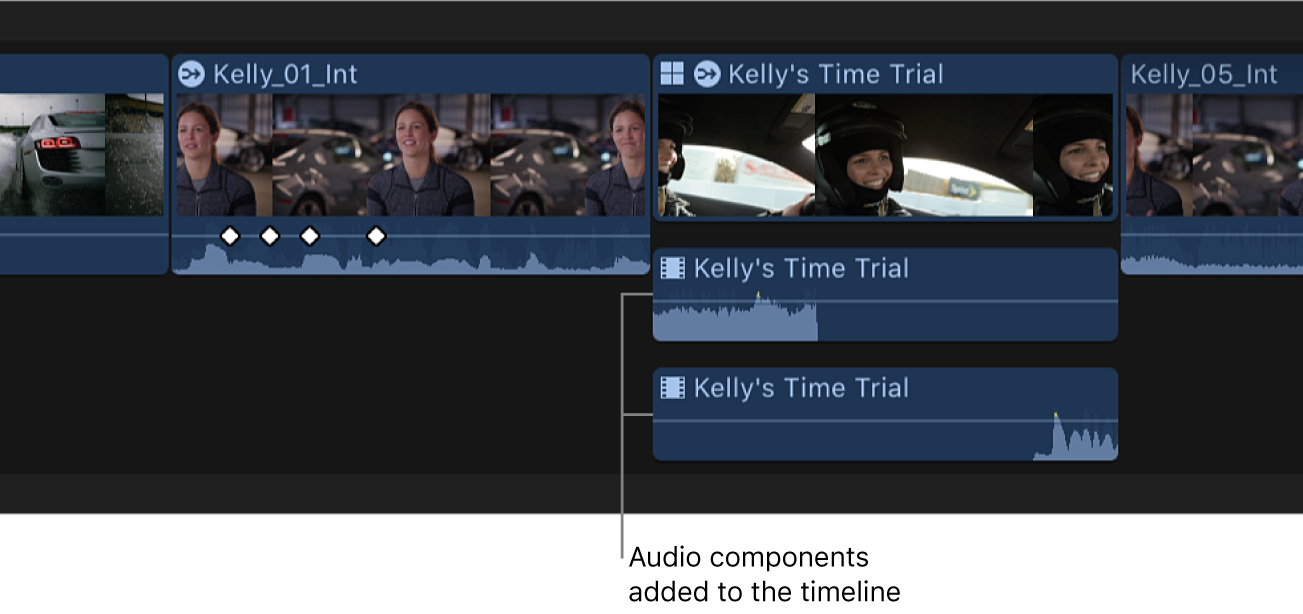
The added audio components also appear in the multicam clip’s component arrangement in the timeline. (To show expanded audio components, choose Clip > Expand Audio Components, or press Control-Option-S.)
To remove an audio component from the active angle, do one of the following:
In the angle viewer: Hold down the Command and Option keys and click the angle (highlighted in green) whose audio you want to remove.
In the Audio inspector: Deselect the checkbox next to the audio component you want to remove.
In the timeline: With the clip’s audio components expanded in the timeline, select the audio component and press Delete.
When a component is removed, it appears dimmed in the Audio inspector and the angle is no longer highlighted in green in the angle viewer. The component also disappears from the multicam clip’s component arrangement in the timeline.
Example: Perform a roll edit on adjacent audio components
Select adjacent clips in the Final Cut Pro timeline, then choose Clip > Expand Audio Components (or press Control-Option-S).
Click the Tools pop-up menu in the top-left corner of the timeline and choose Trim (or press T).
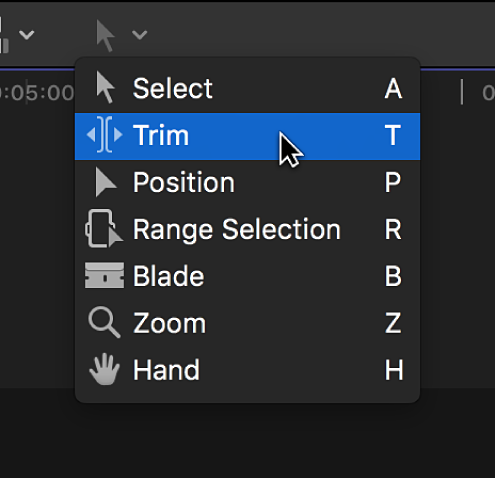
The pointer changes to the Trim tool
 .
.Tip: To switch to the Trim tool temporarily, hold down the T key. When you release the T key, the tool reverts to the previously active tool.
In the timeline, click the center of the edit point between the adjacent audio components that you want to roll, so that both sides of the edit point are selected.
Drag left or right to roll the edit point.
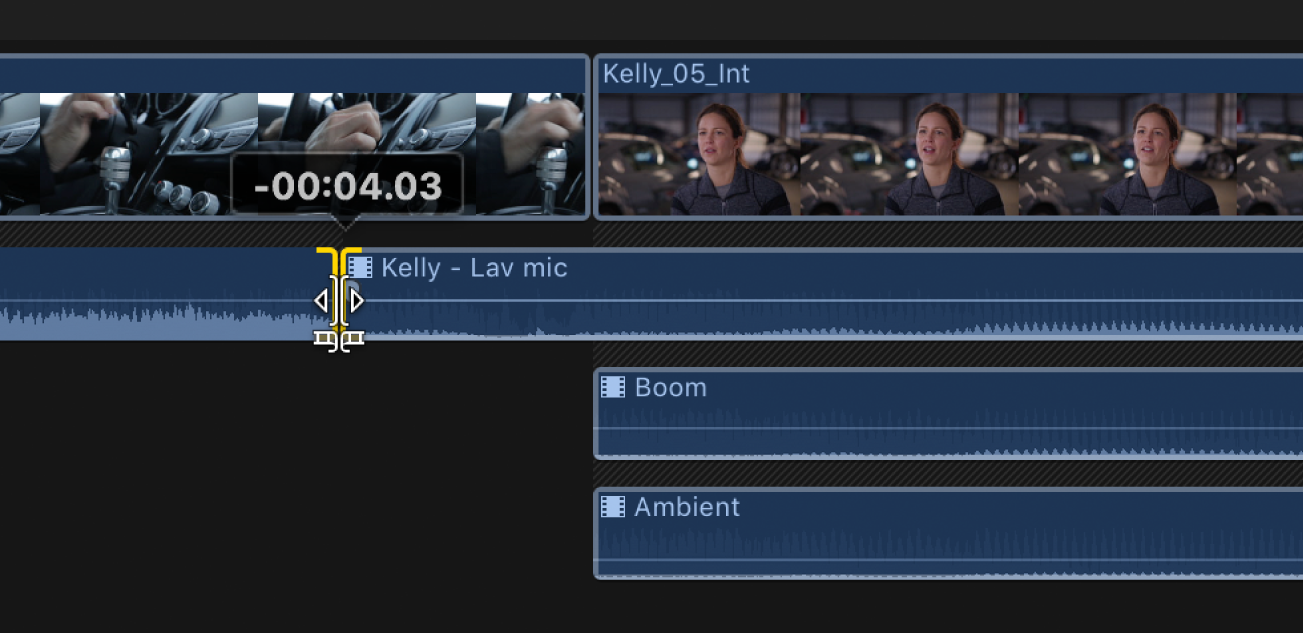
The edit point is rolled to the new location. The combined duration of the two components stays the same.
Note: The adjacent audio components must have sufficient media handles (additional media available beyond the edit point). If you can’t roll the edit point any farther and one side of the edit point appears red, you’ve reached the end of the media for one of the two components.