
Edit in the MainStage Delay Designer Tap display
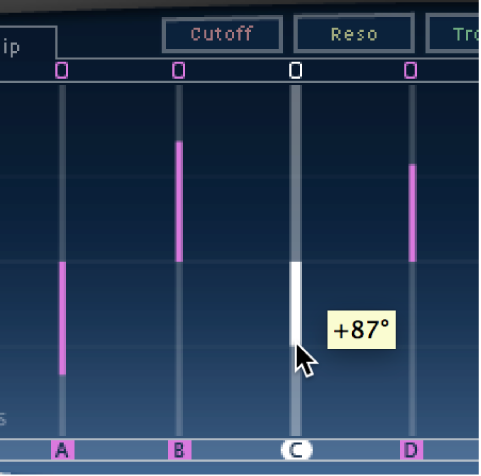
You can graphically edit any tap parameter that is represented as a vertical line in the Tap display. The Tap display is ideal if you want to edit the parameters of one tap relative to other taps or when you need to edit or align multiple taps simultaneously.
In MainStage, click the view button of the parameter you want to edit.
Vertically drag the bright line of the tap you want to edit (or one of the selected taps, if multiple taps are selected).

If you selected multiple taps, the values of all selected taps are changed relative to each other.
Note: The method outlined above is slightly different for the Filter Cutoff and Pan parameters. See the tasks below.
In MainStage, Command-drag over multiple taps to change their value.
Parameter values change to match the pointer position as you drag across the taps. Command-dragging across several taps lets you draw value curves, much like using a pencil to create a curved line on a piece of paper.

In MainStage, Command-click in the Tap display, and drag while holding down the Command key.
A line trails behind the pointer as you drag.

Click the appropriate position to mark the end point of the line.
The values of taps that fall between the start and end points are aligned along the line.

In MainStage, you can use the Tap display or Tap parameter bar to reset tap parameters to their default values.
To reset a parameter to its default setting in the Tap display: Option-click a tap to reset the selected parameter to its default setting.
If multiple taps are selected, Option-clicking any tap resets the chosen parameter to its default value for all selected taps.
To reset a parameter to its default setting in the Tap parameter bar: Option-click a parameter value to reset it to the default setting.
If multiple taps are selected, Option-clicking a parameter of any tap resets all selected taps to the default value for that parameter.
In Cutoff view, each tap actually shows two parameters: highpass and lowpass filter cutoff frequency.
In MainStage, drag the cutoff frequency line—the upper line is lowpass and the lower line is highpass—to independently adjust filter cutoff values. Both cutoff frequencies can be adjusted simultaneously by dragging in the area between them.

When the highpass filter cutoff frequency value is lower than that of the lowpass cutoff frequency, only one line is shown. This line represents the frequency band that passes through the filters—in other words, the filters act as a bandpass filter. In this configuration, the two filters operate in series which means the tap passes through one filter first, then the other.
If the highpass filter cutoff frequency value is above that of the lowpass filter cutoff frequency, the filter switches from serial operation to parallel operation, which means the tap passes through both filters simultaneously. In this case, the space between the two cutoff frequencies represents the frequency band being rejected—in other words, the filters act as a band-rejection filter.
In MainStage, the way the Pan parameter is represented in the Pan view is entirely dependent on the input channel configuration—mono to stereo, stereo to stereo, or surround.
In mono input/stereo output configurations, all taps are initially panned to the center.
In stereo input/stereo output configurations, the Pan parameter adjusts the stereo balance, not the position of the tap in the stereo field.
Note: Pan is not available in mono configurations.
To edit the pan position in mono input/stereo output configurations: Drag vertically from the center of the tap in the direction you want to pan the tap or taps.
A white line extends outward from the center in the direction you have dragged, reflecting the pan position of the tap or taps.
Lines above the center position indicate pans to the left, and lines below the center position denote pans to the right. Left (blue) and right (green) channels are easily identified.

To adjust the stereo balance in stereo input/stereo output configurations: Drag the Pan parameter—which appears as a dot on the tap—up or down the tap to adjust the stereo balance.
By default, stereo spread is set to 100%. To adjust the spread width, drag either side of the dot. As you do so, the width of the line extending outward from the dot changes. Keep an eye on the Spread parameter in the Tap parameter bar while you are adjusting.

In MainStage, Control-click (or right-click) a tap in the Tap display, then choose one of the following commands from the shortcut menu:
Copy sound parameters: Copies all parameters (except the delay time) of the selected tap or taps to the Clipboard.
Paste sound parameters: Pastes the tap parameters from the Clipboard into the selected tap or taps. If there are more taps in the Clipboard than are selected in the Tap display, the extra taps in the Clipboard are ignored.
Reset sound parameters to default values: Resets all parameters of all selected taps (except the delay time) to the default values.
2 x delay time: Doubles the delay time of all selected taps. For example, the delay times of three taps are set as follows: Tap A = 250 ms, Tap B = 500 ms, and Tap C = 750 ms. If you select these three taps and choose “2 x delay time,” the taps are changed as follows: Tap A = 500 ms, Tap B = 1000 ms, and Tap C = 1500 ms. In other words, a rhythmic delay pattern unfolds half as fast. (In musical terms, it is played in half time.)
1/2 x delay time: Halves the delay time of all selected taps. Using the example above, choosing “1/2 x delay time” changes the taps as follows: Tap A = 125 ms, Tap B = 250 ms, and Tap C = 375 ms. In other words, a rhythmic delay pattern unfolds twice as fast. (In musical terms, it is played in double time.)
Delete tap(s): Deletes all selected taps.