Final Cut Pro X User Guide
- Welcome
-
- What’s new in Final Cut Pro 10.4.9
- What’s new in Final Cut Pro 10.4.7
- What’s new in Final Cut Pro 10.4.6
- What’s new in Final Cut Pro 10.4.4
- What’s new in Final Cut Pro 10.4.1
- What’s new in Final Cut Pro 10.4
- What’s new in Final Cut Pro 10.3
- What’s new in Final Cut Pro 10.2
- What’s new in Final Cut Pro 10.1.2
- What’s new in Final Cut Pro 10.1
- What’s new in Final Cut Pro 10.0.6
- What’s new in Final Cut Pro 10.0.3
- What’s new in Final Cut Pro 10.0.1
-
- Intro to effects
-
- Intro to transitions
- How transitions are created
- Add transitions
- Set the default transition
- Delete transitions
- Adjust transitions in the timeline
- Adjust transitions in the inspector and viewer
- Merge jump cuts with the Flow transition
- Adjust transitions with multiple images
- Modify transitions in Motion
-
- Add storylines
- Use the precision editor
- Conform frame sizes and rates
- Use XML to transfer projects
-
-
- Intro to media management
-
- View a clip’s information
- Override a clip’s metadata
- Locate source media files
- Relink clips to media files
- Consolidate projects and libraries
- Back up projects and libraries
- Create optimized and proxy files
- Create a proxy-only project
- Manage render files
- View background tasks
- Convert incompatible media
- Create camera archives
- Glossary
- Copyright

Use multiple masks in Final Cut Pro
Occasionally, it may be necessary to apply multiple masks to the same image. For example, if you’re masking an image of a car, you might draw separate masks for different parts of the car: roof and windows, the lower body, and so on. It’s easier to divide the car into parts, draw separate masks for each part, and composite the masks together at the end than to draw an accurate car shape in one mask. You can apply any combination of Shape Masks and Draw Masks.
Note: Mask blend modes are available for effect masking only. Dragging multiple instances of the Draw Mask or the Shape Mask to the same clip creates the equivalent of the Intersect blend mode in the effect masking feature. In Intersect mode, only the area inside the mask shape that overlaps with other mask shapes is affected. See Combine multiple effect masks in Final Cut Pro. The instructions below explain how to create the equivalent of Add mode, in which multiple mask shapes are merged.
Add the clip you want to mask to the Final Cut Pro timeline.
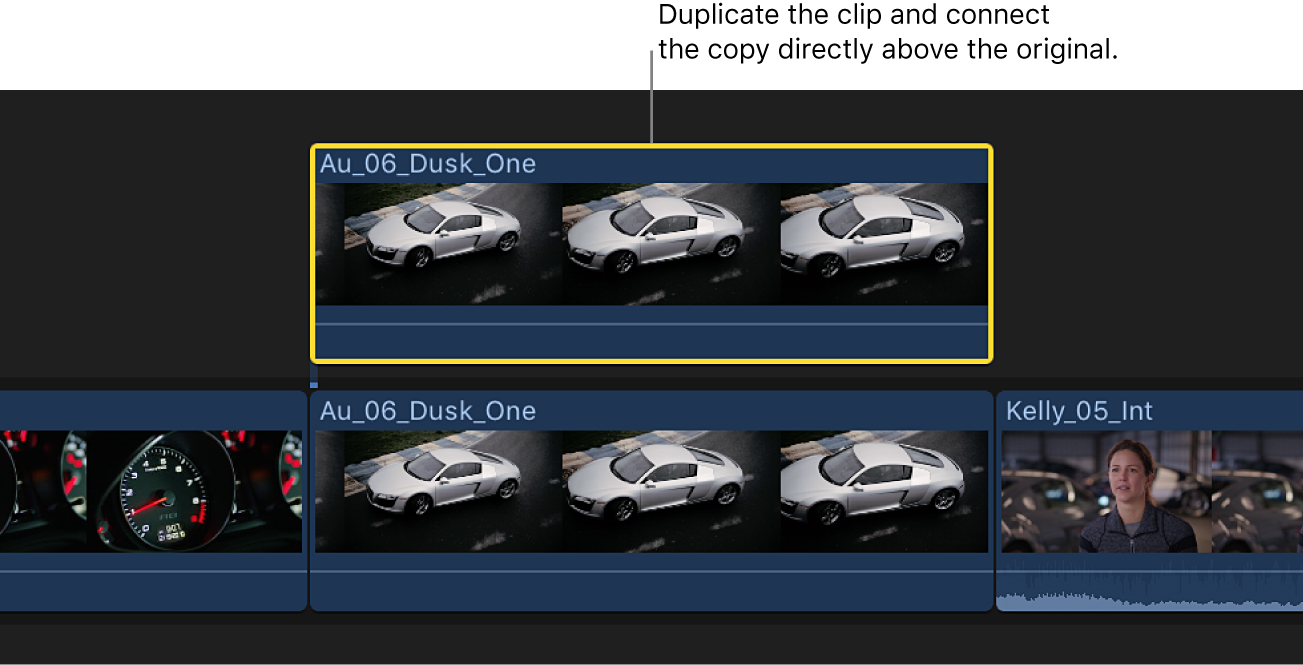
Duplicate the clip as a connected clip directly above the original clip.

Tip: To quickly duplicate the original clip and position it at the same time, Option-drag the clip to the area just above the primary storyline.
Apply a mask to the connected clip.
Tip: To get a better view of your mask as you create it, you can temporarily disable the other clip by selecting it and pressing V. To reenable the clip, press V again.
Apply a mask to the original clip.
The two mask shapes are effectively merged.
To add any additional masks, repeat steps 2 and 3.