Prepare your class in Classroom
You can use Classroom to create groups with whoum to perform specific actions. You can also use Classroom to assign users to Shared iPad devices. As you use Classroom, dynamic groups are created when students use different apps or, in the case of iPad devices, the Home screen. For example, if four students are using Safari, a dynamic group is created showing those four students.
The types of groups are:
All: All students in a class
Manual: Created by you, the teacher
Dynamic: Based on the current app, the Home screen for iPad devices or any student devices that are locked by you, the teacher
You can remove only groups you create manually. Dynamic groups appear and disappear as students use different apps.
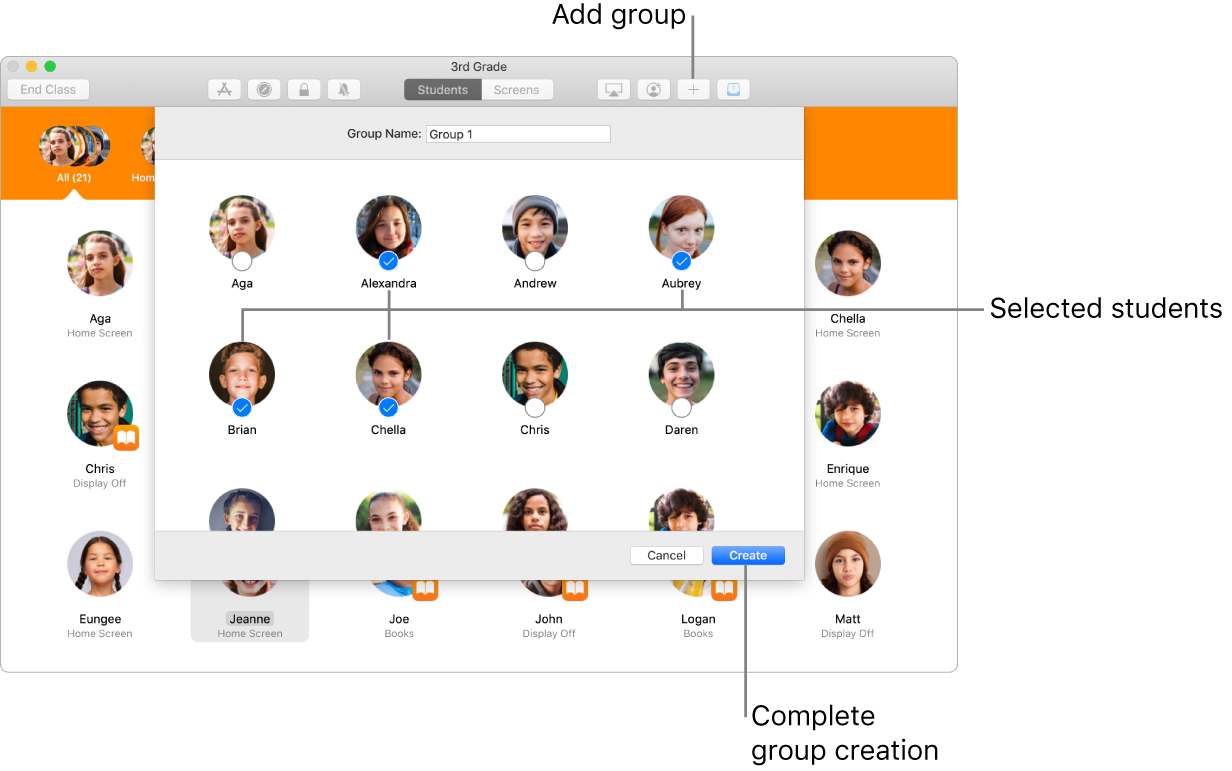
Manually create a group

Open the Classroom app
 on your Mac, then select the names of students who will be members of this group. If you don’t select any students, all students will be added to the group.
Click Group
 in the toolbar, then enter a name for the group.
If necessary, you can further refine who is part of this group. Preselected students will have a tick under their initials or images (if used).
Click Create, then view the new group in the row of groups.
Remove a group you created
Open the Classroom app
 on your Mac, then select the group you want to remove from the group list.
Do one of the following:
Hold down the Control key and choose Remove Group from the pop-up menu.
Choose File > Remove Group.
Click Remove.
Assign a student to an iPad
Classroom can assign a student to an iPad. This ability is useful if a student forgets their passcode or password.
Note: Shared iPad and Managed Apple IDs are required for this action.
Open the Classroom app
 on your Mac, then select the student.
Choose Action > Assign iPad, then select the device group to assign the student to an iPad in that group.
Assign students to iPad devices
Classroom can assign a student group to an iPad group. When you click Assign, Classroom determines whether each iPad has been assigned to a student before and if so, it may assign that student to that iPad again. This optimises the student’s experience by reducing the downloading of files.
Note: Shared iPad and Managed Apple IDs are required for this action.
Open the Classroom app
 on your Mac, then select the students or group that will be assigned an iPad.
Choose Action > Assign iPads, then select a device group to assign the student group to the selected device group.