Final Cut Pro User Guide for Mac
- Welcome
- What’s new
-
- Intro to effects
-
- Intro to transitions
- How transitions are created
- Add transitions and fades
- Quickly add a transition with a keyboard shortcut
- Set the default duration for transitions
- Delete transitions
- Adjust transitions in the timeline
- Adjust transitions in the inspector and viewer
- Merge jump cuts with the Flow transition
- Adjust transitions with multiple images
- Modify transitions in Motion
-
- Add storylines
- Use the precision editor
- Conform frame sizes and rates
- Use XML to transfer projects
- Glossary
- Copyright

Background rendering in Final Cut Pro for Mac
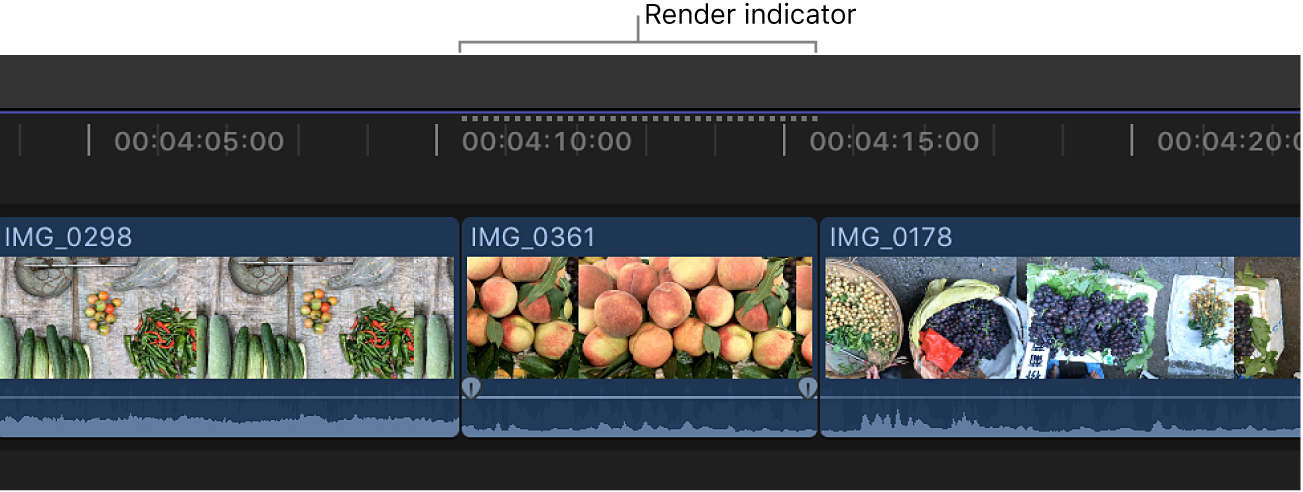
Rendering is the process of creating temporary video and audio render files for segments of your project that Final Cut Pro can’t play in real time. When you add effects, transitions, generators, titles, and other items that require rendering for playback at high quality, the render indicator (a light gray dotted line) appears below the ruler at the top of the timeline.

By default, rendering begins in the background 0.3 seconds after you stop working and moving the pointer in Final Cut Pro. You can turn off background rendering or adjust this setting in Final Cut Pro settings (see Playback settings in Final Cut Pro for Mac).
You can also manually control rendering for a project or a portion of a project, and you can delete render files for one or more projects, events, or libraries to free up storage space. See Manage render files in Final Cut Pro for Mac.
Download this guide: Apple Books | PDF