Logic Pro User Guide for iPad
-
- What is Logic Pro?
- Working areas
- Work with function buttons
- Work with numeric values
- Undo and redo edits in Logic Pro for iPad
-
- Intro to tracks
- Create tracks
- Create tracks using drag and drop
- Choose the default region type for a software instrument track
- Select tracks
- Duplicate tracks
- Reorder tracks
- Rename tracks
- Change track icons
- Change track colors
- Use the tuner on an audio track
- Show the output track in the Tracks area
- Delete tracks
- Edit track parameters
- Start a Logic Pro subscription
- How to get help
-
- Intro to recording
-
- Before recording software instruments
- Record software instruments
- Record additional software instrument takes
- Record to multiple software instrument tracks
- Record multiple MIDI devices to multiple tracks
- Record software instruments and audio simultaneously
- Merge software instrument recordings
- Spot erase software instrument recordings
- Replace software instrument recordings
- Capture your most recent MIDI performance
- Route MIDI internally to software instrument tracks
- Record with Low Latency Monitoring mode
- Use the metronome
- Use the count-in
-
- Intro to arranging
-
- Intro to regions
- Select regions
- Cut, copy, and paste regions
- Move regions
- Remove gaps between regions
- Delay region playback
- Trim regions
- Loop regions
- Repeat regions
- Mute regions
- Split and join regions
- Stretch regions
- Separate a MIDI region by note pitch
- Bounce regions in place
- Change the gain of audio regions
- Create regions in the Tracks area
- Convert a MIDI region to a Session Player region or a pattern region
- Replace a MIDI region with a Session Player region in Logic Pro for iPad
- Rename regions
- Change the color of regions
- Delete regions
-
- Intro to chords
- Add and delete chords
- Select chords
- Cut, copy, and paste chords
- Move and resize chords
- Loop chords on the Chord track
- Color chords on the Chord track
- Edit chords
- Work with chord groups
- Use chord progressions
- Change the chord rhythm
- Choose which chords a Session Player region follows
- Analyze the key signature of a range of chords
- Create fades on audio regions
- Extract vocal and instrumental stems with Stem Splitter
- Access mixing functions using the Fader
-
- Intro to Step Sequencer
- Use Step Sequencer with Drum Machine Designer
- Record Step Sequencer patterns live
- Step record Step Sequencer patterns
- Load and save patterns
- Modify pattern playback
- Edit steps
- Edit rows
- Edit Step Sequencer pattern, row, and step settings in the inspector
- Customize Step Sequencer
-
- Intro to mixing
-
- Channel strip types
- Channel strip controls
- Peak level display and clipping
- Set channel strip volume
- Set channel strip input format
- Set the output for a channel strip
- Set channel strip pan position
- Mute and solo channel strips
- Reorder channel strips in the Mixer in Logic Pro for iPad
- Replace a patch on a channel strip using drag and drop
- Work with plug-ins in the Mixer
- Search for plug-ins in the Mixer in Logic Pro for iPad
-
- Effect plug-ins overview
-
- Instrument plug-ins overview
-
- ES2 overview
- Interface overview
-
- Modulation overview
- Use the Mod Pad
-
- Vector Envelope overview
- Use Vector Envelope points
- Use Vector Envelope solo and sustain points
- Set Vector Envelope segment times
- Vector Envelope XY pad controls
- Vector Envelope Actions menu
- Vector Envelope loop controls
- Vector Envelope point transition shapes
- Vector Envelope release phase behavior
- Use Vector Envelope time scaling
- Modulation source reference
- Via modulation source reference
-
- Sample Alchemy overview
- Interface overview
- Add source material
- Save a preset
- Edit mode
- Play modes
- Source overview
- Synthesis modes
- Granular controls
- Additive effects
- Additive effect controls
- Spectral effect
- Spectral effect controls
- Filter module
- Low, bandpass, and highpass filters
- Comb PM filter
- Downsampler filter
- FM filter
- Envelope generators
- Mod Matrix
- Modulation routing
- Motion mode
- Trim mode
- More menu
- Sampler
- Studio Piano
- Copyright
Step FX processors in Logic Pro for iPad
The parameters of all Step FX processors are described in the respective sections below.
Reverb parameters
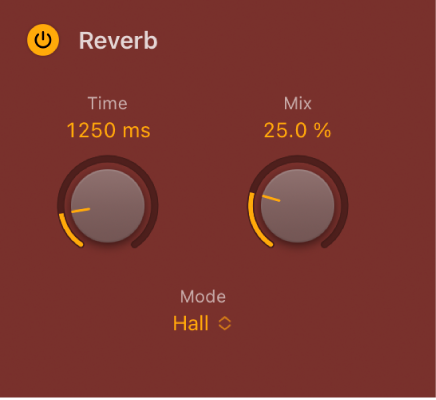
A simple reverb unit that can add space to your parts.
Reverb On/Off button: Enable/disable the reverb effect.
Time knob and field: Set the length of the reverb tail.
Mix knob and field: Set the level of the original versus reverb signal.
Mode pop-up menu: Choose a reverb characteristic. Each option provides a different tonal color and response.
Multimode Filter parameters
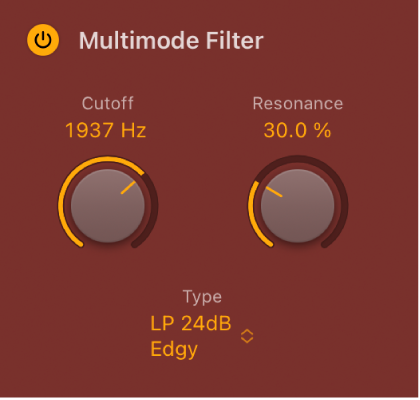
The filter unit provides dozens of filter types. See Step FX filter types.
Multimode Filter On/Off button: Enable/disable the filter effect.
Cutoff knob and field: Set the cutoff frequency for the filter. Higher frequencies are attenuated and lower frequencies are allowed to pass in a lowpass (LP) filter. The reverse is true in a highpass (HP) filter. When in a bandpass (BP) mode, cutoff determines the center frequency of the band that is allowed to pass. The comb and other filter types change the names and behaviors of the filter controls.
Resonance knob and field: Boost or cut signals in the frequency band that surrounds the cutoff frequency. Very high Resonance values cause the filter to begin oscillating at the cutoff frequency. This self-oscillation occurs before you reach the maximum resonance value.
Type pop-up menu: Choose a filter characteristic. Each option provides a different tonal color and response to the Cutoff and Resonance control values.
Note: The chosen filter type can alter the names and functions of the default Cutoff and Resonance knobs.
Mix knob and field: Set the level of the original versus filtered signal.
Mod FX parameters
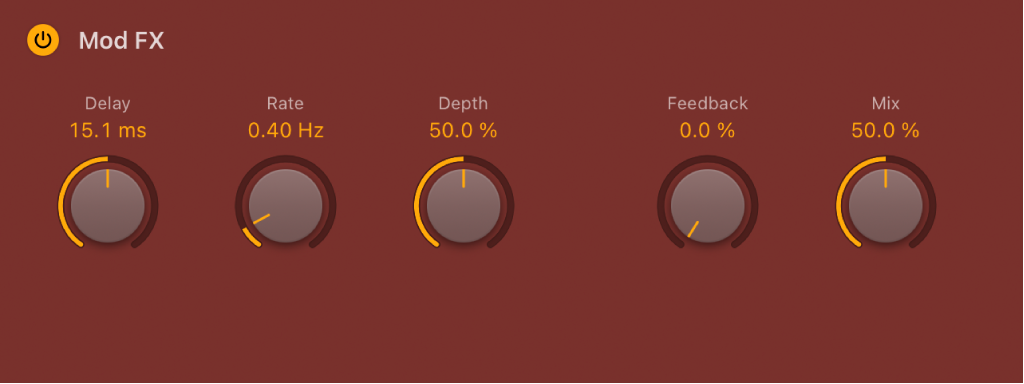
The modulation FX unit provides chorus-like effects, ranging from soft through to heavy tone warping.
Mod FX On/Off button: Enable/disable the Mod FX unit.
Delay knob and field: Set the initial delay time.
Rate knob and field: Set the LFO speed of the modulation effect.
Depth knob and field: Set the intensity of the modulation effect.
Feedback knob and field: Set the amount of the effect signal that is routed back to the input. Use high levels if you’re going for weird sounds.
Mix knob and field: Set the level of the original versus modulated signal. This is a modulation amount control.
Delay parameters
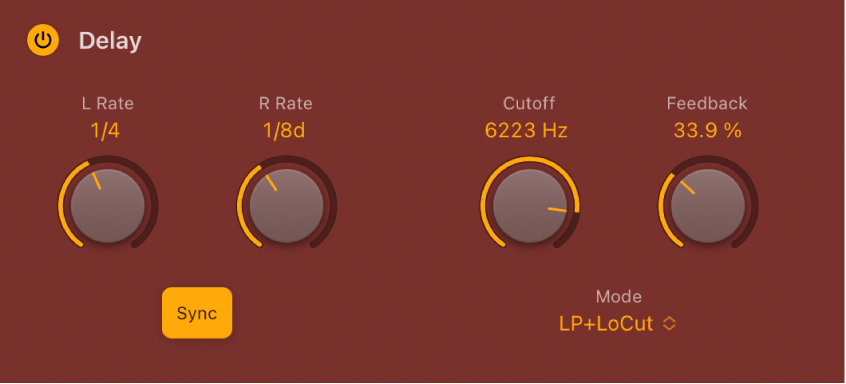
A syncable stereo delay unit with integrated filter. See Step FX filter types.
Delay On/Off button: Enable/disable the delay effect.
L/R Rate knobs and fields: Set the delay time in milliseconds or in beat/division values when synchronized with the project tempo.
Sync button: Turn on to synchronize delay repeats with the project tempo. Turn off to set delay times freely. Set time/beat/division values with the Delay L/R Rate knobs.
Cutoff knob and field: Set the cutoff frequency for the chosen filter type. This filters the selected frequencies from the overall signal.
Feedback knob and field: Set the amount of feedback for the left and right delay signals. Higher values result in more delay repeats.
Mode pop-up menu: Choose a lowpass (LP), bandpass (BP), highpass (HP), or lowpass/low cut hybrid (LP+LoCut) filter type.
Mix knob and field: Set the level of the source versus delay signal.
Distortion parameters
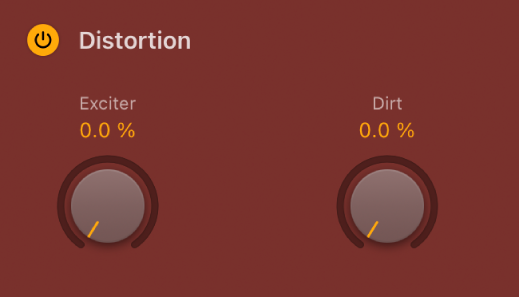
The distortion unit can add color and a saturated tone to your parts.
Distortion On/Off button: Enable/disable the distortion effect.
Exciter knob and field: Set the amount of excitation. Exciter generates high frequency components that are not part of the original signal by introducing a nonlinear distortion.
Dirt knob and field: Set the amount of this saturated, gritty distortion characteristic.
Download this guide: PDF