Animate objects on a slide in Keynote on iPad
You can use action builds to animate an object on a slide. For example, you can have an object move from one side of the slide to the other, make it become transparent, make it blink or bounce for emphasis, and more.
You can apply multiple action builds to an object and specify their order to create interesting effects. For example, you can have an object shrink as it moves across the slide, then disappear.
Animate an object on a slide
On the slide, tap to select the object or text box you want to animate, then tap Animate.
Tap Add Action, then choose an animation.
A preview of the animation plays.
Tap
 .
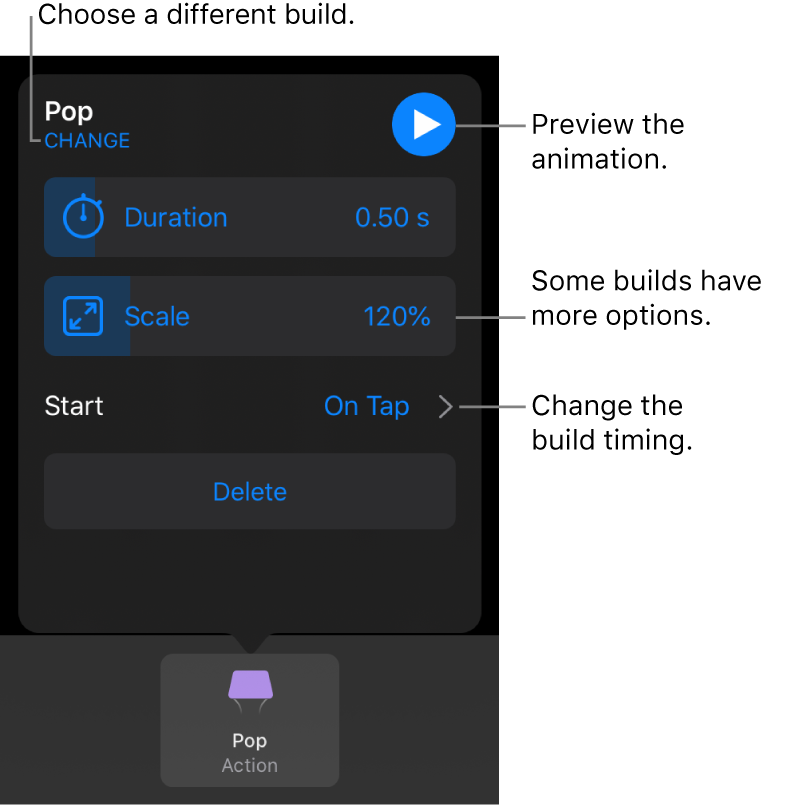
.To set animation options, such as the duration and direction, tap the animation at the bottom of the screen.

The options you see depend on the animation. These build types require special steps:
Opacity: To specify how transparent the object is at the end of the animation, drag the Opacity slider. If you want the object to end up invisible, drag the slider all the way to the left.
Rotate: To change the direction of rotation, tap Clockwise or CounterClockwise. To choose the rotation angle, drag the Angle slider. To choose the number of rotations, tap
 next to Rotations.
Scale: To set how big the object is at the end of the animation, drag the Scale slider. You can also drag any blue dot around the transparent ghost object on the slide to set the object’s final size.
Create Path: See "Create a motion path,” below.
To see a preview of the animation, tap
 .
.To apply another action build to the object, tap
 .
.When you’re finished adding builds, tap Done in the top-right corner of the screen.
Create a motion path
You can create a motion path for an object so that it moves around the slide.
On the slide, tap to select the object or text box you want to animate, then tap Animate.
Tap Add Action, then tap Create Path.
To draw the motion path, drag the object with Apple Pencil or your finger.
By default, the line curves. To create straight lines in the path, tap
 .
.When you’re finished drawing the path, tap Done at the bottom of the screen.
To fine-tune the animation, do any of the following:
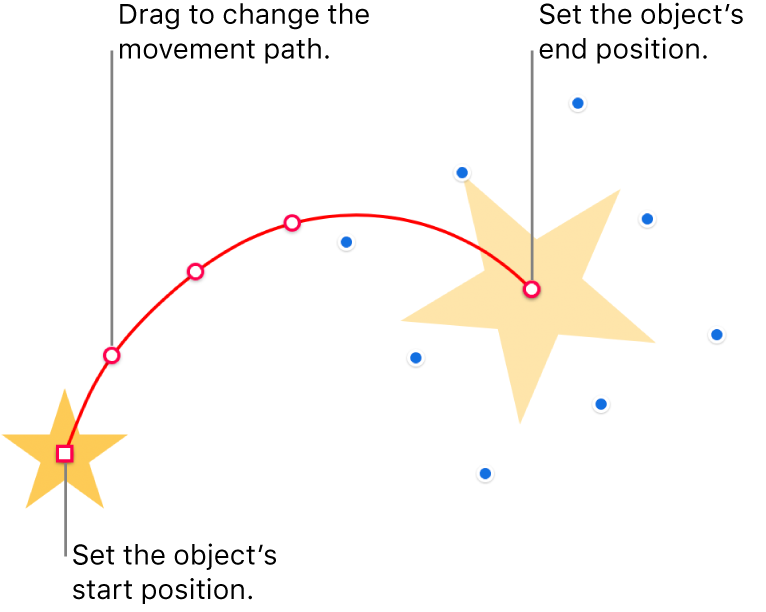
Change the start point: Drag the opaque object on the slide.
Change the end point: Drag the transparent ghost object on the slide.
Edit the path: Tap the path, then drag any red or white dot. To make the path curved or straight, tap a red or white dot along the line you want to edit, then tap Make Sharp Point or Make Smooth Point.
Redraw the path: Tap to select the object, tap it again, then tap Redraw Path.
Split the motion path into separate builds: Tap the path. Tap the point where you want to split the path, then tap Split Path.
Preview the animation: Tap the Motion Path build at the bottom of the screen, then tap
 .
.

To change the timing and acceleration of the animation, tap the Motion Path build at the bottom of the screen, then use the controls.
To make the object pivot to match the curve of the movement path as it moves, tap the Motion Path build at the bottom of the screen, then turn on Align to Path. With Align to Path turned on, you can also use the Rotation slider to adjust the object’s alignment to the movement path.
Tap Done in the top-right corner of the screen.
Tip: You can combine a Motion Path build with other action builds to create more complex animations. For example, to scale an object as it moves across a slide, drag any blue square on the ghost object. To rotate an object as it moves, use two fingers to rotate the ghost object.
To move multiple objects to new positions on a slide, you can also use a Add a Magic Move transition.
Combine action builds into a single animation
You can apply two or more Basic action builds to an object, then set them to play simultaneously to create a single animation. For example, you can make an object move across a slide as it rotates, or make it rotate as it gets bigger.
Emphasis builds like Bounce or Flip can’t combine with other builds, but they can play immediately after other builds.
Tap
 at the top of the screen, then tap Animate.
Tap
 at the top of the screen, then drag the builds you want to combine so they’re listed consecutively.
Tap to select a build to combine with the one above it, then under Start Build, tap With Build [number].
Repeat this step for each build you want to combine with the build above it.
To preview the animation, tap Preview.
Tap Done in the top-right corner of the screen.
Remove an animation
Tap
 at the top of the screen, then tap Animate.
Do one of the following:
Remove all animations from an object: Tap to select the object with the animation you want to remove, tap it again, then tap Delete Animation. Tap Done.
Remove a specific animation from an object: Tap
 , swipe left on the animation you want to remove, then tap Delete. Tap Done.
Apply the same animations to another object
Tap
 , then tap Animate.
Tap to select the object with the animations you want to copy, tap it again, then tap Copy Animation.
Tap to select the object you want to add the animations to, tap it again, then tap Paste Animation.