Manage imported media in Apple Immersive Video Utility
After you import media and Apple Immersive Video Universal (AIVU) files to Apple Immersive Video Utility on Mac, you can rename them, replace their embedded media, tag them, and more.
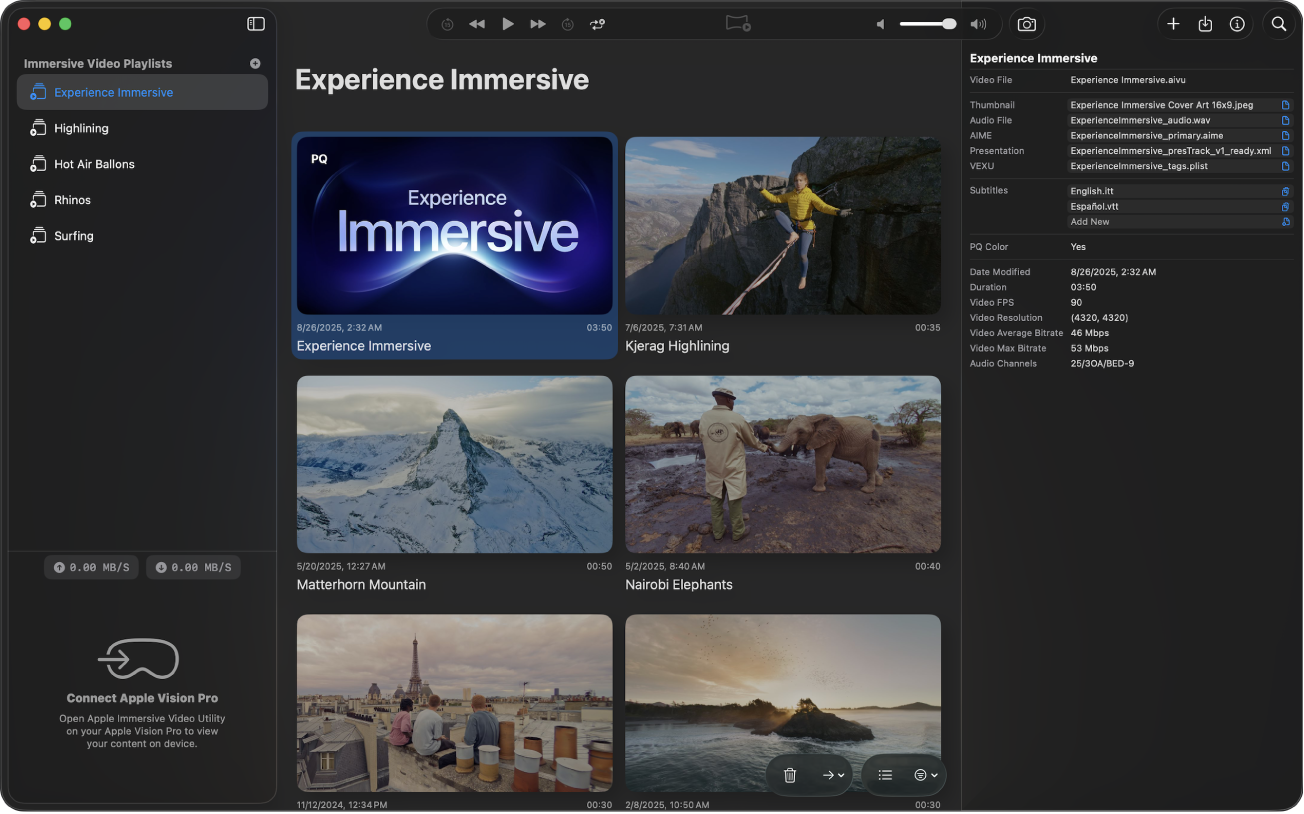
Manage imported media and AIVU files on Mac
In Apple Immersive Video Utility on Mac, Control-click the imported file in the playlist view.
Do any of the following:
Rename the file: Click Edit Title, enter a new name, then press Return.
Replace embedded media (such as the audio stream or AIME file): Choose Replace, choose an option, select a new file, then click Open.
After you replace embedded media, you may need to Control-click the file, then click Regenerate Cache or Regenerate Thumbnail.
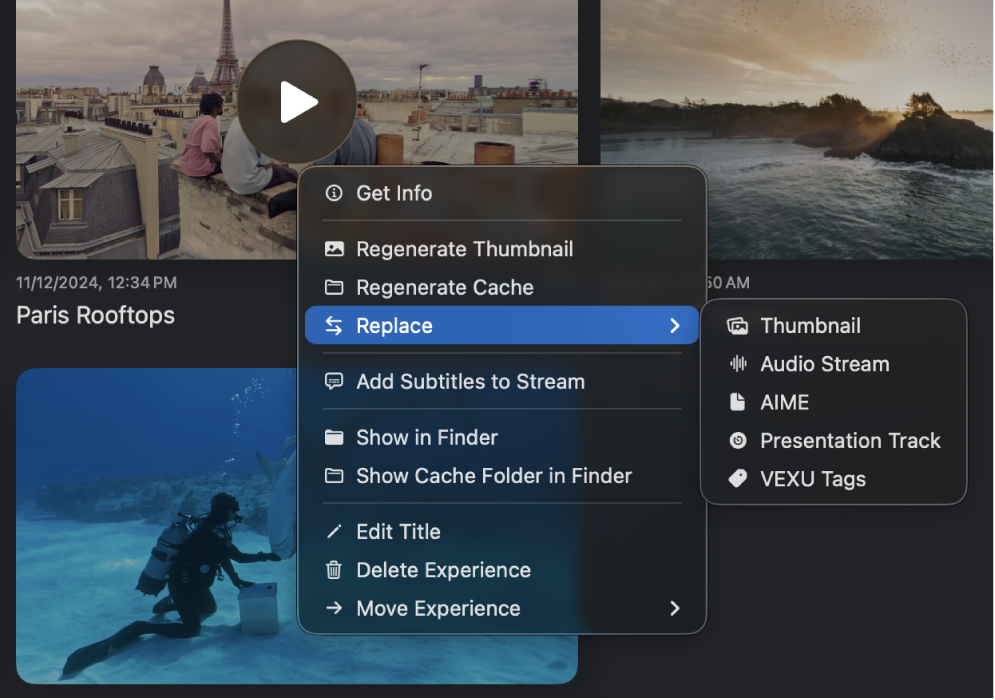
See information about the file (such as the filename, duration, and properties): Click Get Info.
You can also see a list of embedded media in the package, and replace each file individually. Click the file you want to replace (or click
 next to a file), select a new file, then click Open.
Move the file to another playlist: Choose Move Experience, then choose an existing playlist, or create a new one.
Delete the file: Click Delete Experience.
Add subtitles on Mac
You can add subtitles to an immersive media file on Mac, then preview your media with subtitles on Apple Vision Pro. For information on viewing subtitles while previewing media on Apple Vision Pro, see Control playback on your Apple Vision Pro.
In Apple Immersive Video Utility on Mac, Control-click the imported file in the playlist view, then choose Add Subtitles to Stream.

In the file browser that appears, navigate to and select one or more .itt or .vtt subtitles files, then click Open.
Subtitles files you add are visible in the inspector when you select the AIVU file in the playlist view.
Note: Subtitles are not part of the AIVU file, but are added to the HLS stream cache.
To remove a subtitles file, click the subtitles file in the inspector, then choose Delete.
Add and edit tags on Mac
You can tag media files in your library to make them easier to find.
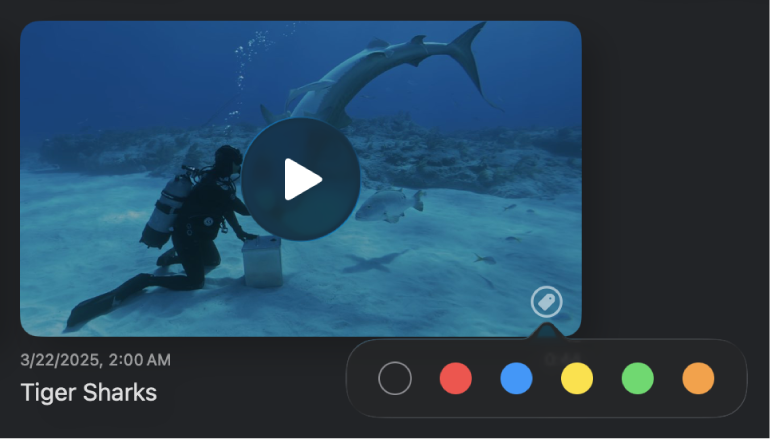
In Apple Immersive Video Utility on Mac, do either of the following:
Add a tag: Position the pointer over a media file in the playlist view, click
 , then choose a tag color.
Remove a tag: Click the color tag next to the file in the playlist view, then click the empty circle on the left.
To filter your playlists by tags, click ![]() , then choose a tag color.
, then choose a tag color.