Motion User Guide
- Welcome
- What’s new
-
- Intro to basic compositing
-
- Intro to transforming layers
-
- Intro to transforming layers in the canvas
- Transform layer properties in the canvas
- Transform tools
- Change layer position, scale, or rotation
- Move a layer’s anchor point
- Add a drop shadow to a layer
- Distort or shear a layer
- Crop a layer
- Modify shape or mask points
- Transform text glyphs and other object attributes
- Align layers in the canvas
- Transform layers in the HUD
- Transform 2D layers in 3D space
-
- Intro to behaviors
- Behaviors versus keyframes
-
- Intro to behavior types
-
- Intro to Parameter behaviors
- Audio behavior
- Average behavior
- Clamp behavior
- Custom behavior
- Add a Custom behavior
- Exponential behavior
- Link behavior
- Logarithmic behavior
- MIDI behavior
- Add a MIDI behavior
- Negate behavior
- Oscillate behavior
- Create a decaying oscillation
- Overshoot behavior
- Quantize behavior
- Ramp behavior
- Randomize behavior
- Rate behavior
- Reverse behavior
- Stop behavior
- Track behavior
- Wriggle behavior
-
- Intro to Simulation behaviors
- Align to Motion behavior
- Attracted To behavior
- Attractor behavior
- Drag behavior
- Drift Attracted To behavior
- Drift Attractor behavior
- Edge Collision behavior
- Gravity behavior
- Orbit Around behavior
- Random Motion behavior
- Repel behavior
- Repel From behavior
- Rotational Drag behavior
- Spring behavior
- Vortex behavior
- Wind behavior
- Additional behaviors
-
- Intro to shapes, masks, and paint strokes
- Edit fill, outline, and feathering
- Keyframe shape control points
- Convert between shapes and masks
- Using filters and masks with shapes
- Copy shape styles
- Save custom shapes and shape styles
-
- Intro to using generators
- Add a generator
-
- Intro to image generators
- Caustics generator
- Cellular generator
- Checkerboard generator
- Clouds generator
- Color Solid generator
- Concentric Polka Dots generator
- Concentric Shapes generator
- Gradient generator
- Grid generator
- Japanese Pattern generator
- Lens Flare generator
- Manga Lines generator
- Membrane generator
- Noise generator
- One Color Ray generator
- Op Art 1 generator
- Op Art 2 generator
- Op Art 3 generator
- Overlapping Circles generator
- Radial Bars generator
- Soft Gradient generator
- Spirals generator
- Spiral Drawing generator
- Use Spiral Drawing onscreen controls
- Star generator
- Stripes generator
- Sunburst generator
- Truchet Tiles generator
- Two Color Ray generator
- Save a custom generator
-
- Intro to filters
- Browse and preview filters
- Apply or remove filters
-
- Intro to filter types
-
- Intro to Color filters
- Brightness filter
- Channel Mixer filter
- Color Adjustments filter
- Color Balance filter
- Example: Color-balance two layers
- Color Curves filter
- Use the Color Curves filter
- Color Reduce filter
- Color Wheels filter
- Use the Color Wheels filter
- Colorize filter
- Contrast filter
- Custom LUT filter
- Use the Custom LUT filter
- Gamma filter
- Gradient Colorize filter
- HDR Tools filter
- Hue/Saturation filter
- Hue/Saturation Curves filter
- Use the Hue/Saturation Curves filter
- Levels filter
- Negative filter
- OpenEXR Tone Map filter
- Sepia filter
- Threshold filter
- Tint filter
-
- Intro to Distortion filters
- Black Hole filter
- Bulge filter
- Bump Map filter
- Disc Warp filter
- Droplet filter
- Earthquake filter
- Fisheye filter
- Flop filter
- Fun House filter
- Glass Block filter
- Glass Distortion
- Insect Eye filter
- Mirror filter
- Page Curl filter
- Poke filter
- Polar filter
- Refraction filter
- Ring Lens filter
- Ripple filter
- Scrape filter
- Sliced Scale filter
- Use the Sliced Scale filter
- Sphere filter
- Starburst filter
- Stripes filter
- Target filter
- Tiny Planet filter
- Twirl filter
- Underwater filter
- Wave filter
-
- Intro to Stylize filters
- Add Noise filter
- Bad Film filter
- Bad TV filter
- Circle Screen filter
- Circles filter
- Color Emboss filter
- Comic filter
- Crystallize filter
- Edges filter
- Extrude filter
- Fill filter
- Halftone filter
- Hatched Screen filter
- Highpass filter
- Indent filter
- Line Art filter
- Line Screen filter
- MinMax filter
- Noise Dissolve filter
- Pixellate filter
- Posterize filter
- Relief filter
- Slit Scan filter
- Slit Tunnel filter
- Texture Screen filter
- Vignette filter
- Wavy Screen filter
- About filters and color processing
- Publish filter controls to Final Cut Pro
- Using filters on alpha channels
- Filter performance
- Save custom filters
-
- Intro to 360-degree video
- 360-degree projects
- Create 360-degree projects
- Add 360-degree video to a project
- Create a tiny planet effect
- Reorient 360-degree media
- Creating 360-degree templates for Final Cut Pro
- 360-degree-aware filters and generators
- Export and share 360-degree projects
- Guidelines for better 360-degree projects
-
- Intro to settings and shortcuts
-
- Intro to Keyboard shortcuts
- Use function keys
- General keyboard shortcuts
- Audio list keyboard shortcuts
-
- Tools keyboard shortcuts
- Transform tool keyboard shortcuts
- Select/Transform tool keyboard shortcuts
- Crop tool keyboard shortcuts
- Edit Points tool keyboard shortcuts
- Edit shape tools keyboard shortcuts
- Pan and Zoom tools keyboard shortcuts
- Shape tools keyboard shortcuts
- Bezier tool keyboard shortcuts
- B-Spline tool keyboard shortcuts
- Paint Stroke tool keyboard shortcuts
- Text tool keyboard shortcuts
- Shape mask tools keyboard shortcuts
- Bezier Mask tool keyboard shortcuts
- B-Spline Mask tool keyboard shortcuts
- Magnetic Mask tool keyboard shortcuts
- Transport control keyboard shortcuts
- View option keyboard shortcuts
- HUD keyboard shortcuts
- Inspector keyboard shortcuts
- Keyframe Editor keyboard shortcuts
- Layers keyboard shortcuts
- Library keyboard shortcuts
- Media list keyboard shortcuts
- Timeline keyboard shortcuts
- Keyframing keyboard shortcuts
- Shape and Mask keyboard shortcuts
- 3D keyboard shortcuts
- Miscellaneous keyboard shortcuts
- Touch Bar shortcuts
- Move assets to another computer
- Work with GPUs
- Glossary
- Copyright and trademarks
Add a Magnetic Mask in Motion
In Motion, use the Magnetic Mask to easily isolate people, objects, and shapes from the background using machine learning. You can then apply the mask to the rest of a video clip automatically, without time-consuming manual tracking or rotoscoping.

Add a Magnetic Mask to isolate a subject from its background
Adding the Magnetic Mask effect to a clip creates a matte, which allows you to composite the isolated foreground image over a different background image.
In the Layers list or Timeline in Motion, select the clip you want to mask, then position the playhead at a point within the clip that shows the area you want to mask.
Do any of the following:
In the canvas toolbar, click the Magnetic Mask tool.

Choose Object > Add Magnetic Mask.
Press Option-Shift-Command-M.
The pointer changes to the Add eyedropper
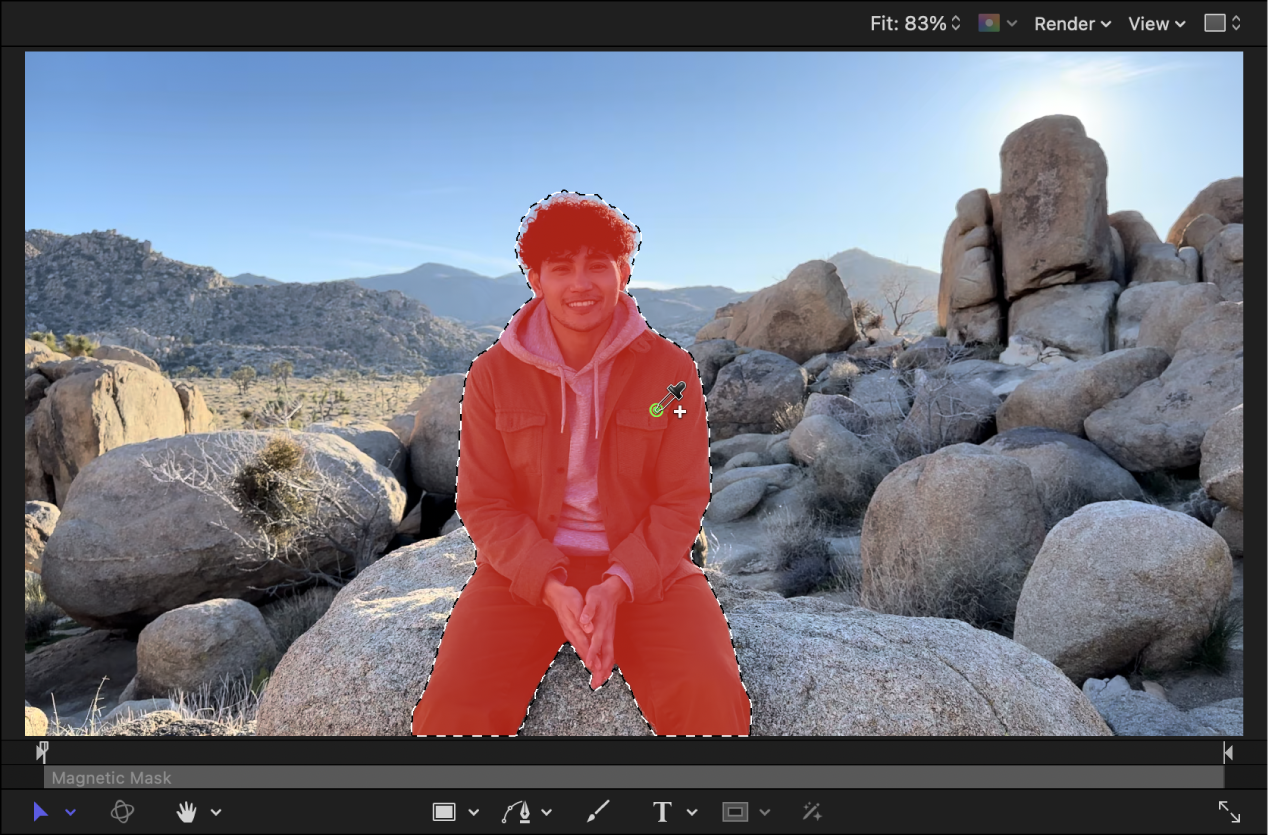
 in the canvas (for adding parts of the image to the mask). As you move the eyedropper in the canvas, objects and shapes in the image are highlighted in a bright color.
In the canvas, position the eyedropper on an object or shape that you want to mask, then click to select it.

A mask and control point are added to the canvas. The control point defines the area to be masked. Additionally, a Magnetic Mask object appears beneath the clip in the Layers list and Timeline, and a reference/analysis indicator (a circled dot with a vertical line through it) appears in the Timeline at the affected frame. That reference frame is used to calculate the mask position in subsequent frames when you analyze the rest of the clip.
To add or subtract from the selected mask area, do any of the following:
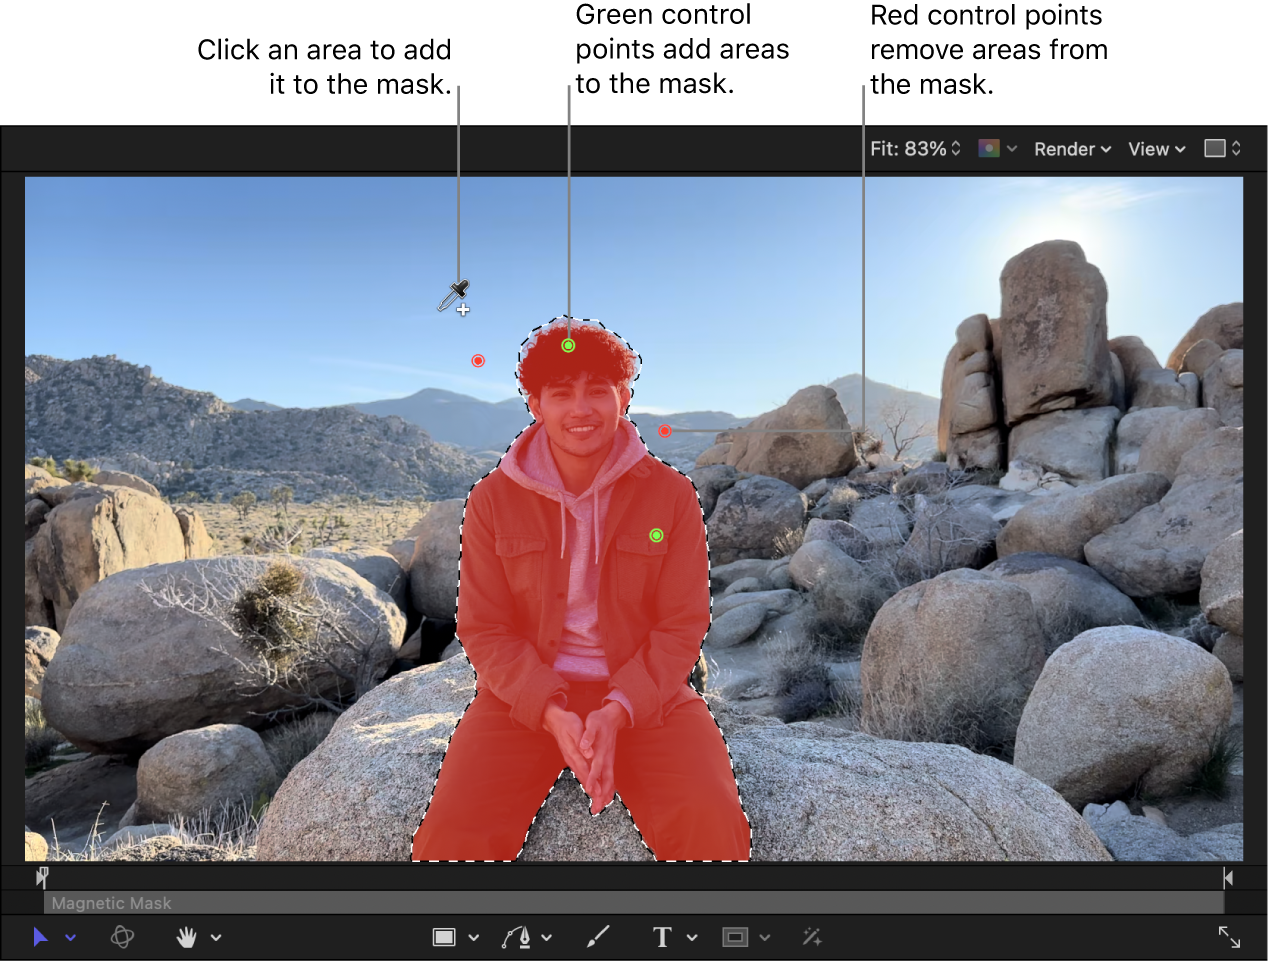
Add to the selection: Click an area in the canvas with the Add eyedropper
 . Each click with the Add eyedropper places a green control point in the canvas, adding an area to the mask.
Subtract from the selection: In the Magnetic Mask Inspector, click the Remove button
 in the Selection Tools row, then click an area in the canvas with the Remove eyedropper
  . Each click with the Remove eyedropper places a red control point, removing an area from the mask.
To switch back to the Add eyedropper, click the Add button
 in the Inspector.
Tip: To switch between eyedroppers temporarily, press and hold the Option key, then click in the canvas. When you release the Option key, the tool reverts to the previously active eyedropper.
In most cases, you need only a handful of control points to select the object or shape you want to mask. There’s no measurable effect after about 20 control points.

To further refine a mask, see Edit a Magnetic Mask.
To extend the Magnetic Mask to additional frames of the clip, do one of the following:
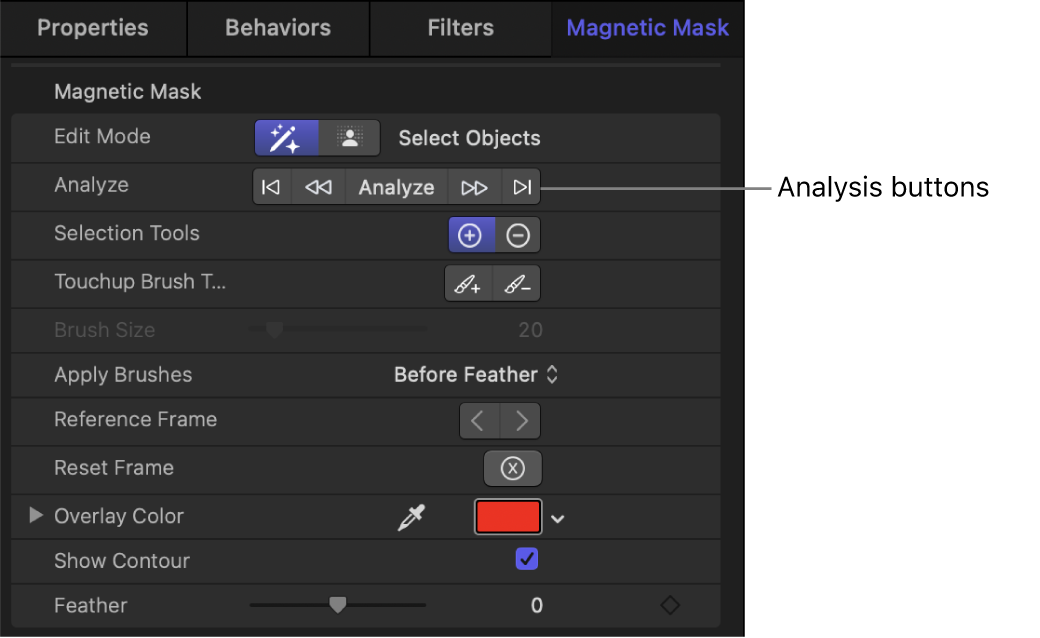
Apply the mask to the play range: Click Analyze.
Note: If you added the Magnetic Mask to a frame before the play range, forward analysis stops at the In point of the play range; if you added the mask after the play range, backward analysis stops at the Out point of the play range.

Apply the mask to the previous or next frame: Click the Previous Frame button
 or the Next Frame button
  .
.When you click
 or
or  , an analysis frame (white vertical line) is added to the Timeline. That frame is used as the basis for the subsequent frames when the mask is calculated.
Apply the mask to the portion of the clip before or after the current frame: Click the Analyze Backward button
 or the Analyze Forward button
  .
.To cancel the analysis, click Stop in the analysis progress window. You can also press Command-Period (.) or press the Esc (Escape) key.
The mask is extended to all analyzed frames. In the Timeline, the range of analyzed frames is represented by a light gray bar.
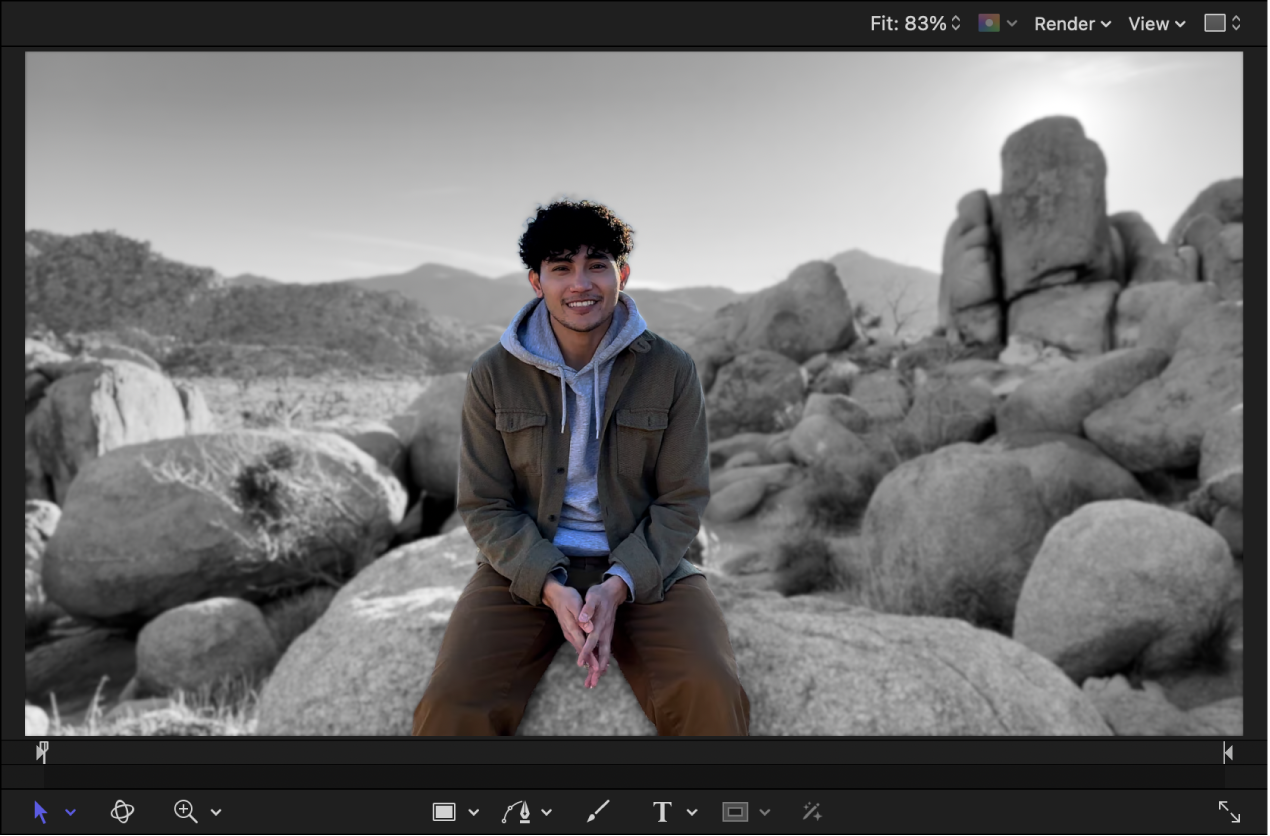
To view the Magnetic Mask result, click the Show Result button
 in the Magnetic Mask Inspector.
If you’re not satisfied with the result, make further refinements.
Optional: To mask additional elements in the clip, select the clip layer again and repeat steps 1–7.
If you add multiple Magnetic Masks to a clip, change the active mask by selecting a different mask in the Layers list or Timeline.
When you save the project, the Magnetic Mask analysis files and any clips or images used in the project are saved to a folder (in your chosen save location).
Modify mask viewing options
You can view the result of a Magnetic Mask, view its alpha channel, change its highlight color, or show or hide its selection outline.
In the Layers list or Timeline in Motion, select a Magnetic Mask.
In the Magnetic Mask Inspector, do any of the following:
View the result of a mask: Click the Show Result button
 .
.View a mask’s alpha channel: Click the Show Result button
 , click the Channels pop-up menu (in the upper-right corner of the canvas), then choose Alpha.
To show all color channels in the canvas, click the Channels pop-up menu (in the upper-right corner of the canvas), then choose Color.
Change the highlight color for a mask: Click the Select Objects button
 , then click the color well and choose a new color in the Colors window.
Show or hide a mask’s dashed selection outline: Click the Select Objects button
 , then select or deselect the Show Contour checkbox.
Download this guide: PDF