
Sync audio and video in Final Cut Pro for Mac
Final Cut Pro can automatically analyze and sync audio and video clips.
A common production technique is double system sound, in which you record the video on one device (such as a DSLR camera) and the audio on a separate device (such as a digital audio recorder). In this workflow, you can use Final Cut Pro to sync the clips recorded on multiple devices.
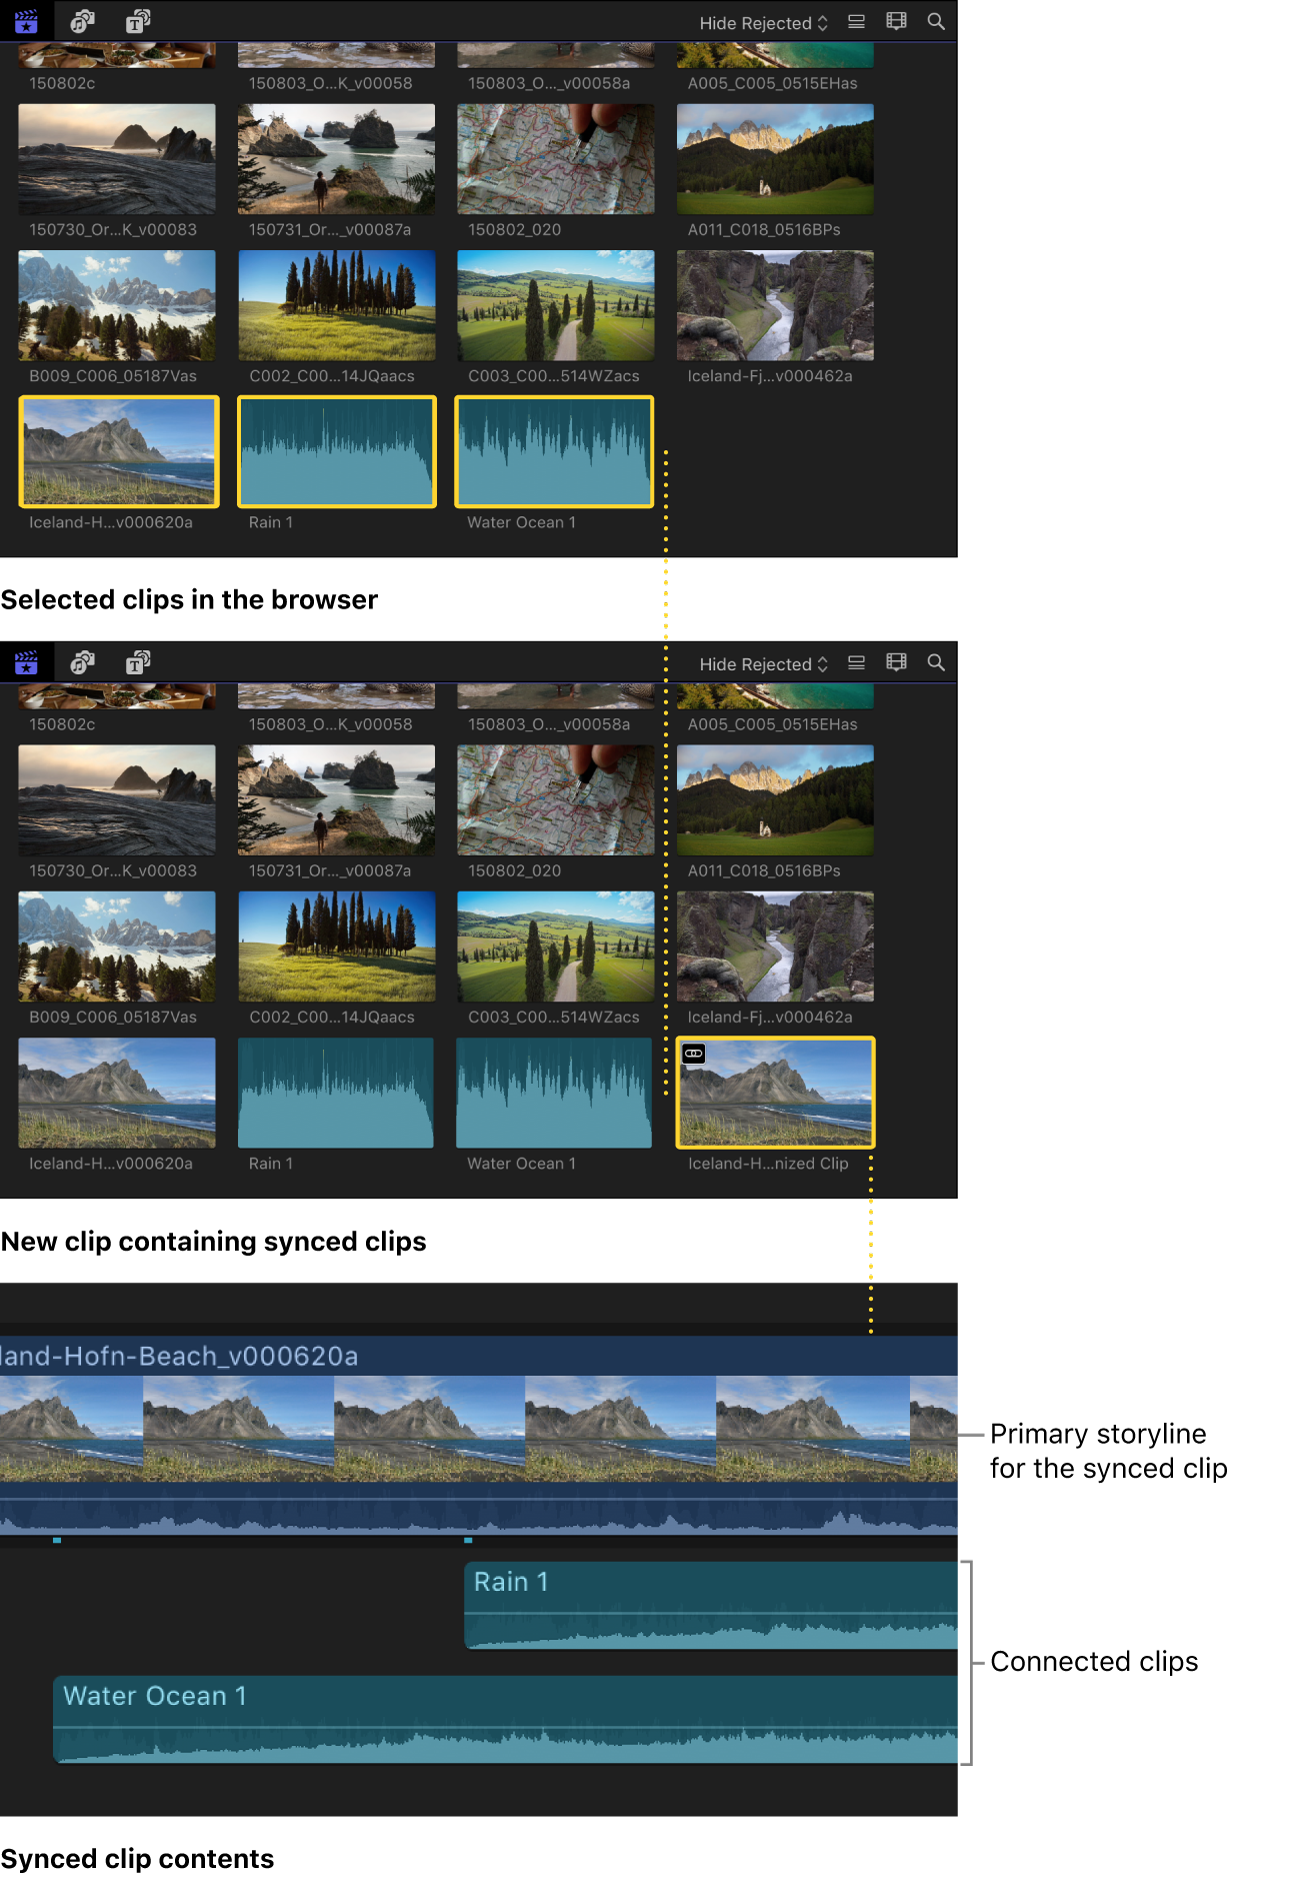
For example, if you select two video clips and three audio clips from different sources that were all recorded during the same take, Final Cut Pro automatically analyzes the clips and syncs them together into a new clip in the browser. The original clips are not affected. Final Cut Pro analyzes the clips for sync points such as markers you’ve added, timecode, file creation date, and audio content. If no sync points can be found, the clips are synced at their respective starting points.
For finer control of the syncing process, you can use custom settings to adjust several different parameters.
Sync clips automatically
In the Final Cut Pro browser, select the audio or video clips you want to sync.
Do one of the following:
Choose Clip > Synchronize Clips (or press Option-Command-G).
Control-click the selection and choose Synchronize Clips.
In the window that appears, type a name for the synced clip in the Synchronized Clip Name field.
Click the In Event pop-up menu and choose the event in which you want to create the new synced clip.
If you want the synced clip’s timecode to start at a value other than the earliest timecode value in the selected clips (the default), type a timecode value in the Starting Timecode field.
To sync clips using audio waveform data, select “Use audio for synchronization.”
This option makes precision sync adjustments using audio waveforms.
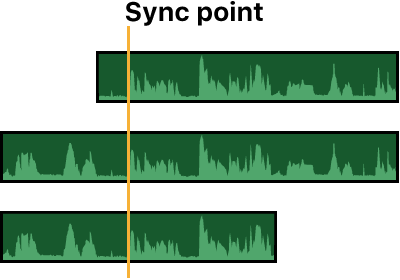
Note: Some audio recordings are not suited for use with this feature. Selecting this option may result in long processing times during which Final Cut Pro is not available for editing.
If you want Final Cut Pro to disable the audio in clips containing both video and audio, select “Disable audio components on AV clips.”
For example, if you record dual-system sound (with a reference audio track on the video camera and a high-quality audio-only recording on a separate sound recorder), you can disable the reference track that was recorded on the camera after you finish syncing the video to the high-quality audio.
If you want to continue to see the source clips in the browser after you create the synced clip, deselect “Hide original clips.”
By default, source clips are hidden from view to reduce clutter. See Hide clips in the browser in Final Cut Pro for Mac.
If the automatic settings aren’t shown, click Use Automatic Settings.
The automatic settings appear.
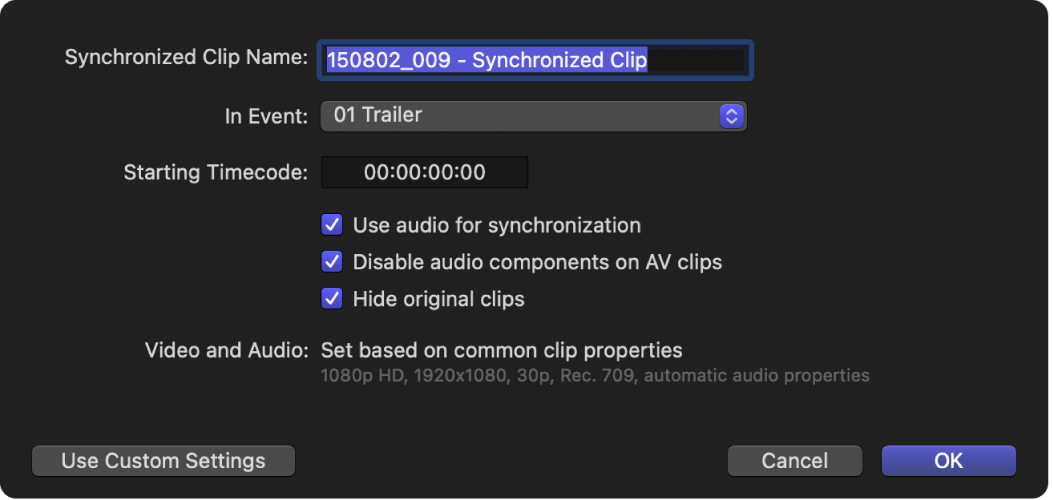
Note: The automatic settings are shown by default, but if the last synced clip you created used custom settings, those settings are shown.
Click OK.
Final Cut Pro creates a new synced clip in the event you specified.
Sync clips using custom settings
In the Final Cut Pro browser, select the audio or video clips you want to sync.
Do one of the following:
Choose Clip > Synchronize Clips (or press Option-Command-G).
Control-click the selection and choose Synchronize Clips.
In the window that appears, type a name for the synced clip in the Synchronized Clip Name field.
Click the In Event pop-up menu and choose the event in which you want to create the new synced clip.
If you want the synced clip’s timecode to start at a value other than the earliest timecode value in the selected clips (the default), type a timecode value in the Starting Timecode field.
To sync clips using audio waveform data, select “Use audio for synchronization.”
This option makes precision sync adjustments using audio waveforms.

Note: Some audio recordings are not suited for use with this feature. Selecting this option may result in long processing times during which Final Cut Pro is not available for editing.
If you want Final Cut Pro to disable the audio in clips containing both video and audio, select “Disable audio components on AV clips.”
For example, if you record dual-system sound (with a reference audio track on the video camera and a high-quality audio-only recording on a separate sound recorder), you can disable the reference track that was recorded on the camera after you finish syncing the video to the high-quality audio.
If you want to continue to see the source clips in the browser after you create the synced clip, deselect “Hide original clips.”
By default, source clips are hidden from view to reduce clutter. See Hide clips in the browser in Final Cut Pro for Mac.
To show the custom settings, click Use Custom Settings.
The custom settings appear.
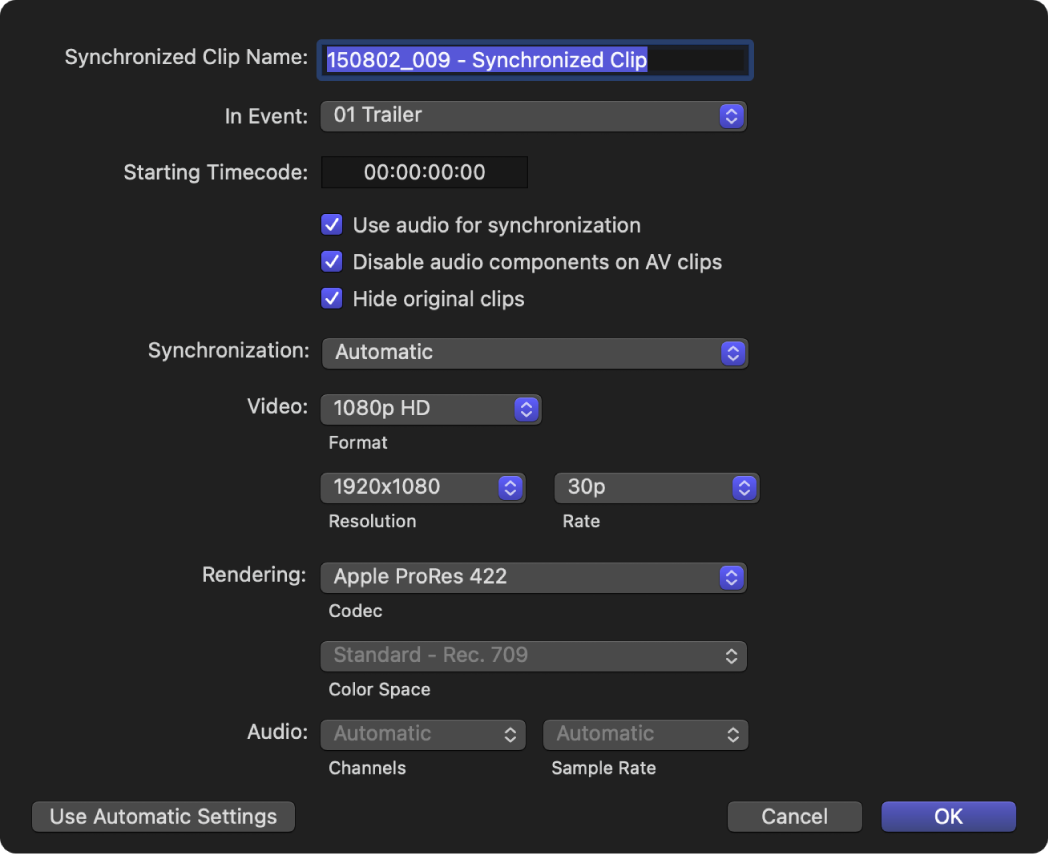
Note: The automatic settings are shown by default, but if the last synced clip you created used custom settings, those settings are shown.
Click the Synchronization pop-up menu and choose how the clips are synced:
Automatic: Final Cut Pro syncs the clips automatically.
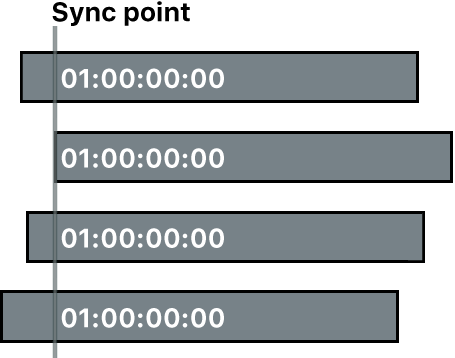
Timecode: Final Cut Pro syncs the clips using timecode recorded in the clips. If you recorded timecode in your clips, choose this option. It’s the fastest and most frame-accurate method of syncing clips.
Note: The Timecode option is not available when the drop frame patterns in the selected clips don’t match.
Content Created: Final Cut Pro syncs the clips using the date and time information recorded by your camcorder or video recording device.
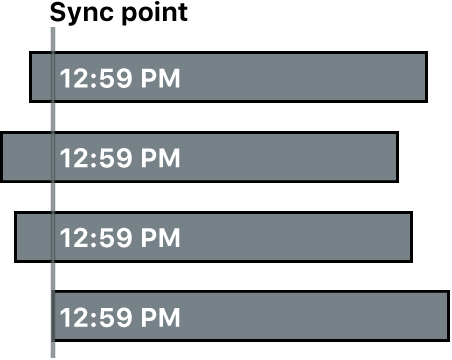
The Content Created method can sync clips within 1-second accuracy (because in most camcorders the smallest unit in date and time information is 1 second). If you choose this syncing method, consider doing any of the following to make the sync frame-accurate:
Select “Use audio for synchronization.” (See step 7.) Final Cut Pro uses the Content Created data as a starting point and then further refines the sync.
Manually adjust the sync. (See Manually adjust or slip a synced clip, below.)
Note: At any time, you can change the Content Created date and time of your source clips in the browser. Just select one or more clips and choose Modify > Adjust Content Created Date and Time.
Start of First Clip: Final Cut Pro uses the first frame in each clip as the sync point.
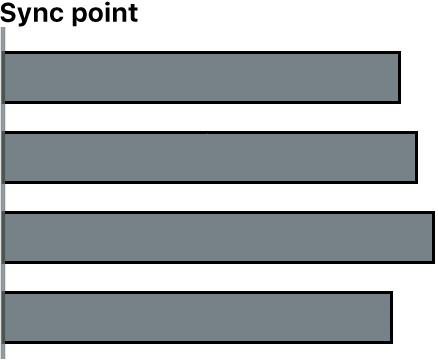
Tip: The Start of First Clip method is useful if you want to use specific range selections of your source clips only. In the browser, add keywords to the ranges you want to use, or rate them as favorites, and then filter or search for the clips. When you create your synced clip, Final Cut Pro uses only the media showing in the filtered view.
First Marker on the Clip: Final Cut Pro uses the first marker in each clip as the sync point.
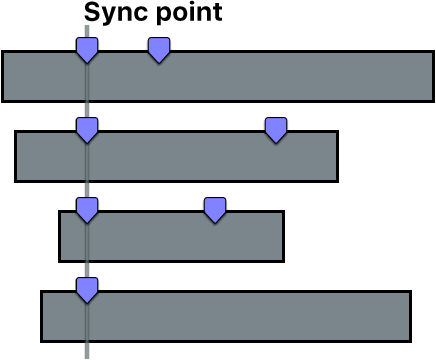
Tip: With this method, you can use the first marker to define a region that can be fine-tuned with the “Use audio for synchronization” option (described in step 6). In other words, you don’t need to place the marker exactly—just close enough so that the automatic audio sync feature can sync the clips the rest of the way.
If you want to change the video properties for the synced clip, click the Video pop-up menu and choose Custom, then change the settings as appropriate.
Note: By default, Final Cut Pro analyzes the selected clips and configures these settings according to the most common clip properties among the clips.
If you want to change the rendering or audio settings for the synced clip, change the settings as appropriate in the Rendering and Audio sections.
Click OK.
Final Cut Pro creates a new synced clip in the event you specified.
Manually adjust or slip a synced clip
You may need to adjust a synced clip (by slipping the sync, for example). You can do this by opening the contents of the synced clip in the timeline.
In Final Cut Pro, select the clip in the browser or the timeline.
Choose Clip > Open Clip.
The timeline displays the contents of the clip.
Make adjustments to the contents of the synced clip.
The contents of a synced clip include a clip in the primary storyline and one or more connected clips. You can adjust or slip the sync by dragging the connected clips left or right to change the points at which they connect to the clip in the primary storyline. See Connect clips in Final Cut Pro for Mac.
When you’re done, click the left arrow in the upper-left corner of the timeline to save your changes and close the contents of the synced clip.
Tip: To easily view all synced clips, you can create a Smart Collection that uses the Type search category set to Synchronized as one of the search criteria. See Create Smart Collections in Final Cut Pro for Mac.
If your synced clip contains audio channels that aren’t being used, you can turn them off. See Configure audio channels in Final Cut Pro for Mac.
Download this guide: PDF