GarageBand User Guide
- Welcome
-
- Play a lesson
- Choose the input source for your guitar
- Customize the lesson window
- See how well you played a lesson
- Measure your progress over time
- Slow down a lesson
- Change the mix of a lesson
- View full-page music notation
- View glossary topics
- Practice guitar chords
- Tune your guitar in a lesson
- Open lessons in the GarageBand window
- Get additional Learn to Play lessons
- If your lesson doesn’t finish downloading
- Touch Bar shortcuts
- Glossary

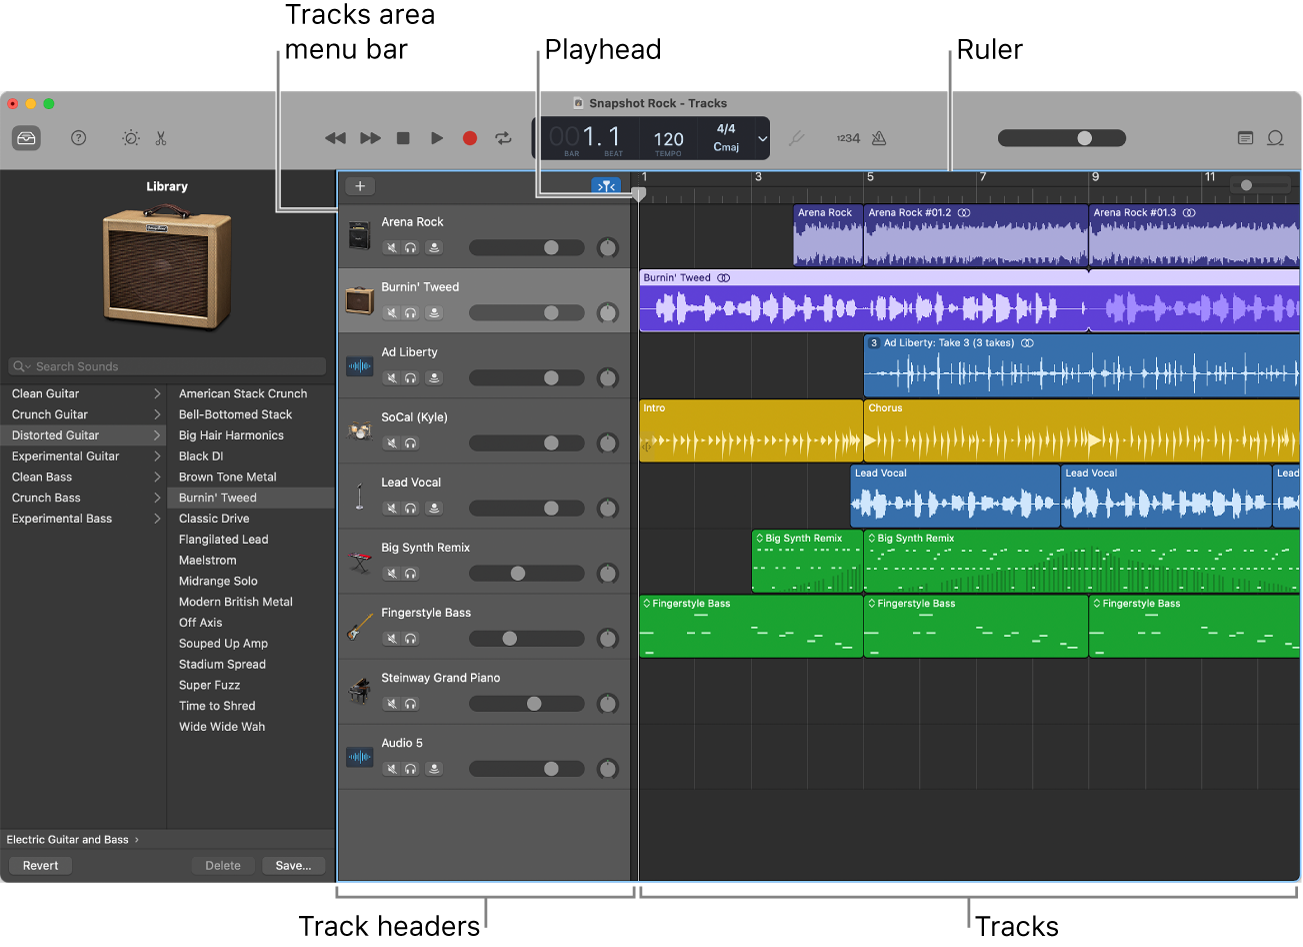
Tracks area in Garage Band on Mac
The Tracks area is the primary workspace of GarageBand, where you record and arrange audio and MIDI regions to create your project. The main elements of the Tracks area include:

Tracks area menu bar: Contains controls for adding tracks, showing track automation, a Catch button, and a zoom slider.
Ruler: Shows divisions of time, either in bars and beats or in hours, minutes, and seconds. The ruler lets you align items in the Tracks area, and has additional uses for various playback and recording tasks.
Track headers: Each track has a header that shows the track name and icon, and includes controls for muting and soloing the track, arming the track for recording, and other functions.
Tracks: All audio, MIDI, and Drummer regions appear on horizontal lanes called tracks, aligned to time positions in a grid.
Playhead: The thin vertical line extending from the top to bottom of the Tracks area, the playhead shows the part of the project currently playing or where playback starts. You can use the playhead to help align regions and other items, and for editing tasks, such as splitting regions.
For information about arranging regions in the Tracks area, see What are regions in GarageBand on Mac?