Final Cut Pro User Guide for Mac
- Welcome
- What’s new
-
- Intro to effects
-
- Intro to transitions
- How transitions are created
- Add transitions and fades
- Quickly add a transition with a keyboard shortcut
- Set the default duration for transitions
- Delete transitions
- Adjust transitions in the timeline
- Adjust transitions in the inspector and viewer
- Merge jump cuts with the Flow transition
- Adjust transitions with multiple images
- Modify transitions in Motion
-
- Add storylines
- Use the precision editor
- Conform frame sizes and rates
- Use XML to transfer projects
- Glossary
- Copyright

Animate a mask with keyframes in Final Cut Pro for Mac
As with many effects and titles in Final Cut Pro, you can animate simple and complex masks using keyframes.
You can also use a Magnetic Mask to isolate a foreground subject from the background automatically using machine learning. See Add a Magnetic Mask in Final Cut Pro for Mac.
Add a simple mask effect or a Draw Mask effect to a clip in the Final Cut Pro timeline.
Select the clip, then position the playhead in the timeline where you want the animation to begin.
If the inspector isn’t already shown, do one of the following:
Choose Window > Show in Workspace > Inspector (or press Command-4).
Click the Inspector button on the right side of the toolbar.

Click the Video button at the top of the inspector.

To create the starting shape of your animated mask, do one of the following:
Adjust the onscreen controls in the viewer.
Adjust the mask controls in the Video inspector.
To add keyframes for the starting shape of your animated mask, do one of the following in the Video inspector:
Add a keyframe for a single parameter: Move the pointer over the area to the right of the parameter you want to animate, then click the Keyframe button that appears.

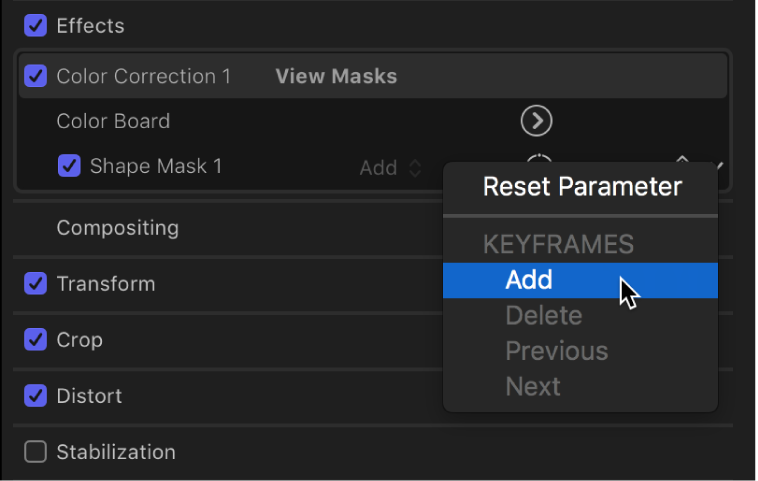
Add a keyframe to every mask effect parameter: Move the pointer over the far-right side of the effect heading, click the down arrow that appears, and choose Add from the pop-up menu.

After you add a keyframe, the Keyframe button changes to yellow, indicating that the playhead is positioned on this keyframe.
In the timeline, move the playhead to the next point where you want to define the mask shape, and repeat steps 4 and 5.
Final Cut Pro adds a keyframe for the parameters you adjusted, and the Keyframe button changes to yellow.
When you move the playhead in the timeline, arrows appear next to the Keyframe button in the Video inspector to indicate which side of the playhead has keyframes. To go to the previous keyframe, click the left arrow. To go to the next keyframe, click the right arrow.

Continue adjusting the mask shape and adding keyframes as needed.
To see the effect of your animation, play the clip.
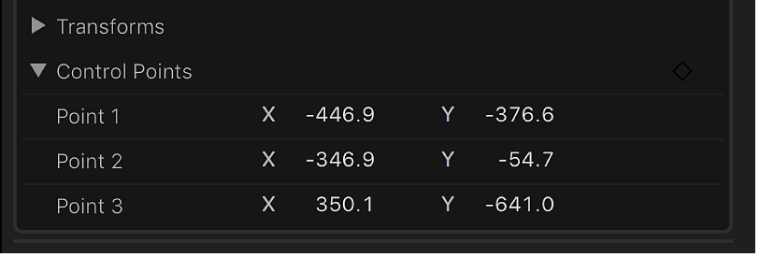
If you’re animating a Draw Mask, you can keyframe its control points numerically in the Video inspector. To reveal these parameters, click the Control Points disclosure triangle at the bottom of the Draw Mask section of the Video inspector. See Mask controls in Final Cut Pro for Mac.

Download this guide: PDF