Mac User Guide
- Welcome
- What’s new in macOS Tahoe
-
- Intro to Apple Intelligence
- Translate messages and calls
- Create original images with Image Playground
- Create your own emoji with Genmoji
- Use Apple Intelligence with Siri
- Find the right words with Writing Tools
- Summarize notifications and reduce interruptions
- Use ChatGPT with Apple Intelligence
- Apple Intelligence and privacy
- Block access to Apple Intelligence features
-
- Intro to Continuity
- Use AirDrop to send items to nearby devices
- Hand off tasks between devices
- Control your iPhone from your Mac
- Copy and paste between devices
- Stream video and audio with AirPlay
- Make and receive calls and text messages on your Mac
- Use your iPhone internet connection with your Mac
- Share your Wi-Fi password with another device
- Use iPhone as a webcam
- Insert sketches, photos, and scans from iPhone or iPad
- Unlock your Mac with Apple Watch
- Use your iPad as a second display
- Use one keyboard and mouse to control Mac and iPad
- Sync music, books, and more between devices
-
- Get started
-
- Accessibility features for vision
- Get started with VoiceOver
- Zoom in on what’s around you
- Zoom in on your Mac screen
- Increase font size and icons
- Adjust the display colors
- Hover to zoom in on text and colors
- Listen to or change how text appears in apps
- Customize onscreen motion
- Increase the size of what’s on your screen
- Make the pointer easier to see
- Have your Mac speak text that’s on the screen
- Resources for your Mac
- Resources for your Apple devices
- Copyright and trademarks

Use a screen saver on your Mac
You can use a screen saver to hide the desktop when you’re away from your Mac or if you need extra privacy.
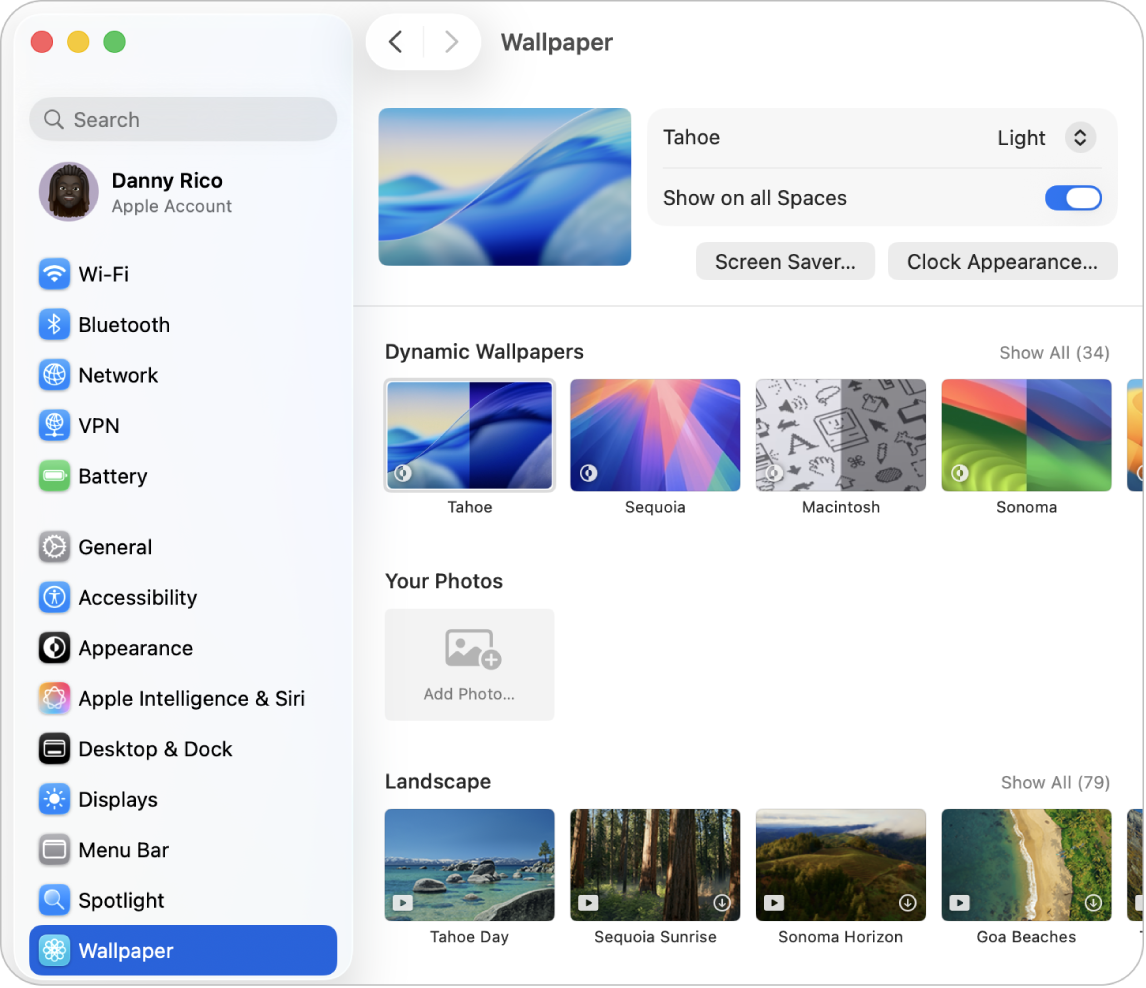
Customize the screen saver on your Mac
Go to the System Settings app
 on your Mac.
Click Wallpaper
in the sidebar. (You may need to scroll down.)Click Screen Saver.
Select Custom, then choose a screen saver from one of the available categories:
macOS: These are slow-motion images.
Landscape, Cityscape, Underwater, and Earth aerials: These slow-motion images show dramatic views.
Shuffle Aerials: These slow-motion images change at an interval you set.
Other: These are your photos and distinctive screen savers that allow you to show a message, see a “Word of the Day,” and more.
Set options for your screen saver.
Options vary based on the screen saver you choose. For example, you can:
Turn on an aerial for your wallpaper, using the slow-motion aerial as your screen saver.
Choose how often to shuffle through aerials.
Choose a style to shuffle through your images.
Start or stop the screen saver on your Mac
The screen saver automatically starts whenever your Mac sits idle for the amount of time you choose, unless your display is turned off. To change how long your Mac can be inactive before the display is turned off, choose Apple menu

 in the sidebar. (You may need to scroll down.) See Change Lock Screen settings.
If you set up a hot corner for the screen saver, move the pointer over the corner to immediately start the screen saver. See Use hot corners.
You can also start the screen saver by choosing Apple menu
To stop the screen saver and show the desktop, press any key, move the mouse, or touch the trackpad.

If you want more security when you stop the screen saver, see Require a password after waking your Mac.