
Merge your data
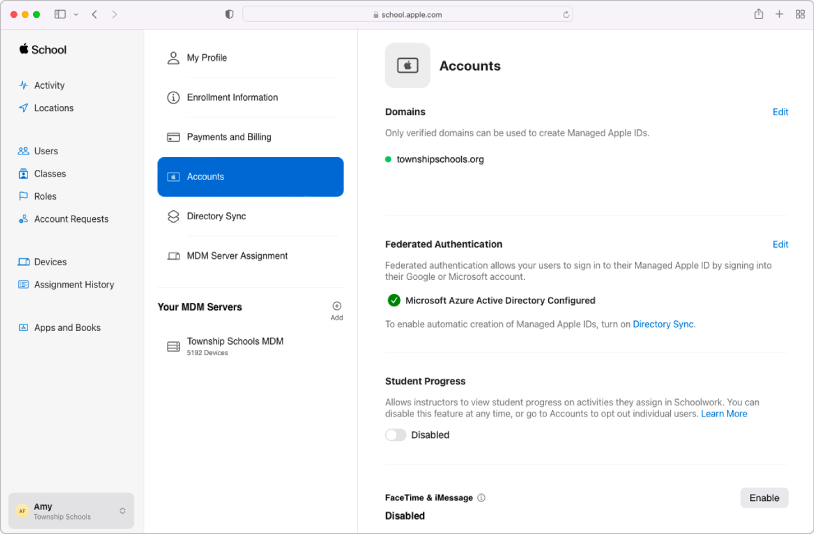
Sync user accounts from your Student Information System, Google Workspace, or Microsoft Azure Active Directory, or with files you create and upload using SFTP.
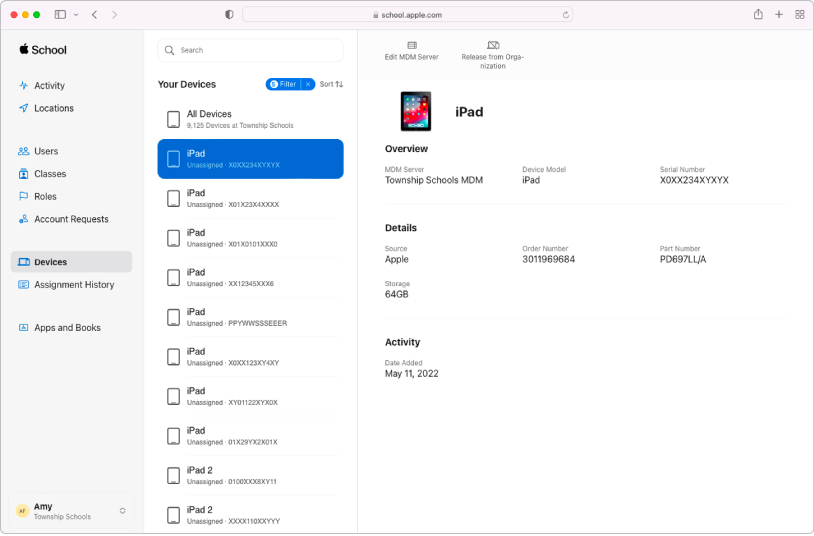
Manage devices
Streamline how you deploy Apple devices to your organization.
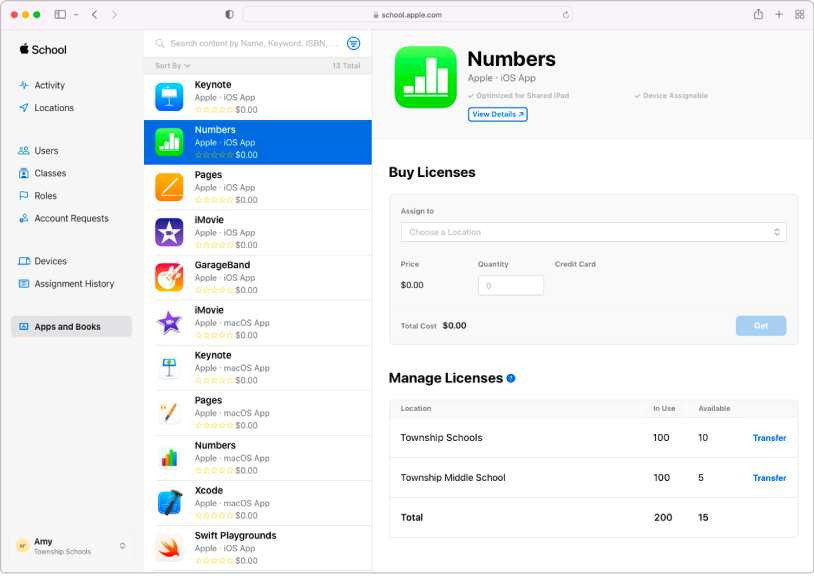
Buy content in bulk and assign it to devices
Buy apps and books in bulk, then assign them to devices for your staff, instructors, and students to use. You can also reassign apps from one device to another.
To explore the Apple School Manager User Guide, tap Table of Contents at the top of the page, or enter a word or phrase in the search field.
Apple School Manager User Guide
- Welcome
-
-
- Intro to federated authentication
- Intro to Google Workspace
- Use federated authentication with Google Workspace
- Intro to Microsoft Azure AD
- Use federated authentication with MS Azure AD
- Resolve Apple ID conflicts
- Get notified about user name conflicts
- Change a user’s domain information
- Transfer Apple services when federating
-
- Integrate your SIS
-
- Document revision history
- Copyright
感谢您的反馈。