Final Cut Pro X User Guide
- Welcome
-
- What’s new in Final Cut Pro 10.4.9
- What’s new in Final Cut Pro 10.4.7
- What’s new in Final Cut Pro 10.4.6
- What’s new in Final Cut Pro 10.4.4
- What’s new in Final Cut Pro 10.4.1
- What’s new in Final Cut Pro 10.4
- What’s new in Final Cut Pro 10.3
- What’s new in Final Cut Pro 10.2
- What’s new in Final Cut Pro 10.1.2
- What’s new in Final Cut Pro 10.1
- What’s new in Final Cut Pro 10.0.6
- What’s new in Final Cut Pro 10.0.3
- What’s new in Final Cut Pro 10.0.1
-
- Intro to effects
-
- Intro to transitions
- How transitions are created
- Add transitions
- Set the default transition
- Delete transitions
- Adjust transitions in the timeline
- Adjust transitions in the inspector and viewer
- Merge jump cuts with the Flow transition
- Adjust transitions with multiple images
- Modify transitions in Motion
-
- Add storylines
- Use the precision editor
- Conform frame sizes and rates
- Use XML to transfer projects
-
-
- Intro to media management
-
- View a clip’s information
- Override a clip’s metadata
- Locate source media files
- Relink clips to media files
- Consolidate projects and libraries
- Back up projects and libraries
- Create optimized and proxy files
- Create a proxy-only project
- Manage render files
- View background tasks
- Convert incompatible media
- Create camera archives
- Glossary
- Copyright

Trim the edges of the video frame in Final Cut Pro
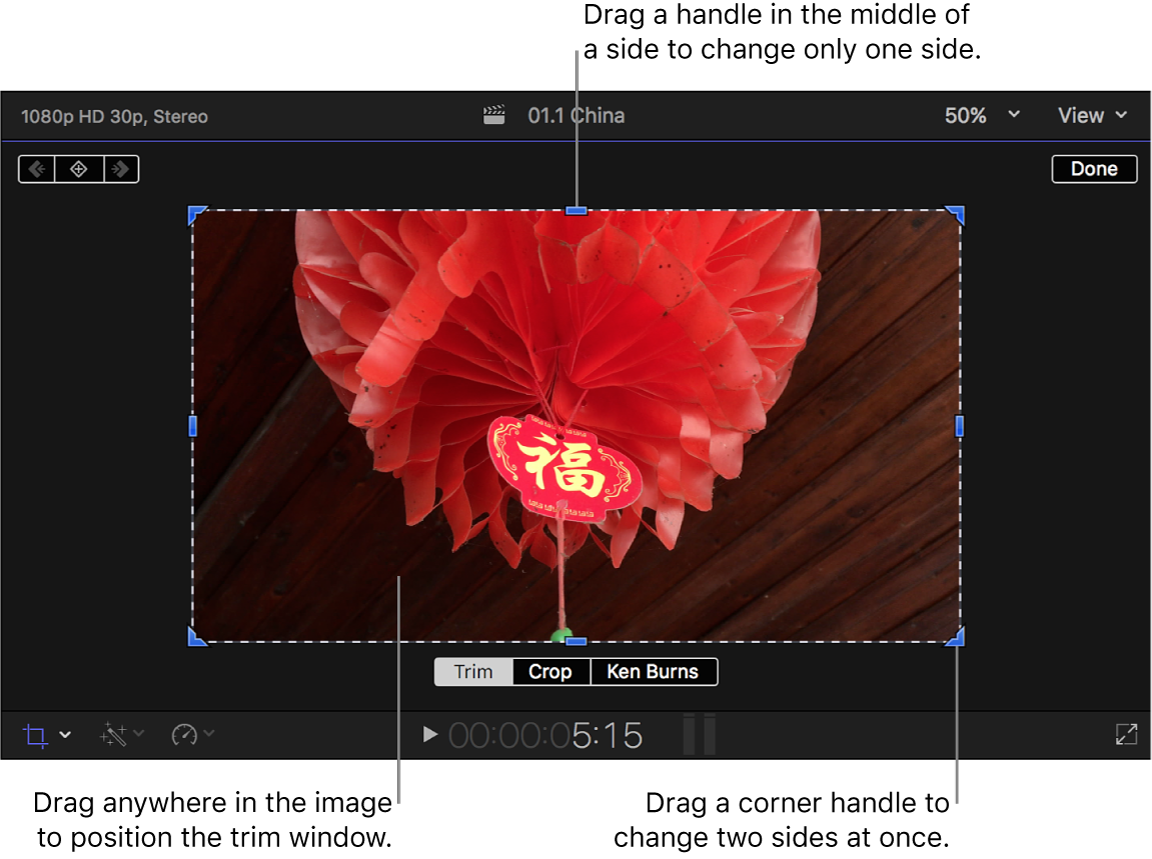
Trim controls allow you to independently trim each of the image edges, creating a window look. This effect, often used along with the Transform effect, is commonly used on a clip placed over a primary storyline clip, which becomes the background of the trimmed clip.
Select a clip in the Final Cut Pro timeline.
Position the playhead over the clip in the timeline so that the clip’s video is displayed in the viewer.
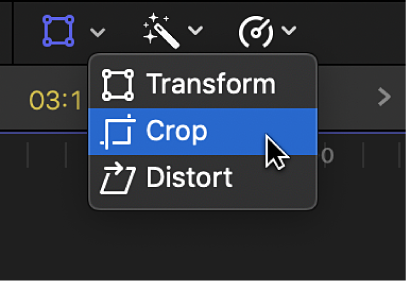
To access the Trim controls, do one of the following:
Click the pop-up menu in the lower-left corner of the viewer and choose Crop (or press Shift-C).

Control-click in the viewer and choose Crop.
Click the Trim button at the bottom of the viewer.
Adjust the effect using the onscreen controls:
Blue handles at each corner: Drag these to adjust the position of two trim window sides at the same time.
Blue handles in the middle of each side: Drag these to independently adjust the position of each side.
Anywhere inside the window: Drag anywhere inside the window to adjust its position.

You can also adjust each edge of the image individually using the Left, Right, Top, and Bottom parameters in the Crop section of the Video inspector.
When you’re finished adjusting the effect, click Done.
You can animate the effect and have it appear over a background. See Work with built-in effects in Final Cut Pro.