Share on the web with Final Cut Pro
You can publish your projects and clips to popular websites such as YouTube, Vimeo, and Facebook. You must first set up an account with the service you plan to use.
Share to YouTube
In Final Cut Pro, do one of the following:
Select one or more projects or clips in the browser.
Note: You can’t mix projects and clips in a batch share. Your selection must contain only projects or only clips. See Batch sharing in Final Cut Pro.
Select ranges in one or more clips in the browser.
Select a range in a project in the timeline.
Note: To share just a portion of a project, you must make a range selection. A clip selection is not sufficient. You can use the I and O keys to set the range start and end points.
If you’re sharing a project that is set to use proxy media for playback, open it in the timeline, then click the View pop-up menu in the top-right corner of the viewer and choose Optimized/Original.
This ensures the highest quality in the exported file. When you choose this setting, Final Cut Pro uses optimized media to create the shared file. If optimized media doesn’t exist, the original media is used. For more information about optimized and proxy media, see Control playback quality in Final Cut Pro.
Do one of the following:
Choose File > Share > YouTube.
Click the Share button in the toolbar, then click YouTube.

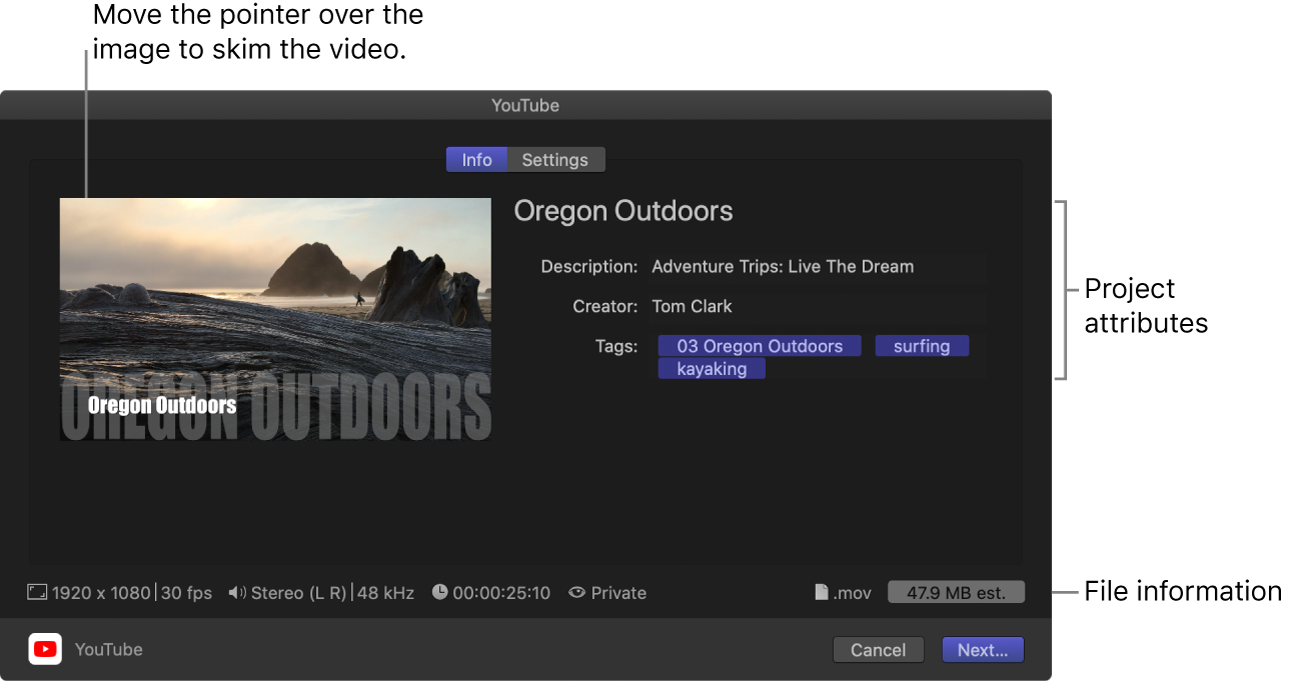
In the Share window that appears, do any of the following:

Move the pointer over the image to skim the video.
If you’re batch sharing (exporting multiple items), the image is replaced by a list of the items you’re exporting.
In the Info pane, view and modify project or clip attributes, such as the title and description.
See Change metadata for shared items in Final Cut Pro. All of the attributes associated with the project or clip are included in the output file.
Important: By default, the title field lists the project or clip name. Changing the title does not change the project or clip name, which is the name used for the exported file.
At the bottom of the window, view information about the file that will be exported, including frame size and frame rate, audio channels and sample rate, duration, output file type, and file size.
Click Settings to confirm the settings and make any necessary adjustments.
If you see your account name in the Settings pane: Go to step 6.
If you don’t see your account name in the Settings pane: Do one of the following:
If this is your first time publishing to YouTube from Final Cut Pro: Click the Sign In button, and, in the window that appears, enter your YouTube account email address and password. Click Sign In, then click Allow.
If you don’t have a YouTube account, go to https://accounts.google.com/ to create one.
If you have more than one YouTube account: Click the current account name, then enter the YouTube email address and password for your account. Click Sign In, then click Allow.
If you want to add another YouTube account: Create an additional YouTube destination. See Create share destinations in Final Cut Pro and Intro to Destinations preferences in Final Cut Pro.
In the Settings pane, enter the requested information:
Resolution: Choose a frame size.
Compression: Choose “Better quality” to maximize the quality. Choose “Faster encode” to speed up the encoding.
Privacy: Choose a privacy setting. See YouTube help.
Category: Choose a YouTube content category.
Note: All the above items are required.
Include captions: If you added captions to your project, you can choose a language version to include in the YouTube video. See Intro to captions in Final Cut Pro.
Burn in captions: If you added captions to your project, you can choose a caption language to burn in to the output media file.
Note: Burned-in captions are permanently visible in the output file and are not the same as embedded captions.
Click Next and read the terms of service, then click Publish.
Your selection is transcoded and uploaded to YouTube. The time it takes depends on how long it takes to transcode your project and on website traffic.
Share to Vimeo
In Final Cut Pro, do one of the following:
Select one or more projects or clips in the browser.
Note: You can’t mix projects and clips in a batch share. Your selection must contain only projects or only clips. See Batch sharing in Final Cut Pro.
Select ranges in one or more clips in the browser.
Select a range in a project in the timeline.
Note: To share just a portion of a project, you must make a range selection. A clip selection is not sufficient. You can use the I and O keys to set the range start and end points.
If you’re sharing a project that is set to use proxy media for playback, open it in the timeline, then click the View pop-up menu in the top-right corner of the viewer and choose Optimized/Original.
This ensures the highest quality in the exported file. When you choose this setting, Final Cut Pro uses optimized media to create the shared file. If optimized media doesn’t exist, the original media is used. For more information about optimized and proxy media, see Control playback quality in Final Cut Pro.
Do one of the following:
Choose File > Share > Vimeo.
Click the Share button in the toolbar, then click Vimeo.

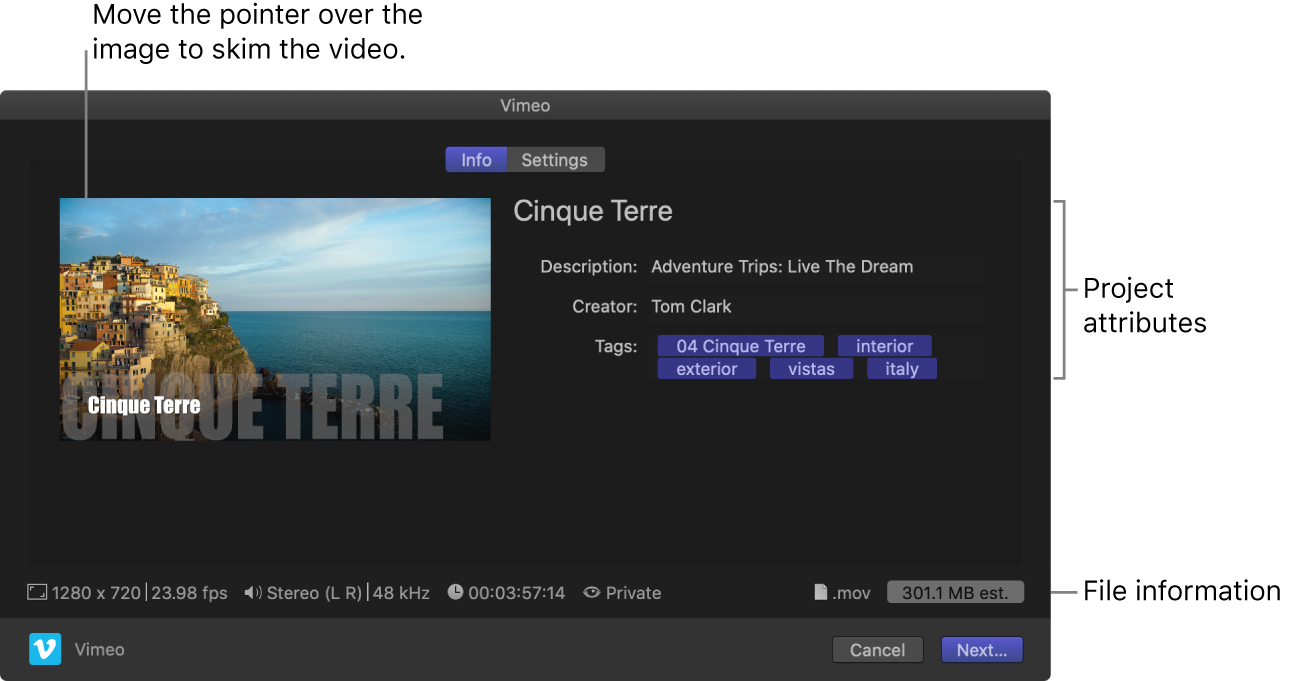
In the Share window that appears, do any of the following:

Move the pointer over the image to skim the video.
If you’re batch sharing (exporting multiple items), the image is replaced by a list of the items you’re exporting.
In the Info pane, view and modify project or clip attributes, such as the title and description.
See Change metadata for shared items in Final Cut Pro. All of the attributes associated with the project or clip are included in the output file.
Important: By default, the title field lists the project or clip name. Changing the title does not change the project or clip name, which is the name used for the exported file.
At the bottom of the window, view information about the file that will be exported, including frame size and frame rate, audio channels and sample rate, duration, output file type, and file size.
Click Settings to confirm the settings and make any necessary adjustments.
If you see your account name in the Settings pane: Go to step 6.
If you don’t see your account name in the Settings pane: Do one of the following:
If this is your first time publishing to Vimeo from Final Cut Pro: Click the Sign In button, and, in the window that appears, enter your Vimeo account email address and password. Click Sign In, then click Allow.
If you don’t have a Vimeo account, go to http://www.vimeo.com to create one.
If you have more than one Vimeo account: Click Details, then enter the Vimeo email address and password for your account. Click Sign In, then click Allow.
If you want to add another Vimeo account: Create an additional Vimeo destination. See Create share destinations in Final Cut Pro and Intro to Destinations preferences in Final Cut Pro.
In the Settings pane, enter the requested information:
Resolution: Choose a frame size.
Compression: Choose “Better quality” to maximize the quality. Choose “Faster encode” to speed up the encoding.
Viewable by: Choose an option to determine who can view your video.
Include captions: If you added captions to your project, you can choose a language version to include in the Vimeo video. See Intro to captions in Final Cut Pro.
Burn in captions: If you added captions to your project, you can choose a caption language to burn in to the output media file.
Note: Burned-in captions are permanently visible in the output file and are not the same as embedded captions.
Click Next and read the terms of service, then click Publish.
Your selection is transcoded and uploaded to Vimeo. The time it takes depends on how long it takes to transcode your project and on website traffic.
Share to Facebook
You can use the Prepare for Facebook share option to save a project or clip as a file that is ready for posting on the Facebook website.
In Final Cut Pro, do one of the following:
Select one or more projects or clips in the browser.
Note: You can’t mix projects and clips in a batch share. Your selection must contain only projects or only clips. See Batch sharing in Final Cut Pro.
Select ranges in one or more clips in the browser.
Select a range in a project in the timeline.
Note: To share just a portion of a project, you must make a range selection. A clip selection is not sufficient. You can use the I and O keys to set the range start and end points.
If you’re sharing a project that is set to use proxy media for playback, open it in the timeline, then click the View pop-up menu in the top-right corner of the viewer and choose Optimized/Original.
This ensures the highest quality in the exported file. When you choose this setting, Final Cut Pro uses optimized media to create the shared file. If optimized media doesn’t exist, the original media is used. For more information about optimized and proxy media, see Control playback quality in Final Cut Pro.
Do one of the following:
Choose File > Share > Prepare for Facebook.
Click the Share button in the toolbar, then click Prepare for Facebook.

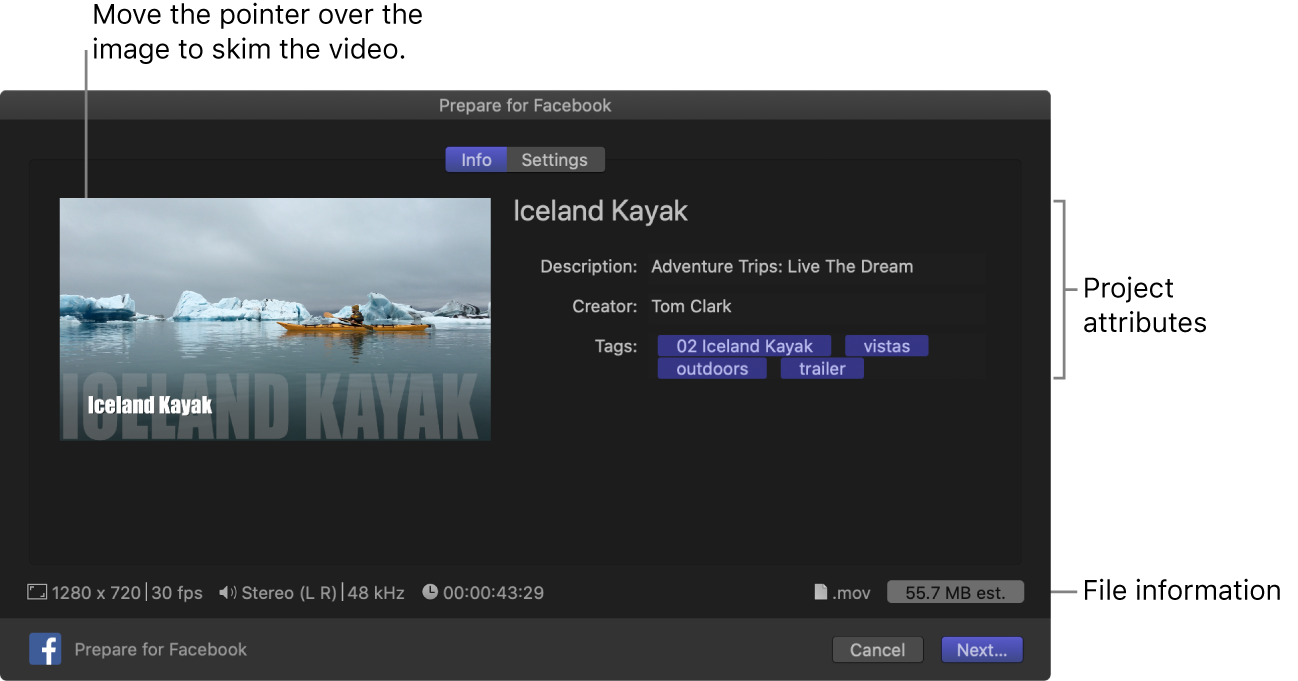
In the Share window that appears, do any of the following:

Move the pointer over the image to skim the video.
If you’re batch sharing (exporting multiple items), the image is replaced by a list of the items you’re exporting.
In the Info pane, view and modify project or clip attributes, such as the title and description.
See Change metadata for shared items in Final Cut Pro. All of the attributes associated with the project or clip are included in the output file.
Important: By default, the title field lists the project or clip name. Changing the title does not change the project or clip name, which is the name used for the exported file.
At the bottom of the window, view information about the file that will be exported, including frame size and frame rate, audio channels and sample rate, duration, output file type, and file size.
Click Settings to confirm the settings and make any necessary adjustments.
In the Settings pane, enter the requested information:
Resolution: Choose a frame size.
Compression: Choose “Better quality” to maximize the quality. Choose “Faster encode” to speed up the encoding.
Burn in captions: If you added captions to your project, you can choose a caption language to burn in to the output media file.
Note: Burned-in captions are permanently visible in the output file and are not the same as embedded captions.
Click Next.
Enter a name for the output media file, navigate to a location on your Mac or storage device where you want to save the file, and click Save.
Your project is transcoded to a format suitable for Facebook.
Upload the file to Facebook using the Facebook website or app.
For more information about sharing to Facebook, see this Apple Support article.
You can monitor the progress of the transcode in the Background Tasks window, and you can continue to work in Final Cut Pro while the file is transcoded.
When transcoding is complete, a notification appears. You can view and locate shared projects in the Share inspector. See View the status of shared items in Final Cut Pro.