Final Cut Pro X User Guide
- Welcome
-
- What’s new in Final Cut Pro 10.4.9
- What’s new in Final Cut Pro 10.4.7
- What’s new in Final Cut Pro 10.4.6
- What’s new in Final Cut Pro 10.4.4
- What’s new in Final Cut Pro 10.4.1
- What’s new in Final Cut Pro 10.4
- What’s new in Final Cut Pro 10.3
- What’s new in Final Cut Pro 10.2
- What’s new in Final Cut Pro 10.1.2
- What’s new in Final Cut Pro 10.1
- What’s new in Final Cut Pro 10.0.6
- What’s new in Final Cut Pro 10.0.3
- What’s new in Final Cut Pro 10.0.1
-
- Intro to effects
-
- Intro to transitions
- How transitions are created
- Add transitions
- Set the default transition
- Delete transitions
- Adjust transitions in the timeline
- Adjust transitions in the inspector and viewer
- Merge jump cuts with the Flow transition
- Adjust transitions with multiple images
- Modify transitions in Motion
-
- Add storylines
- Use the precision editor
- Conform frame sizes and rates
- Use XML to transfer projects
-
-
- Intro to media management
-
- View a clip’s information
- Override a clip’s metadata
- Locate source media files
- Relink clips to media files
- Consolidate projects and libraries
- Back up projects and libraries
- Create optimized and proxy files
- Create a proxy-only project
- Manage render files
- View background tasks
- Convert incompatible media
- Create camera archives
- Glossary
- Copyright

Add standard clips to 360° projects in Final Cut Pro
You can include rectilinear clips and titles in a 360° project—for example, you might want to place a logo or a title within the 360° equirectangular projection.
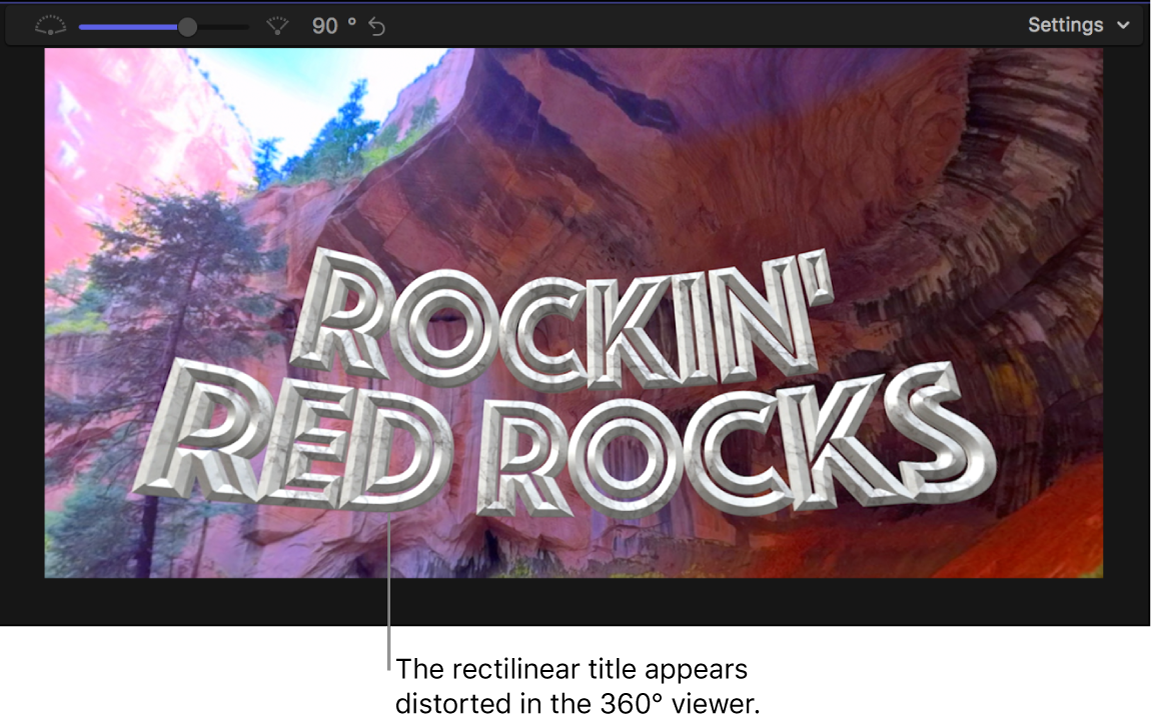
When you add a standard title (a title not optimized for 360° video) to a 360° project, the title looks “flat” in the viewer but appears as if it is pasted on the inside of the 360° sphere in the 360° viewer.

You can turn on the 360° Transform controls to project the title correctly into the equirectangular projection. When 360° Transform is on, the title appears on a flat plane within the 360° sphere. However, a standard 3D title projected by 360° Transform does not have the depth of a 360°-optimized 3D title. You can position it in the 360° sphere, but it always appears thin, like a piece of paper with a photograph of a 3D title on it.

In Final Cut Pro, do one of the following:
Add a standard clip: Import the rectilinear media, then add one or more rectilinear clips to your 360° project.
Add a standard title: Choose Window > Go To > Titles and Generators (or press Option-Command-1), then select any category below Titles in the sidebar (other than the 360° category) and add a title to your project. To change the text of the title, see Edit title text.
In the timeline, select one or more of the standard clips or titles.
If the Video inspector isn’t already shown, do one of the following:
Choose Window > Show in Workspace > Inspector (or press Command-4).
Click the Inspector button on the right side of the toolbar.

Click the Video button at the top of the inspector.

If you added a title, select the 360° Transform checkbox to turn on the 360° Transform controls.
Note: The 360° Transform parameters are turned off by default for standard titles so that you can first edit the text in the viewer using onscreen controls. After you finish editing the title content with onscreen controls, select the title in the timeline, then select the 360° Transform checkbox in the Video inspector to enable those controls and project the title as a flat plane.
If the 360° Transform controls aren’t shown in the Video inspector, move the pointer over 360° Transform and click Show.
Click the Coordinates pop-up menu and choose a method of positioning the clip or title in the equirectangular projection:
Spherical: Use this coordinate system for logos, titles, or video clips that are either stationary or orbiting around the center.
Cartesian: Use this coordinate system when you want to animate a clip or title to travel from one point in 3D space to another. For example, if you were to re-create the opening text scroll of Star Wars, you would create it on a single plane, then rotate it on the x-axis and fly it from behind the center out in front.
Depending on the coordinate system you chose, adjust the following position parameters:
If you chose Spherical:
Latitude: Rotate the clip plane up or down around the center.
Longitude: Rotate the clip plane left or right around the center.
Distance: Move the clip plane closer to or farther from the center.
Scale: Change the clip’s size (without affecting the distance or parallax).
If you chose Cartesian:
X Position: Move the clip plane on the x-axis.
Y Position: Move the clip plane on the y-axis.
Z Position: Move the clip plane on the z-axis.
If you want the clip plane to always face the center, select the Auto-orient checkbox.
To set the local orientation of the clip, adjust the following parameters:
X Rotation: Rotate the clip plane on its x-axis.
Y Rotation: Rotate the clip plane on its y-axis.
Z Rotation: Rotate the clip plane on its z-axis.
Convergence: Adjust the apparent convergence point of elements in stereoscopic space, allowing them to be perceived as closer or farther away. (The Convergence parameter appears for rectilinear clips in stereoscopic projects.)
Interaxial: Adjust the stereoscopic depth of the selected clip. The effect becomes apparent when you adjust the clip’s local orientation. (The Interaxial parameter appears for rectilinear clips in stereoscopic projects.)