Use the Preview pane in the Finder on Mac
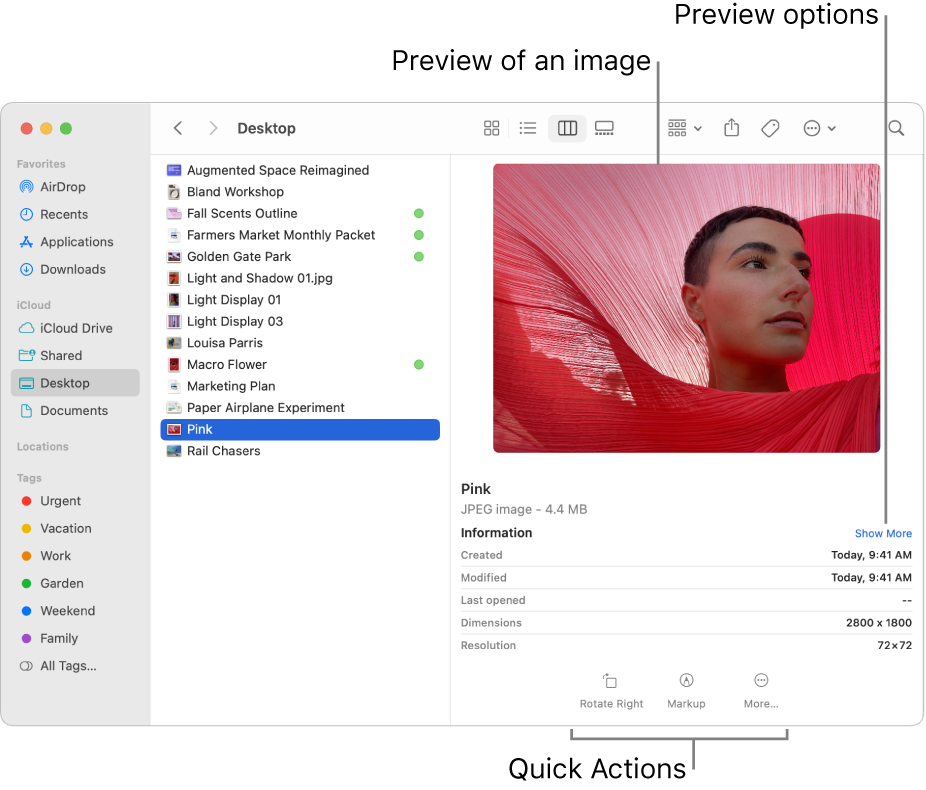
In the Preview pane of a Finder window, you get a small view of what a document contains or an image looks like, and a comprehensive list of all the metadata for the file. It’s helpful for checking details like the date a document was created, the type of camera or lens model used for a photo, and more. There are also Quick Actions buttons you can click to perform certain tasks without opening an app, right from the Finder.

On your Mac, click the Finder icon
 in the Dock to open a Finder window.
Select the folder or file.
If you don’t see the Preview pane on the right, choose View > Show Preview.
Choose View > Show Preview Options, then select the checkboxes for the options you want to show for the file you selected (available options depend on the file type).
If you want to perform some tasks with the file right from the pane (such as rotating an image or creating a PDF), make sure the Show Quick Actions checkbox is selected. See Perform quick actions in the Finder.
Tip: Change the size of the Preview pane by dragging the separator line that’s between the files and folders and the preview details. Drag the separator line all the way to the right to close the Preview pane.