Backup disks you can use with Time Machine
Time Machine can back up your Mac to any of these storage devices.
External storage device connected to Mac
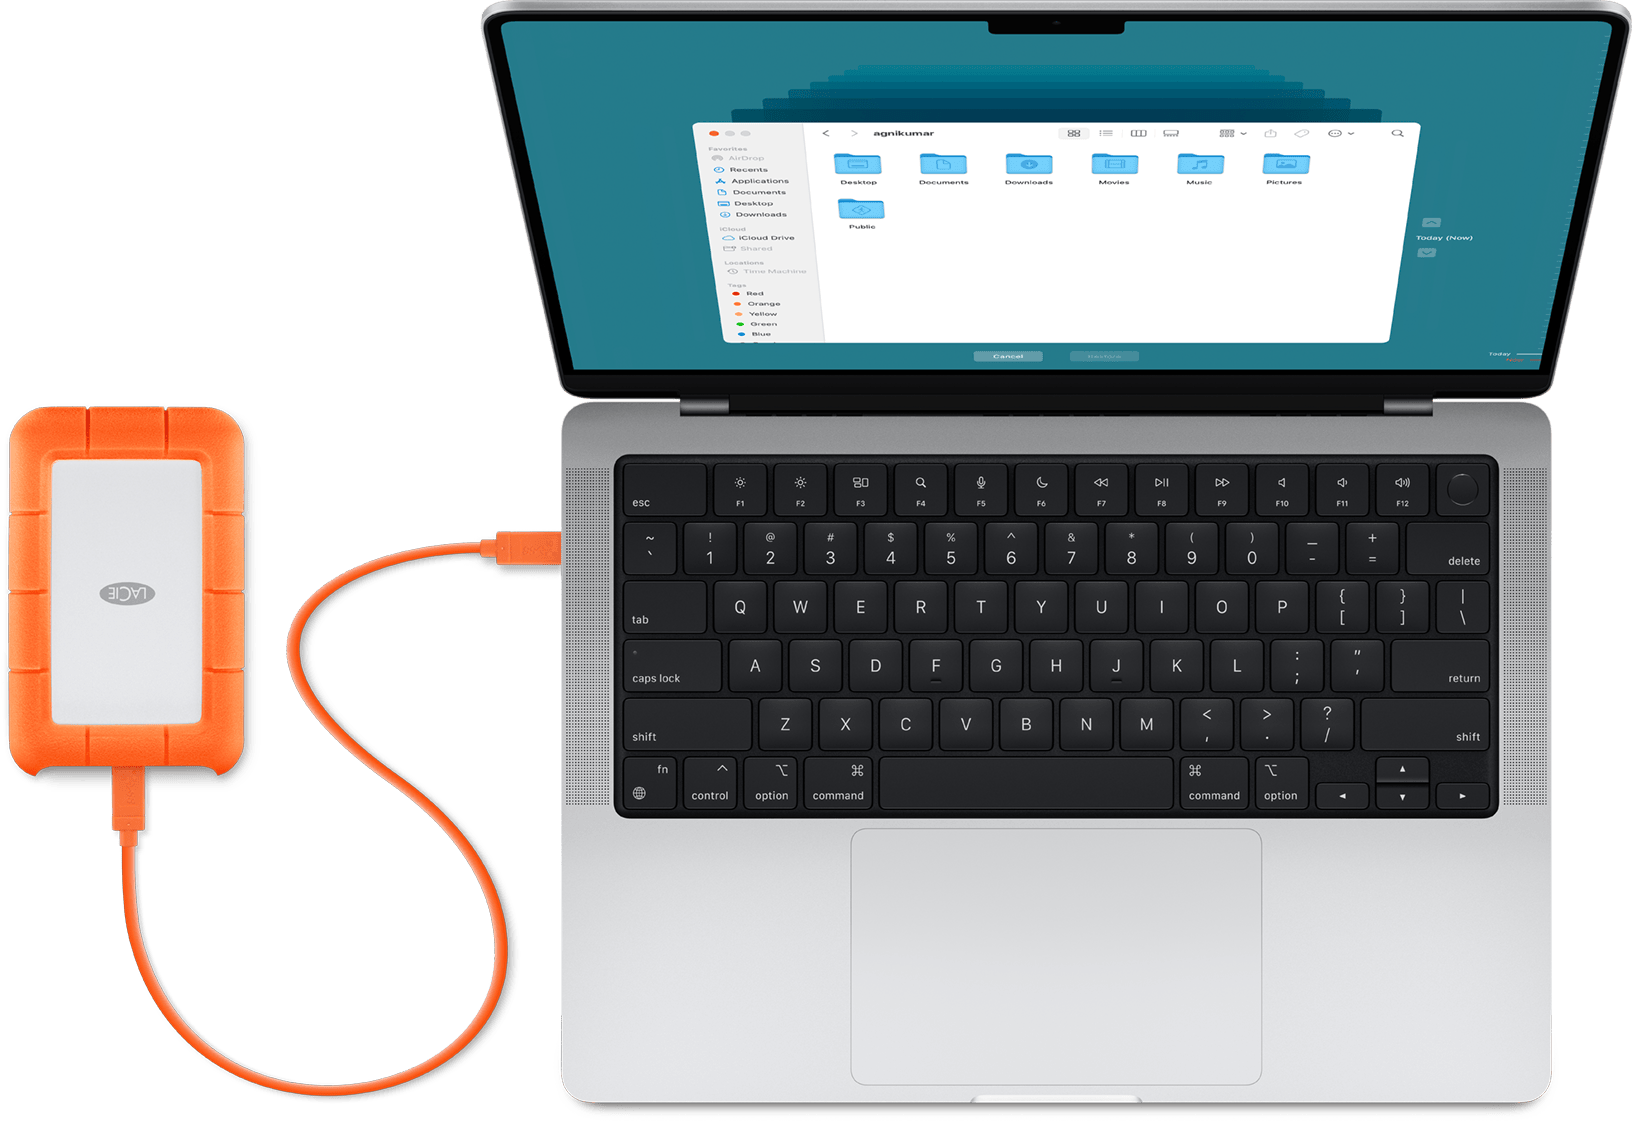
Time Machine can back up to an external storage device connected to a compatible port on your Mac, such as a USB-C or Thunderbolt port. This is the most common Time Machine setup.
Compatibility: Some older versions of macOS created backup disks using Mac OS Extended as the file system format instead of APFS. If you have an existing Time Machine backup disk, and you chose to encrypt that backup, learn about support for encrypted Mac OS Extended disks in macOS 28 or later.
Mac shared as a network backup destination
Time Machine can back up to the built-in disk of another Mac on your network, or to an external storage device connected to that Mac.
Compatibility: This solution is recommended only when both computers are using macOS 11 or later. When either Mac is using an earlier macOS, network backup uses Apple Filing Protocol (AFP), which isn't supported in macOS 27 or later.
macOS Ventura 13 or later
On the Mac to be used as a Time Machine backup destination, choose System Settings from the Apple menu .
Click General in the sidebar, then click Sharing on the right.
Turn on File Sharing. If prompted, enter your administrator password.
Click the More info button
 next to File Sharing.
Click the Add button
 under the Shared Folders list, then choose a folder or external storage device to use for Time Machine backups.
Control-click the folder or storage device that you added, then choose Advanced Options from the menu that appears.

Select “Share as a Time Machine backup destination,” then click OK.
When setting up Time Machine on other Mac computers that are connected to the same network, you can now select the shared folder or storage device as the backup disk.
macOS Monterey 12 or macOS Big Sur 11
On the Mac to be used as a Time Machine backup destination, choose System Preferences from the Apple menu .
Click Sharing.
From the list of services on the left, select File Sharing.
Click the add button (+) under the Shared Folders list on the right, then choose a folder or external storage device to use for Time Machine backups.
Control-click the folder that you added, then choose Advanced Options from the menu that appears.
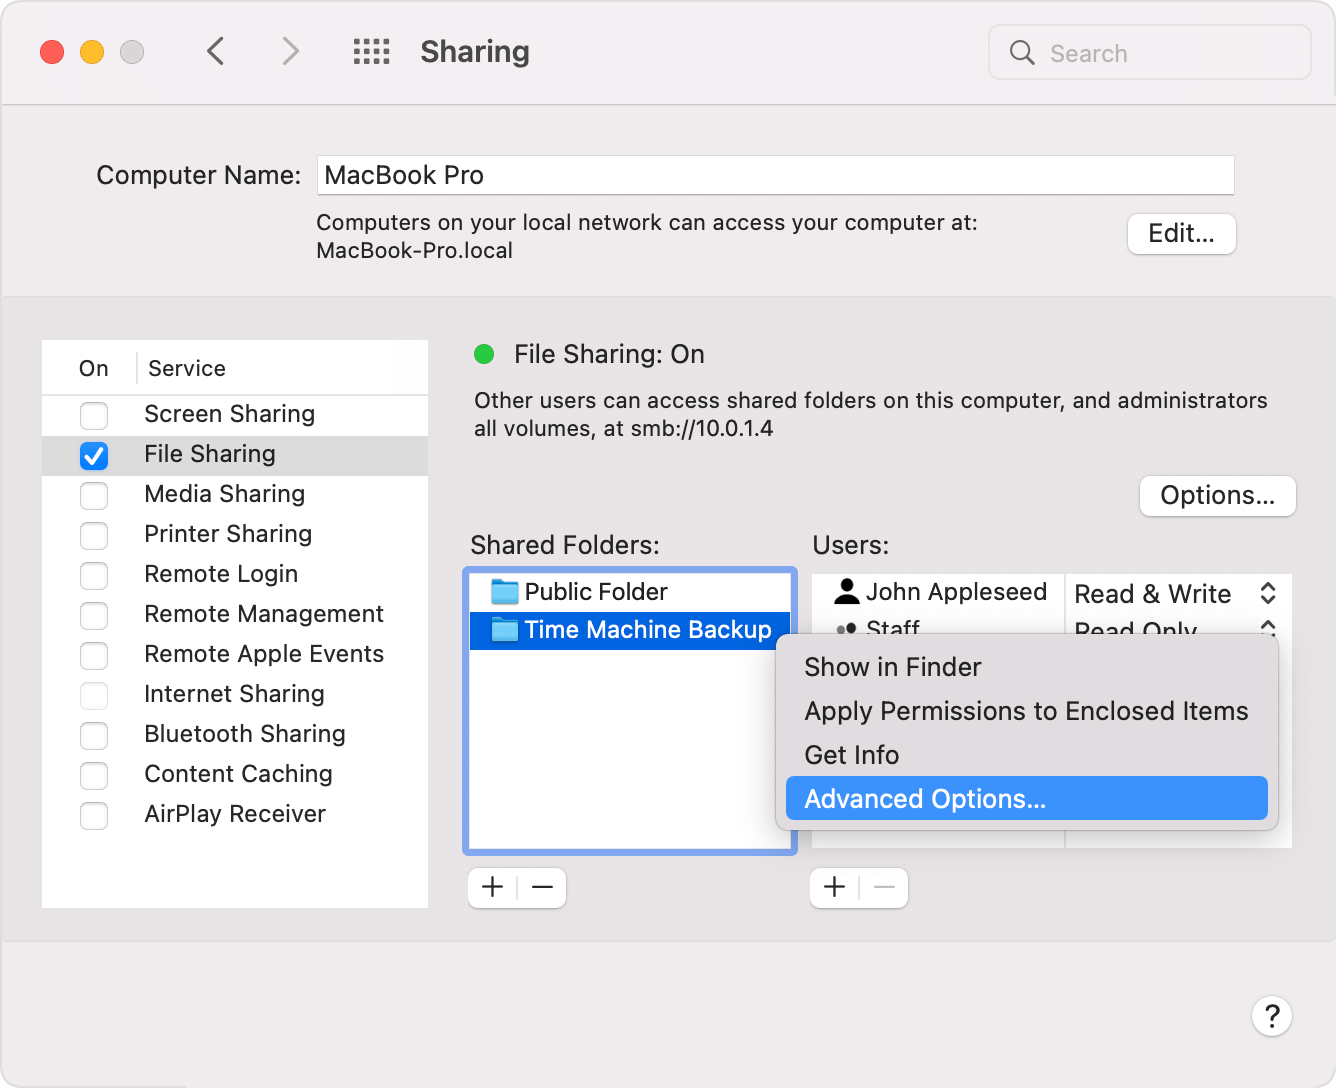
Select “Share as a Time Machine backup destination,” then click OK.
When setting up Time Machine on other Mac computers that are connected to the same network, you can now select the shared folder or storage device as the backup disk.
Network-attached storage (NAS) device
Time Machine can back up to a third-party NAS device that supports Time Machine over the SMB network protocol. Check the documentation of your NAS device for help setting it up for use with Time Machine.
Compatibility: Time Machine backup or other data transfer to or from NAS devices over Apple Filing Protocol (AFP) is not recommended and isn't supported in macOS 27 or later.
AirPort Extreme Base Station or Time Capsule
Compatibility: These solutions are no longer recommended, because Time Machine backup and other data transfer to or from these devices use Apple Filing Protocol (AFP), which isn't supported in macOS 27 or later.
Time Machine can back up to the built-in disk of an AirPort Time Capsule on your network. Simply select the Time Capsule as the backup disk when setting up Time Machine on your Mac.
Time Machine can also back up to an external storage device connected to the USB port of an AirPort Extreme Base Station (802.11ac model) or AirPort Time Capsule on your network:
If the storage device isn’t using Mac OS Extended (Journaled) format, connect it to your Mac and reformat it with Disk Utility.
Connect the storage device to a USB port on your base station, then turn it on.
Open AirPort Utility, which is in the Utilities folder of your Applications folder.
Select your base station, then click Edit to view its settings.
Click the Disks tab in the settings window.
Select your backup disk from the list of partitions, then select “Enable file sharing”:
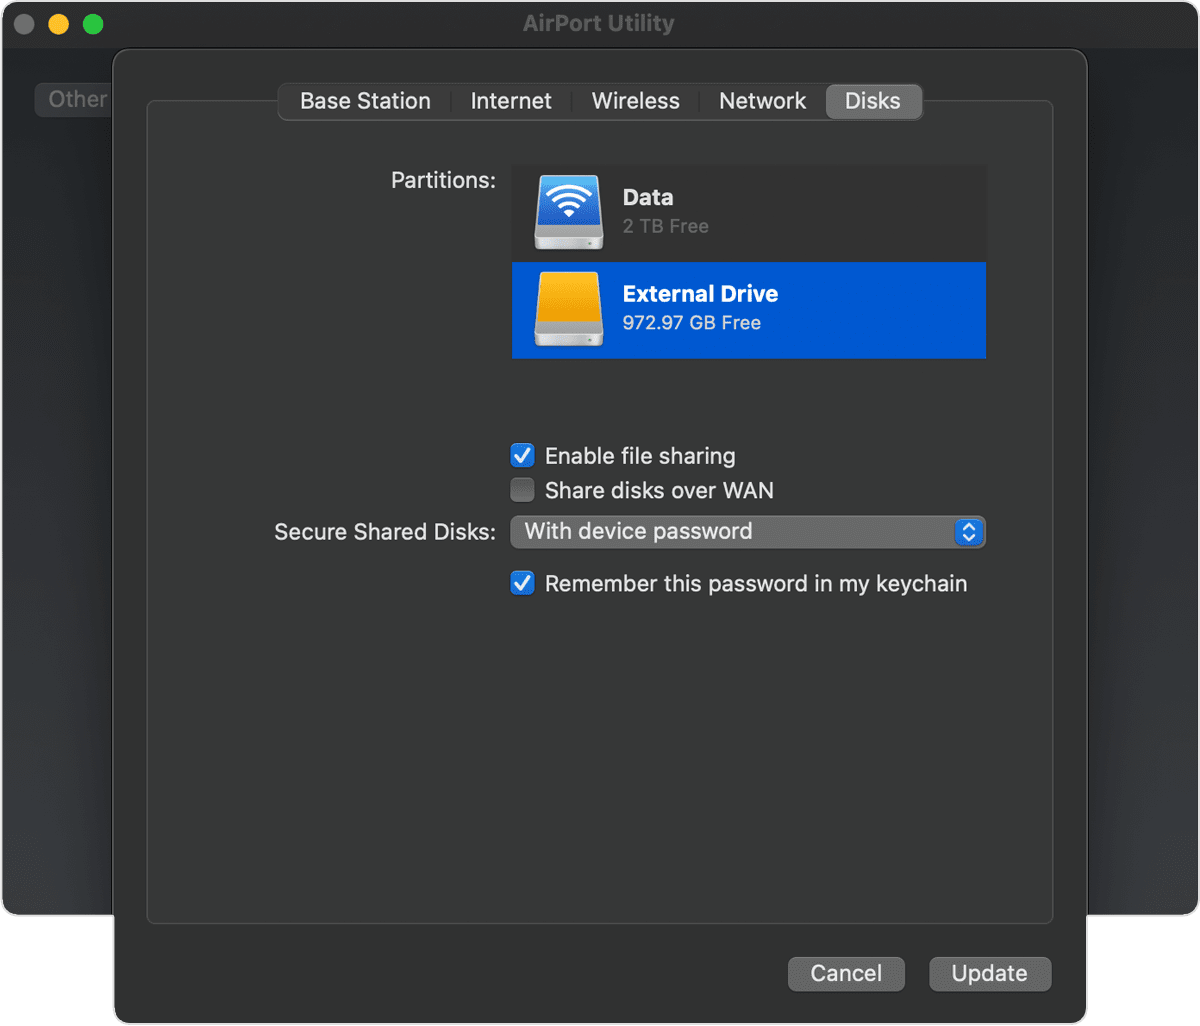
If more than one user on your network will back up to this disk with Time Machine, you can use the Secure Shared Disks pop-up menu to make sure that they can view only their own backups, not yours. Choose “With accounts” from the menu, then click the add button (+) to add users.
Click Update to restart your base station and apply the settings.