Final Cut Pro User Guide
- Welcome
-
- What’s new in Final Cut Pro 10.6
- What’s new in Final Cut Pro 10.5.3
- What’s new in Final Cut Pro 10.5
- What’s new in Final Cut Pro 10.4.9
- What’s new in Final Cut Pro 10.4.7
- What’s new in Final Cut Pro 10.4.6
- What’s new in Final Cut Pro 10.4.4
- What’s new in Final Cut Pro 10.4.1
- What’s new in Final Cut Pro 10.4
- What’s new in Final Cut Pro 10.3
- What’s new in Final Cut Pro 10.2
- What’s new in Final Cut Pro 10.1.2
- What’s new in Final Cut Pro 10.1
- What’s new in Final Cut Pro 10.0.6
- What’s new in Final Cut Pro 10.0.3
- What’s new in Final Cut Pro 10.0.1
-
- Intro to effects
-
- Intro to transitions
- How transitions are created
- Add transitions
- Set the default transition
- Delete transitions
- Adjust transitions in the timeline
- Adjust transitions in the inspector and viewer
- Merge jump cuts with the Flow transition
- Adjust transitions with multiple images
- Modify transitions in Motion
-
- Add storylines
- Use the precision editor
- Conform frame sizes and rates
- Use XML to transfer projects
-
- Glossary
- Copyright

Edit color masks in Final Cut Pro
A color mask is defined by a specific color range, so only areas in your video clip that contain colors within the range are part of the mask. The illustration below shows an example of a color range selection in a 3D color model.
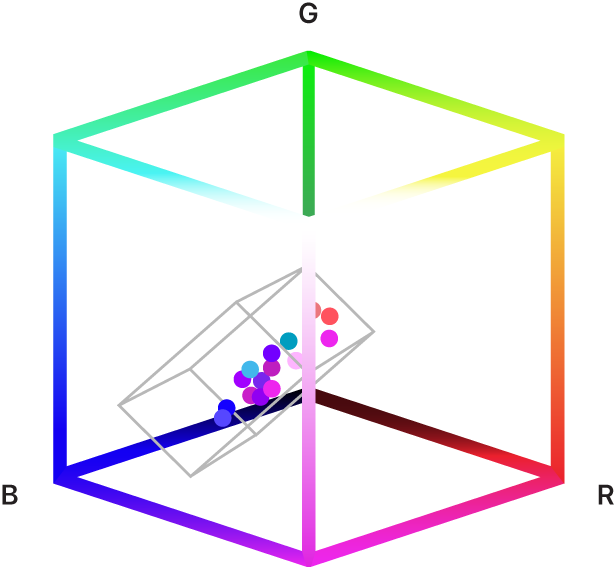
In Final Cut Pro, you can adjust the range of colors included in a color mask—for example, to add or remove colors as the subject moves or the scene changes. With the eyedropper, you can quickly select a base range of colors or expand or shrink a selection.
Depending on the type of color mask you created, you can use additional controls to fine-tune the color range. If you created a 3D color mask, you can add or remove surrounding colors using the Softness slider. If you created an HSL color mask, you can adjust hue, saturation, and luma values independently.
Edit a color mask with the eyedropper
In Final Cut Pro, add a color mask to a clip in the timeline.
Position the playhead in the timeline so that the clip appears in the viewer.
If the Color inspector isn’t already shown, do one of the following:
Choose Window > Go To > Color Inspector (or press Command-6).
Click the Enhancements pop-up menu below the viewer and choose Show Color Inspector.

In the Color Mask section of the inspector, click the eyedropper to enable it (the eyedropper turns blue).
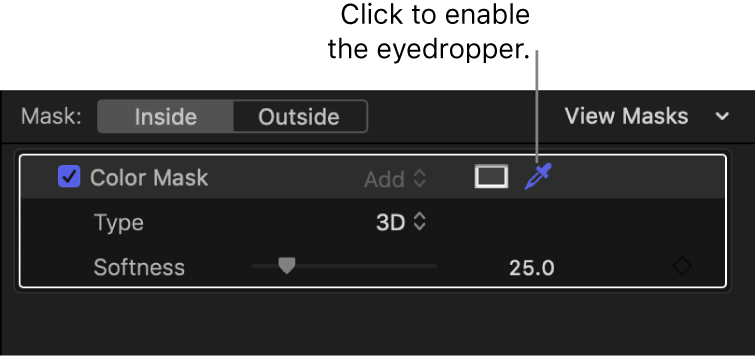
Do any of the following:
Make a new single-color selection: Position the eyedropper on a color you want to include in the mask, then click once.
Add color shades: Hold down the Shift key, position the eyedropper on a color you want to add to the mask, then drag to select the range of color.
Subtract color shades: Hold down the Option key, position the eyedropper on a color you want to remove from the mask, then drag to select the range of color.
Edit a 3D color mask with the Softness slider
In Final Cut Pro, add a 3D color mask to a clip in the timeline, then select the clip.
Position the playhead in the timeline so that the clip appears in the viewer.
If the Color inspector isn’t already shown, do one of the following:
Choose Window > Go To > Color Inspector (or press Command-6).
Click the Enhancements pop-up menu below the viewer and choose Show Color Inspector.

In the Color Mask section of the inspector, make sure 3D is chosen from the Type pop-up menu.
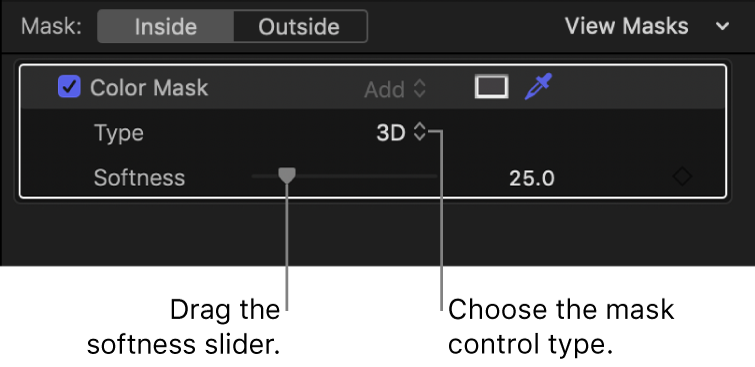
Drag the Softness slider to the right to add surrounding colors to the range included in the mask, or to the left to remove colors.
Tip: To view the mask contents while you make your change, press the Command key as you drag the Softness slider. See Ways to view masks in Final Cut Pro.
Edit an HSL color mask with hue, saturation, and luma controls
In Final Cut Pro, add an HSL color mask to a clip in the timeline, then select the clip.
Position the playhead in the timeline so that the clip appears in the viewer.
If the Color inspector isn’t already shown, do one of the following:
Choose Window > Go To > Color Inspector (or press Command-6).
Click the Enhancements pop-up menu below the viewer and choose Show Color Inspector.

In the Color Mask section of the inspector, make sure HSL is chosen from the Type pop-up menu.
The Hue, Saturation, and Luma parameter controls appear below the Type pop-up menu.
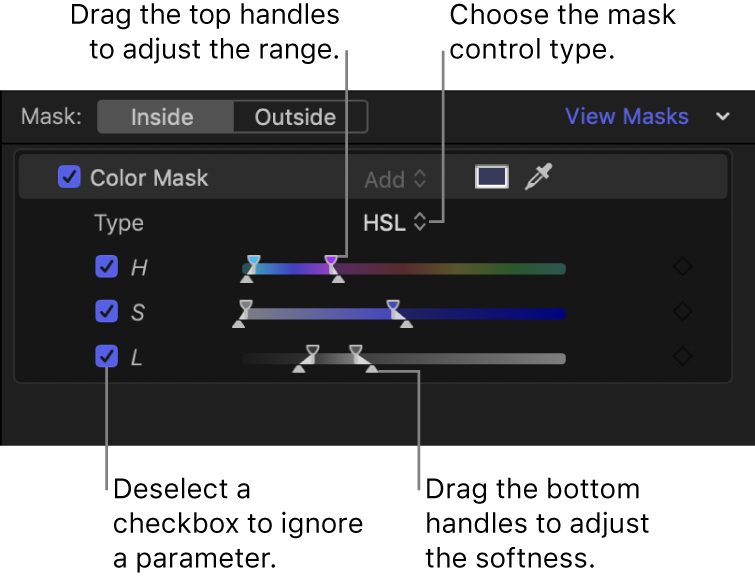
Do any of the following:
Adjust the range of a parameter: Drag the top handles of the parameter.
Tip: To adjust ranges slowly, press the Option key while dragging a top handle.
Adjust the softness of a parameter’s range: Drag the bottom handles of the parameter. Adjusting the softness adds or subtracts surrounding colors.
In the Hue parameter only, adjusting one bottom handle automatically adjusts the other.
Disable a parameter while adjusting the color mask: Deselect the parameter’s checkbox.
For example, deselecting the H (Hue) checkbox selects all colors with similar saturation and luma values. Selecting only the L (Luma) checkbox selects all colors with similar luma values.
Adjust both ends of the parameter’s range simultaneously: Drag between the handles on any of the sliders.
Tip: To view the mask contents while you make your change, press the Command key as you adjust a control. See Ways to view masks in Final Cut Pro.
Download this guide: Apple Books | PDF