Add and remove headers and footers in Pages on Mac
You can add headers and footers — fields at the top and bottom of a page that can include text, images, page numbers, the page count, and the date and time — to your document and then set where you want them to appear.
Note: Before you begin, find out whether you’re working in a word processing or page layout document. There are some differences in how you format headers and footers for each type of document.
Add headers and footers in a word processing document
Click in a page where you want to add headers and footers.
Note: If your document has multiple sections and you intend to use different headers or footers for some sections (for example, different chapters in a book), select a page in the section you’re adding this header or footer to; otherwise, you can add the header or footer to any page.
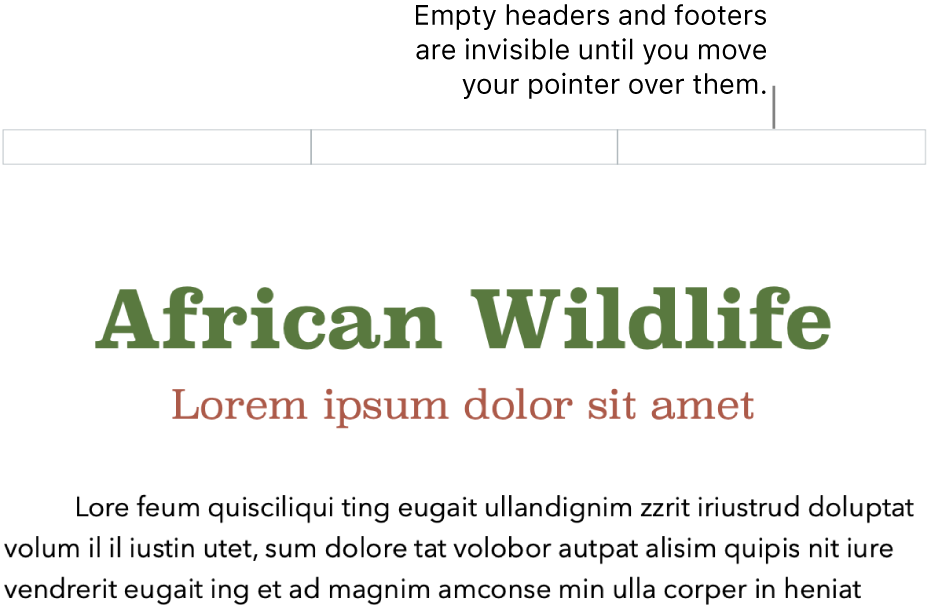
Move the pointer over the top or bottom of the page until you see the three header or footer fields, then click one (you can use any combination of fields to complete your header or footer).

If you can’t see the fields, turn on headers and footers for the document (click
 in the toolbar, click the Document tab at the top of the sidebar, then select the Header and Footer tickboxes).
Type your text, or click the Insert Page Number pop-up menu and choose a numbering style.
Note: If you already added page numbers in another section, you don’t see the Insert Page Number pop-up menu. Instead, click
 in the toolbar and choose Page Number.
To set the distance from the top and bottom page margins, click
 in the toolbar, click the Document tab at the top of the sidebar, then click the arrows or enter values in the Top and Bottom fields (below the Header and Footer tickboxes).
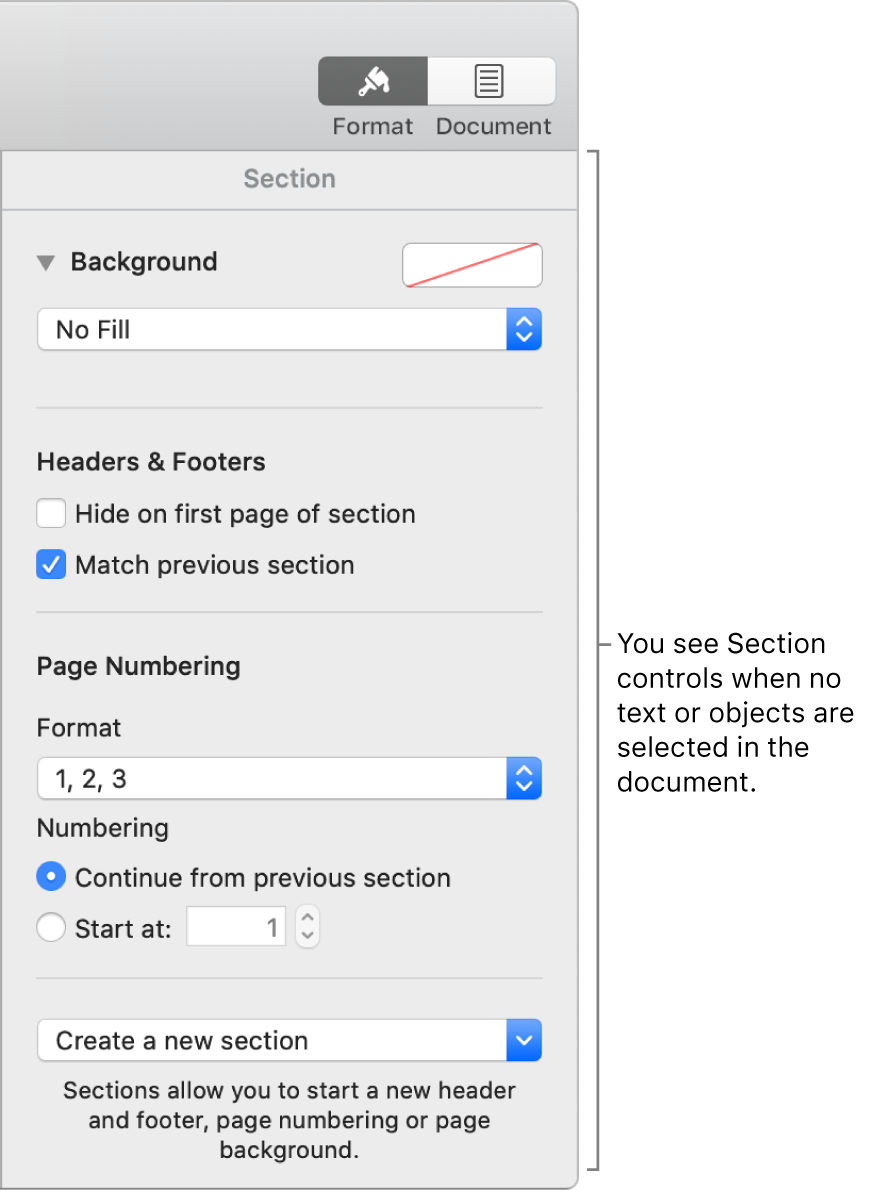
To set header or footer behaviour for each section, click in the corner of the page (so nothing is selected), click
 in the toolbar, then choose any of the following:
Hide on first page of section: Hide the header or footer on the first page. If the document has more than one section, the setting applies only to the first page of this section.
Match previous section: Use the same headers and footers from one section to the next. Deselect this tickbox if you want to use different headers and footers for this section.
Left and right pages are different: When this tickbox is selected in a document using facing pages, the headers and footers on left and right pages can be different. See Set up facing pages.
To change the font, font size, colour and alignment of header and footer text, select the text, then use the controls in the Format
 sidebar.
If a button is dimmed, that format can’t be applied to the selected text.
If the text in your header or footer is too long to fit in a field, the field adjusts to allow for the longer text. However, if there is text or a page number already in one of the fields, the original field limits apply. Try putting text in the header and the page number in the footer, for example, to avoid cutting off the text.
Add headers and footers in a page layout document
Move the pointer over the top or bottom of a page until you see the header or footer area, then click any of the three fields (you can use any combination of the fields).

If you can’t see the fields, turn on headers and footers for the document (click
 in the toolbar, click the Document tab at the top of the sidebar, then select the Header and Footer tickboxes).
Type your text, or click the Insert Page Number pop-up menu and choose a numbering style.
Note: If you already added a page number on another page, you won’t see the Insert Page Number pop-up menu. Instead, click
 in the toolbar and choose Page Number.
If your document uses facing pages and you want to enter different information on left and right pages, click
 and select the “Left and right pages are different” tickbox. See Set up facing pages.
To set the distance from the top and bottom page margins, click
 in the toolbar, click the Document tab at the top of the sidebar, then click the arrows or enter values in the Top and Bottom fields (below the Header and Footer tickboxes).
To adjust headers and footers for a page, click a blank spot on the page (so nothing is selected), click
 in the toolbar, then select any of the following:
Show header and footer: Select or deselect the tickbox to show or hide the header and footer on this page.
Match previous page: Use the same headers and footers from one page to the next. Deselect this tickbox if you want to use different headers and footers for this page.
If the text in your header or footer is too long to fit in a field, the field adjusts to allow for the longer text. However, if there is text or a page number already in one of the fields, the original field limits apply. Try putting text in the header and the page number in the footer, for example, to avoid cutting off the text.
Add an image to a header or footer
Click anywhere in a header or footer field to place the insertion point.
Click
 in the toolbar, then choose an image from Photos or another source.
Drag the selection handles on the image to resize it.
You can also copy and paste an image into the header and footer.
Delete headers or footers in a document
Turning headers or footers off removes the content from all headers and footers in your document.
In the Document
 sidebar, click the Document tab.
Deselect the Header or Footer tickbox.
Note: If you change your mind, press Command-Z on your keyboard to add the deleted text back. Simply selecting the tickbox again won’t retrieve the deleted text.