
Format a disk for Windows computers in Disk Utility on Mac
In Disk Utility, you can format an external disk that you can use with both a Microsoft Windows-based computer and a Mac. For example, you might want to do this if you use a flash drive to store data files you need to use on your Mac at home and when using a Windows-based computer at school or the public library.
WARNING: Formatting a disk or volume erases all the files on it. Save any files you need to another volume before formatting.
In the Disk Utility app
on your Mac, choose View > Show All Devices.If Disk Utility isn’t open, click the Launchpad icon
 in the Dock, type Disk Utility in the Search field, then click the Disk Utility icon .
In the sidebar, select the disk you want to format to use with Windows computers.
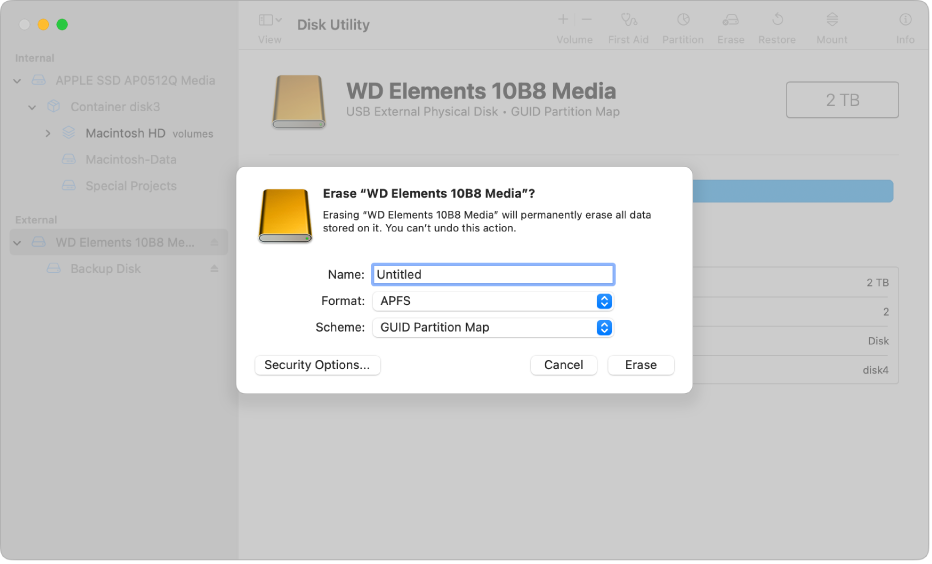
Click the Erase button
 in the toolbar.
In the Erase dialog, click the Scheme pop-up menu, then choose a partition scheme.
Click the Format pop-up menu, then choose one of the following:
MS-DOS (FAT): Choose this format if the size of the disk is 32 GB or less.
ExFAT: Choose this format if the size of the disk is over 32 GB.
Enter a name for the volume.
The maximum length for the volume name is 11 characters.
Click Erase, then click Done.