How to use institutional recovery keys with Intel-based Macs
Learn how to create an institutional recovery key (IRK) to unlock FileVault-encrypted Intel-based Mac computers and recover data.
This article covers the legacy method of creating an institutional recovery key (IRK) to unlock FileVault-encrypted Intel-based Macs. If your Mac computer with Apple silicon or Intel-based Mac uses MDM, you can escrow the recovery key to a server instead of using an IRK.
You can use a recovery key to regain access to FileVault-encrypted data for users unable to access the data with their password. On Intel-based Mac computers, you can use an institutional recovery key to unlock FileVault-encrypted Mac computers and recover data using Target Disk Mode.
Create a FileVault master keychain
Open the Terminal app on your Mac, then enter this command:
security create-filevaultmaster-keychain ~/Desktop/FileVaultMaster.keychainWhen prompted, enter the master password for the new keychain, then enter it again when prompted to retype. Terminal doesn't show the password as you type.
A key pair is generated, and a file named FileVaultMaster.keychain is saved to your desktop. Copy this file to a secure location, such an encrypted disk image on an external drive. This secure copy is the private recovery key that can unlock the startup disk of any Intel-based Mac set up to use the FileVault master keychain. It is not for distribution.
In the next section, you will update the FileVaultMaster.keychain file that is still on your desktop. You can then deploy that keychain to Mac computers in your organization.
Remove the private key from the master keychain
After creating the FileVault master keychain, follow these steps to prepare a copy of it for deployment:
Double-click the FileVaultMaster.keychain file on your desktop. The Keychain Access app opens.
In the Keychain Access sidebar, select FileVaultMaster.
If the FileVaultMaster keychain is locked,choose File > Unlock Keychain "FileVaultMaster" from the menu bar, then enter the master password you created.
From the two items shown on the right, select the one identified as ”private key” in the Kind column:
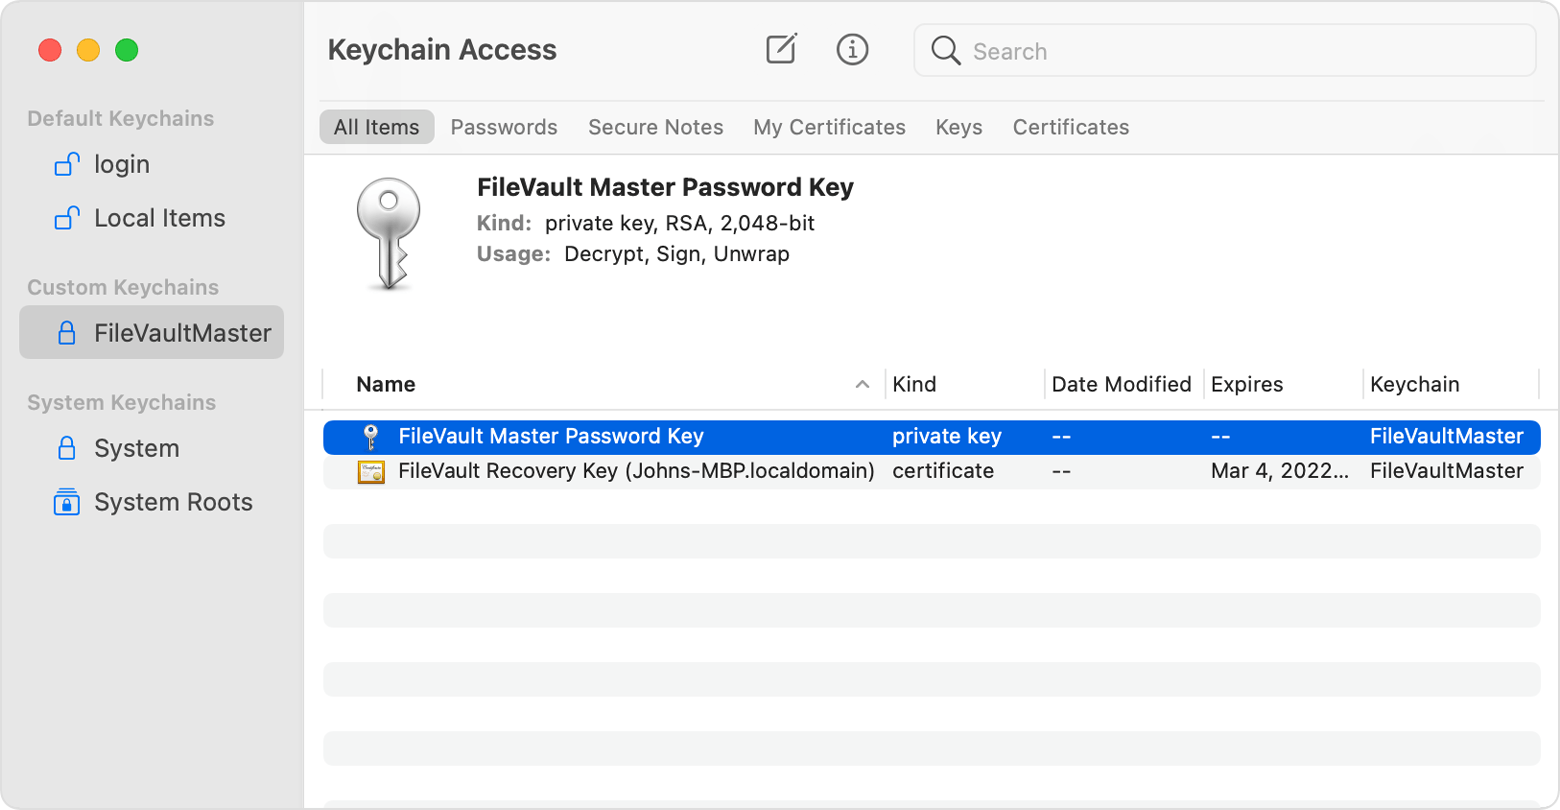
Delete the private key: Choose Edit > Delete from the menu bar, enter the keychain master password, then click Delete when asked to confirm.
Quit Keychain Access.
Now that the master keychain on your desktop no longer contains the private key, it's ready for deployment.
Deploy the updated master keychain on each Mac
After removing the private key from the keychain, follow these steps on each Intel-based Mac that you want to be able to unlock with your private key.
Put a copy of the updated FileVaultMaster.keychain file in the /Library/Keychains/ folder.
Open the Terminal app and enter both of the following commands. These commands make sure that the file's permissions are set to
-rw-r--r--and the file is owned by root and assigned to the group named wheel.sudo chown root:wheel /Library/Keychains/FileVaultMaster.keychainsudo chmod 644 /Library/Keychains/FileVaultMaster.keychainIf FileVault is already turned on, enter this command in Terminal:
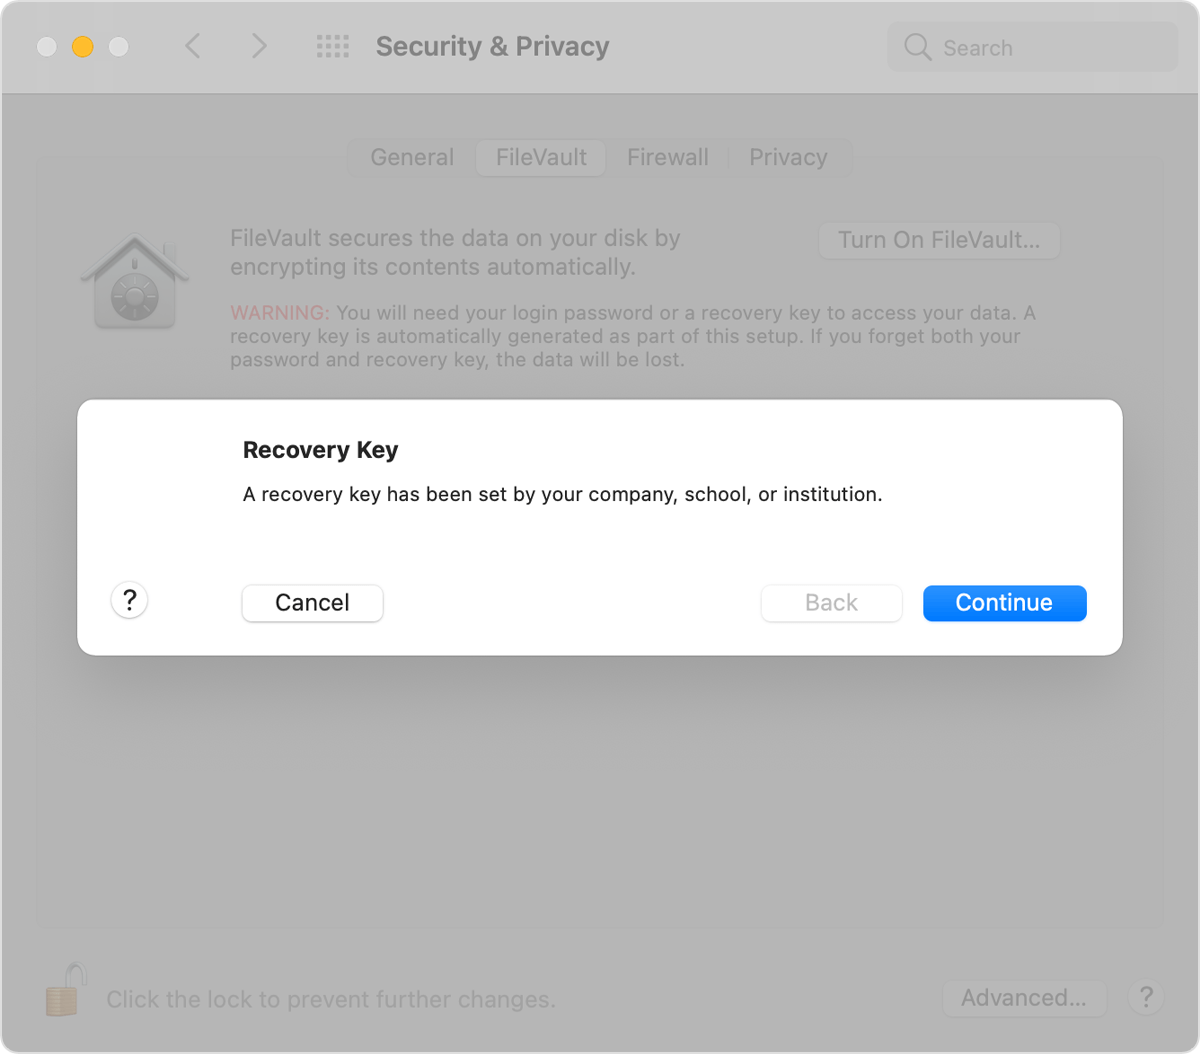
sudo fdesetup changerecovery -institutional -keychain /Library/Keychains/FileVaultMaster.keychainIf FileVault is turned off, open Security & Privacy preferences and turn on FileVault. You should see a message that a recovery key has been set by your company, school, or organization. Click Continue.
This completes the process. If a user forgets their macOS user account password and can't log in to their Mac, you can use the private key to unlock their disk.
Use the private key to unlock a user's startup disk
On the Mac you want to unlock, turn on the computer while holding the T key.
Once you see the Thunderbolt logo, release the T key.
Connect the Mac to another Mac (the host) using a Thunderbolt 3 (USB-C) cable.
When you're prompted to enter a password to unlock the disk, click Cancel.
On the host Mac, connect the external drive that contains the private recovery key.
If you stored the private recovery key in an encrypted disk image, double-click the file to mount the image and enter the password when prompted.
If you don't know the name of the startup volume (such as Macintosh HD) on the disk you want to unlock, open Disk Utility, then locate the volume name in the sidebar. You will need this information in the next step.
Open Terminal, then enter the following command to unlock the encrypted startup disk. Replace "name" with the name of the startup volume, and replace /path with the path to FileVaultMaster.keychain on the external drive or disk image:
diskutil ap unlockVolume "name" -recoveryKeychain /pathExample for a startup volume named Macintosh HD and a recovery-key volume named ThumbDrive:
diskutil ap unlockVolume "Macintosh HD" -recoveryKeychain /Volumes/ThumbDrive/FileVaultMaster.keychainEnter the master password to unlock the startup disk. If the password is accepted, the volume mounts on the Desktop.