Use more than one version of macOS on Mac
If you install a compatible macOS on an additional internal or external storage volume, your Mac can start up from either volume.
Before you begin
This “dual boot” setup is a convenient way to try a later version of macOS while temporarily keeping the currently installed macOS for older software that still needs it.
Important: This is not a long-term way to continue using an earlier macOS after upgrading. Later macOS versions can install changes designed to keep your Mac secure, and these changes can affect your computer's ability to continue using a significantly earlier version.
Prepare a new APFS volume for the new macOS
If you have enough free storage space, you can install the new macOS on your built-in startup disk without removing the macOS already installed. Or you can install macOS on an external storage device.
If installing on your built-in startup disk
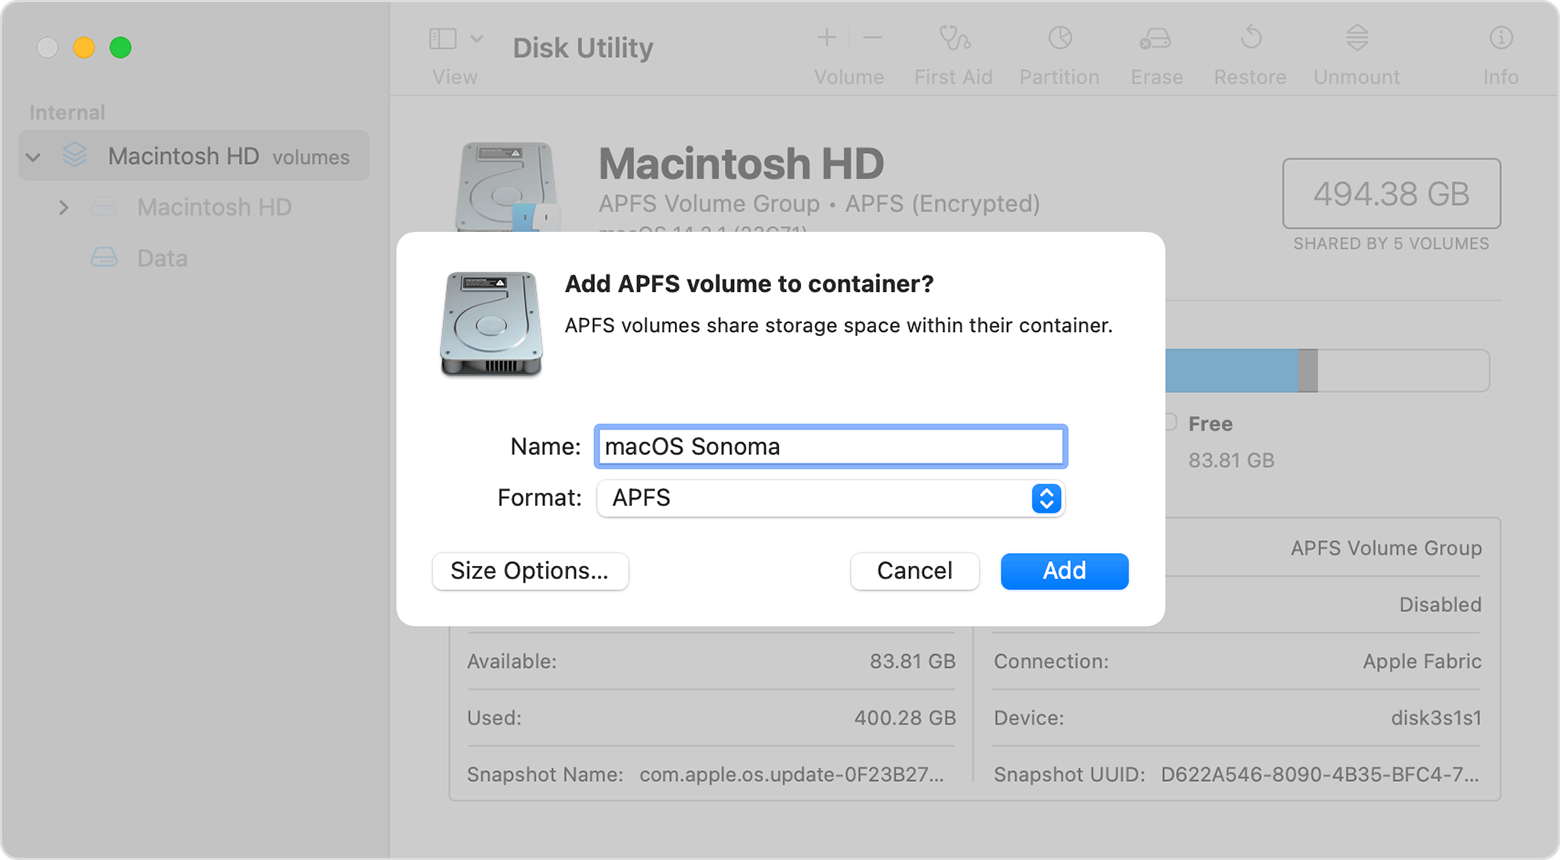
If you want to install the new macOS on your built-in startup disk, create a new APFS volume to contain it.
Make sure that your Mac is using macOS High Sierra or later. Earlier versions of macOS aren't compatible with APFS.
Open Disk Utility, which is in the Utilities folder of your Applications folder.
In the sidebar, select your existing APFS volume, such as Macintosh HD.
Choose Edit > Add APFS Volume from the menu bar, or click the add volume button (+) in the Disk Utility toolbar. These options are available only when an APFS-formatted volume is selected.
Type any name for the new volume, then click Add.
When done, quit Disk Utility.
If installing on an external storage device
Learn how to install and update macOS on an external storage device
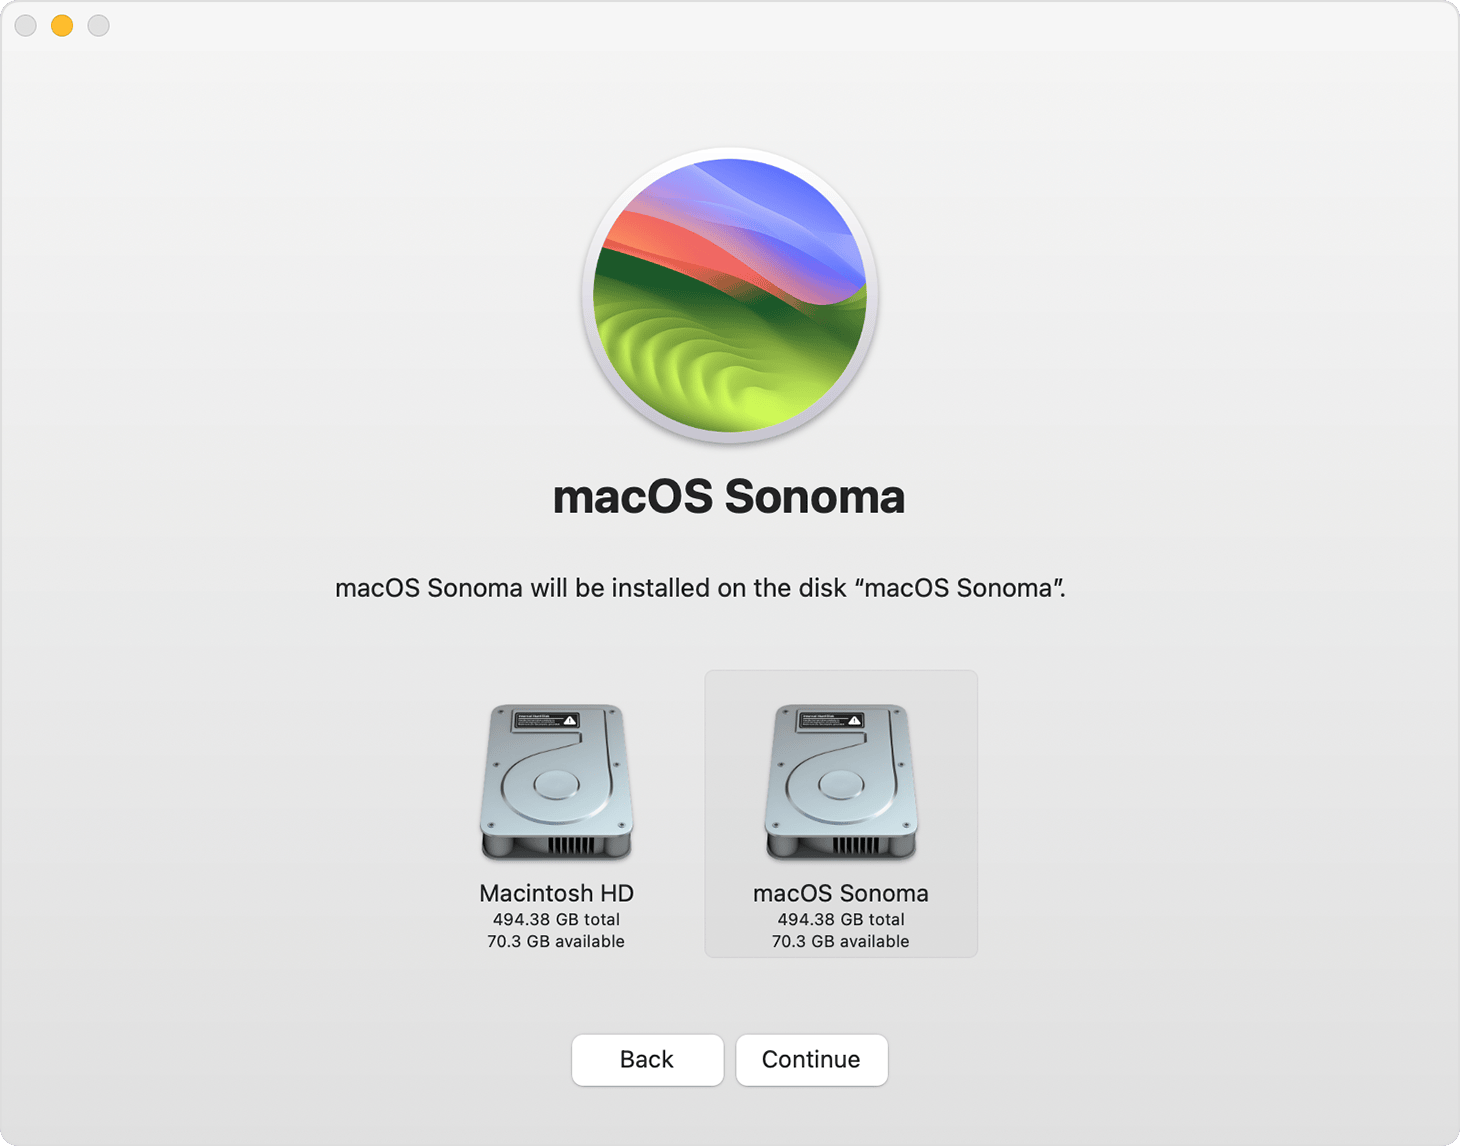
Install a compatible macOS on the new volume
When the installer opens and you're asked to choose where to install, click Show All Disks, then select the new volume before continuing.
Switch between macOS versions
Follow the steps to change your Mac startup disk.
Restart your Mac to start up from the other volume.
Repeat these steps as needed to switch between using each volume as a startup disk.
When you first start up from the new volume, a setup assistant helps you to create a new user account. When setup is complete, you can share files between user accounts on each volume. For details, see Share files with others who use your Mac.
Keep macOS up to date on each volume
To get the latest updates for each version of macOS, check for software updates, then start up from the other volume and check for software updates again.
Delete a volume
If you want to delete a volume, including the macOS and all other data on that volume:
Optional: Make a backup of the volume that you're deleting. After you delete the volume, you can use this backup to restore your files from that volume.
Start up your Mac from a volume that you aren't deleting.
Open Disk Utility.
From the sidebar in Disk Utility, select the volume that you want to delete.
Choose Edit > Delete APFS Volume from the menu bar, or click the delete volume button (–) in the Disk Utility toolbar.
Click Delete. If the volume is part of a volume group, delete the volume group when prompted.
Need more help?
Tell us more about what's happening, and we’ll suggest what you can do next.
