Create a custom cell format in Numbers on Mac
You can create your own cell formats for displaying numbers, text, and date and time values. Your custom formats are saved automatically and listed in the Data Format pop-up menu so you can use them again.
You might need to create a custom text format for a numeral so that you can use it as a text label. For example, if you enter a zip code with a leading zero, Numbers would normally treat it as a number and remove the leading zero automatically. If you format the zip code as text, that doesn’t happen.
Note: To create a custom format for numerals to be used as text labels, see “Create a custom text format,” below.
Create a custom number format
Select the cells you want to format.
In the Format
 sidebar, click the Cell tab.
Click the Data Format pop-up menu, then choose Create Custom Format.
Type a name for your format, then click the Type pop-up menu and choose Number.
Do any of the following to specify the format:
Type text in the field: The text you type appears in the cell.
Use tokens to represent the type of information you will enter in a cell: Drag tokens to the custom format field. For example, if you’re entering U.S. zip codes into a custom format, you can use an integer token with five digits.
You can also drag tokens within the field to rearrange them.
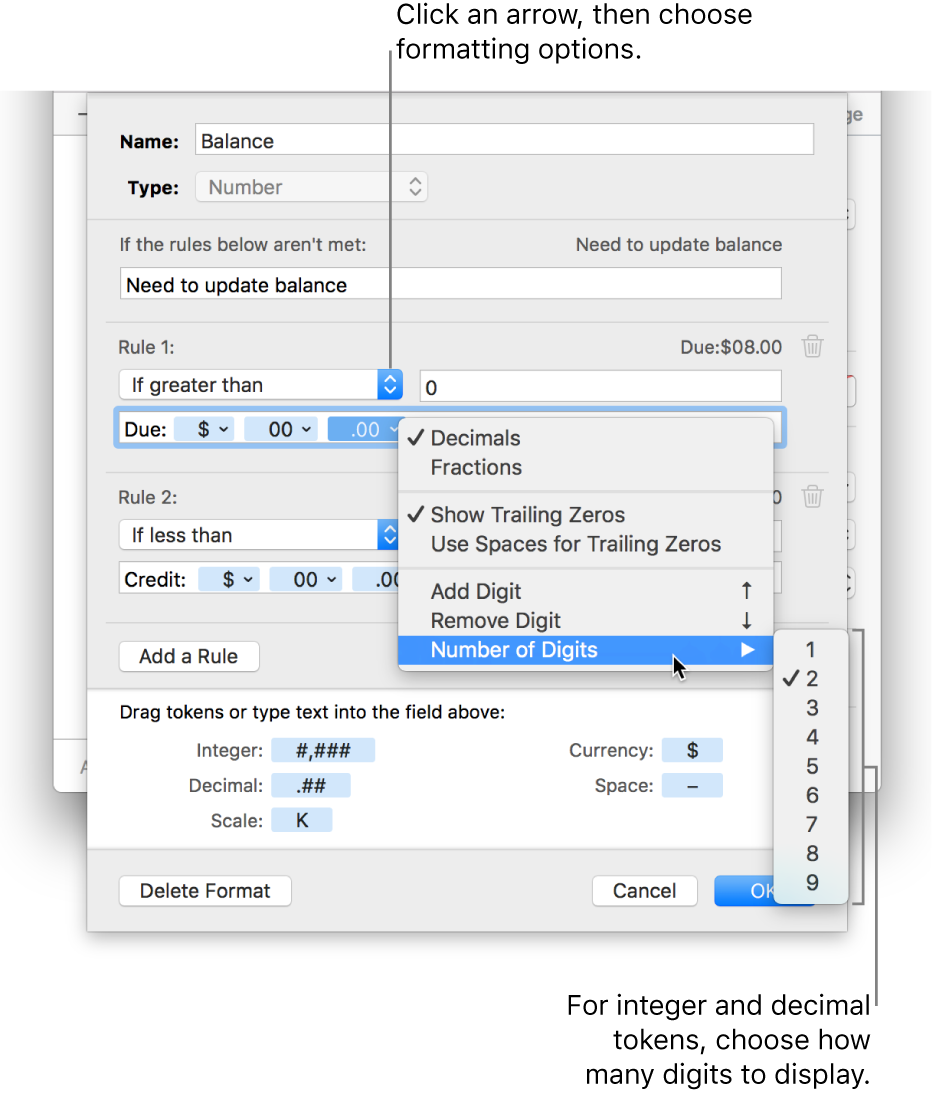
Customize a token element: Click the arrow on a token to show formatting options, such as the type of currency symbol or the number of digits to display.

Specify rules to accommodate multiple conditions: Add up to three rules to change the formatting of a cell based on specific conditions you define.
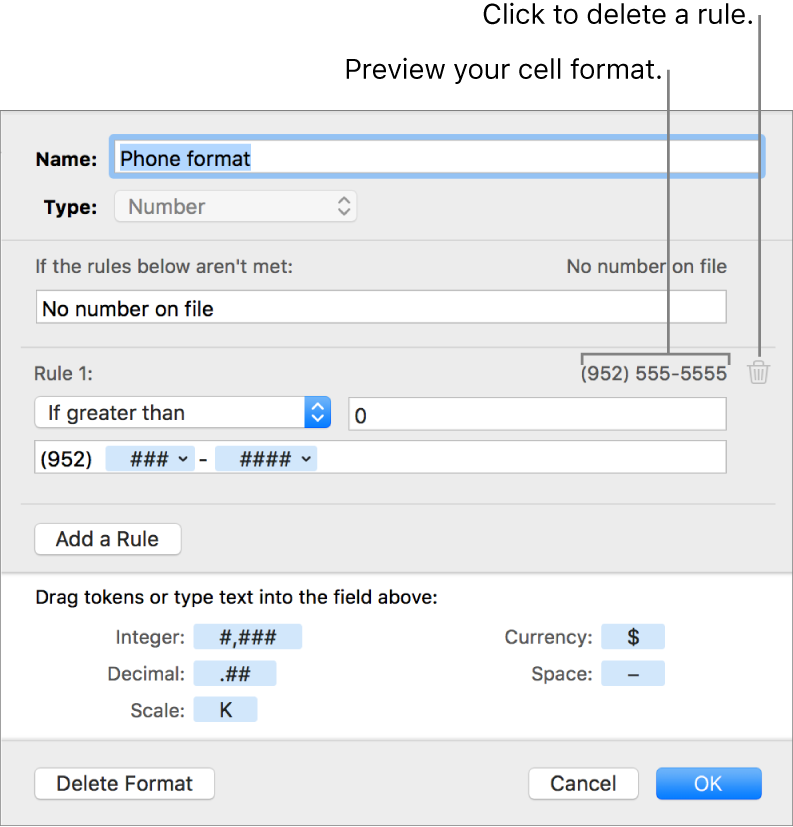
In the example below, all positive numbers you enter are displayed as a phone number with the area code (952). When you type “5555103” in a cell, it’s displayed as “(952) 555-5103.” When you type “0” in a cell, the cell shows “No number on file.”

Create a custom date and time format
Select the cells you want to format.
In the Format
 sidebar, click the Cell tab.
Click the Data Format pop-up menu, then choose Create Custom Format.
Type a name for your format, then click the Type pop-up menu and choose Date & Time.
Define your custom format by doing any of the following:
Type text in the field: The text you type appears in the cell.
Use tokens to represent the type of information you will enter in a cell: Drag tokens to the custom format field. You can also drag tokens within the field to rearrange them.
Customize a token element: Click the arrow on a token to show formatting options for the data.
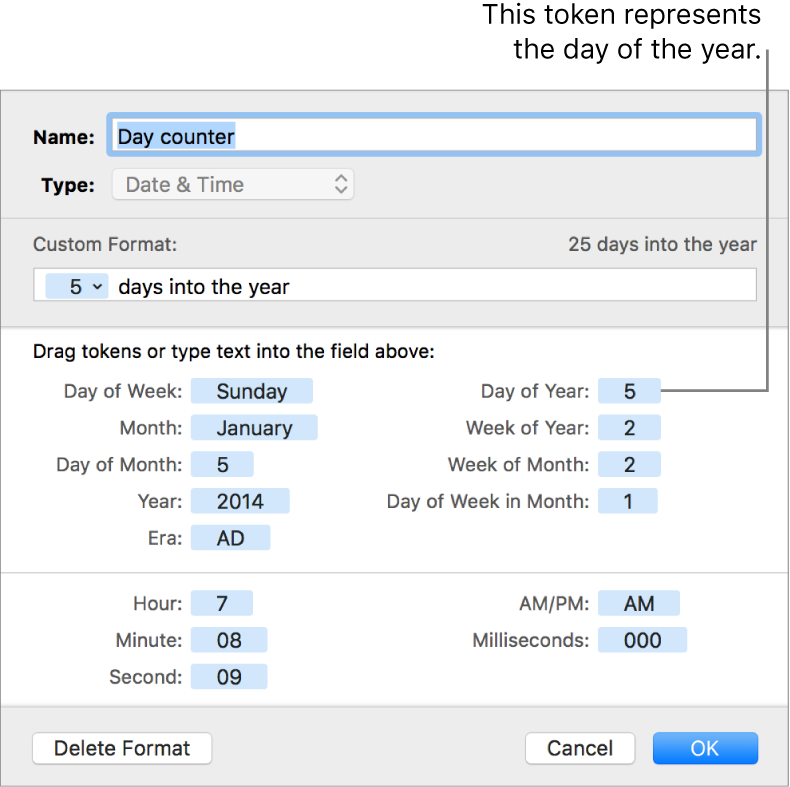
The example below uses the day of the year token (which is set to “5” here) and custom text so that when you type “2/25/2014” in a cell, the cell displays “56 days into the year.”

If you enter a value that contains a hyphen (-) or a slash (/), such as “1/4/2014,” Numbers assumes it’s a date and assigns it a date and time format automatically.
Create a custom text format
Select the cells you want to format.
In the Format
 sidebar, click the Cell tab.
Click the Data Format pop-up menu, then choose Create Custom Format.
Type a name for your format, then click the Type pop-up menu and choose Text.
In the text field, type text that you want to appear automatically in each cell that uses this format.
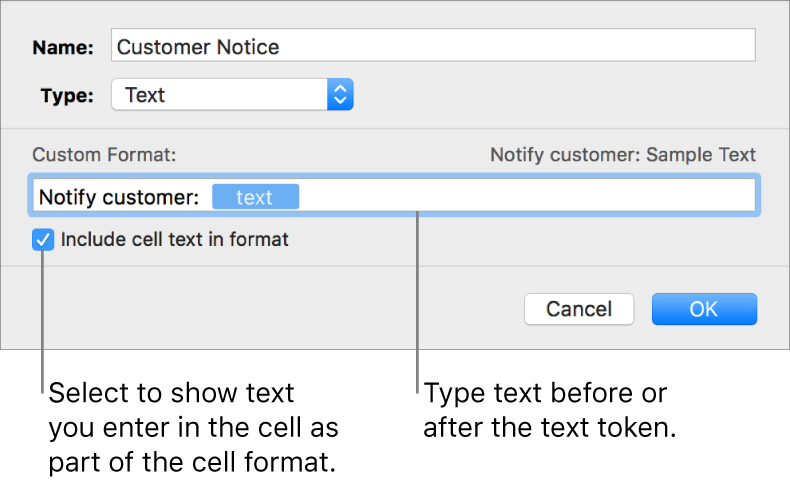
The blue “text” token that appears by default in the Custom Format field represents the text that you type in the cell. In this example, the text “Notify customer:” appears before whatever you type in a cell. If you type “Need to update address,” it displays “Notify customer: Need to update address.”
