Final Cut Pro User Guide
- Welcome
-
- What’s new in Final Cut Pro 10.6
- What’s new in Final Cut Pro 10.5.3
- What’s new in Final Cut Pro 10.5
- What’s new in Final Cut Pro 10.4.9
- What’s new in Final Cut Pro 10.4.7
- What’s new in Final Cut Pro 10.4.6
- What’s new in Final Cut Pro 10.4.4
- What’s new in Final Cut Pro 10.4.1
- What’s new in Final Cut Pro 10.4
- What’s new in Final Cut Pro 10.3
- What’s new in Final Cut Pro 10.2
- What’s new in Final Cut Pro 10.1.2
- What’s new in Final Cut Pro 10.1
- What’s new in Final Cut Pro 10.0.6
- What’s new in Final Cut Pro 10.0.3
- What’s new in Final Cut Pro 10.0.1
-
- Intro to effects
-
- Intro to transitions
- How transitions are created
- Add transitions
- Set the default transition
- Delete transitions
- Adjust transitions in the timeline
- Adjust transitions in the inspector and viewer
- Merge jump cuts with the Flow transition
- Adjust transitions with multiple images
- Modify transitions in Motion
-
- Add storylines
- Use the precision editor
- Conform frame sizes and rates
- Use XML to transfer projects
-
- Glossary
- Copyright

Reduce video noise in Final Cut Pro
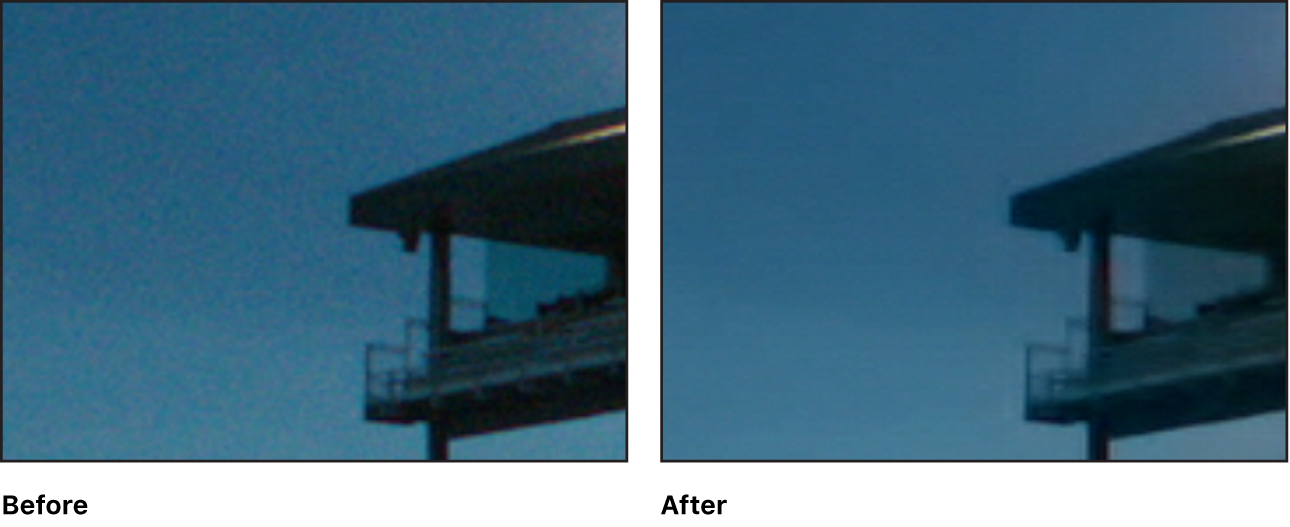
Video noise is a common problem in video clips shot in low-light conditions or with small-sensor devices such as smartphones or action cameras. Video noise is typically a result of digital gain and appears as unwanted grain or artifacts in the video image.
You can remove video noise from standard video clips and 360° clips using the Noise Reduction clip effect.

Add the Noise Reduction effect
Select the clip with video noise in the Final Cut Pro timeline, and position the playhead so that the clip appears in the viewer.
Click the Effects button in the top-right corner of the timeline (or press Command-5).

In the Effects browser, select the Basics category in the list of Video effects on the left, then select the Noise Reduction effect.
For 360° clips, select the 360° category, then select the 360° Noise Reduction effect.
Tip: To quickly find the Noise Reduction and 360° Noise Reduction effects, type “noise reduction” in the Effects browser search field.
Do one of the following:
Drag the effect to the timeline clip you want to apply it to.
Double-click the effect thumbnail to apply the effect to the selected clip.
The first time the effect is applied, Final Cut Pro analyzes the clip for noise. This analysis must be complete before you can see the result.
Tip: If you’re applying multiple clip effects to the clip, add Noise Reduction as the first effect (so that it appears at the top of the effects list), or rearrange the order of processing by dragging the Noise Reduction effect to the top of the list. This ensures the best performance and results. See Change clip effect order in Final Cut Pro.
Adjust the amount of noise reduction
In the Final Cut Pro timeline, select a clip with the Noise Reduction effect.
If the inspector isn’t already shown, do one of the following:
Choose Window > Show in Workspace > Inspector (or press Command-4).
Click the Inspector button on the right side of the toolbar.

Do any of the following:
Adjust the amount of noise reduction: Click the Amount pop-up menu and choose the amount of noise reduction to apply.
Adjust sharpness: Click the Sharpness pop-up menu and choose the amount of sharpness to apply.
You can examine the effect closely by setting the Zoom pop-up menu in the upper-right corner of the viewer to 100%. When you’re finished, choose Fit from the same menu (or press Shift-Z).
Download this guide: Apple Books | PDF