Use Apple Pencil with Pages on iPad
You can use your Apple Pencil in Pages on iPad to write, create drawings, annotate documents, and select and scroll as you would with your finger. By default, when you use Apple Pencil in Pages, you enter a view to write, draw, or annotate. If you want to use Apple Pencil for scrolling and selecting objects instead, you can change its default setting.
Note: To convert your handwriting to text using Scribble, you must have a compatible iPad with iPadOS 14 or later installed. Scribble is not available in all languages. For more information, see this Support article.
Change the default Apple Pencil behavior for Pages
If you want to use Apple Pencil for scrolling and selecting objects instead of writing, drawing, and annotating, change its default setting. The Apple Pencil setting in Pages applies only to Pages. If you change the setting in one document, it applies to all Pages documents but doesn’t affect other applications, such as Keynote and Numbers.
Go to the Pages app
 on your iPad.
Open a document.
Tap
 , then tap Settings.
Turn on Select and Scroll.
Apple Pencil Pro and Apple Pencil (2nd generation) support Double-Tap to Switch. When Double-Tap to Switch is turned on, you can double-tap the lower part of the Apple Pencil to quickly turn Select and Scroll on and off.
If you change the default setting to Select and Scroll, you can still use Apple Pencil to draw or annotate in Pages. To draw, tap ![]() in the toolbar, then tap Drawing. To annotate, tap
in the toolbar, then tap Drawing. To annotate, tap ![]() , then tap Smart Annotation.
, then tap Smart Annotation.
Turn handwriting into text
Scribble is an iPad feature that turns your handwriting into text. When you pair an Apple Pencil with a supported iPad with iPadOS 14 or later installed, Scribble is on by default. To check the Scribble setting, or to turn it off, go to Settings ![]() > Apple Pencil.
> Apple Pencil.
Go to the Pages app
 on your iPad.
Open a document.
Tap Apple Pencil in the body of a word-processing document, in a text box or shape, or in a table cell where you want to write.
Note: In a table, tap a cell if you want to replace all of its contents. To edit a cell, tap the cell again to place the insertion point where you want to begin writing.

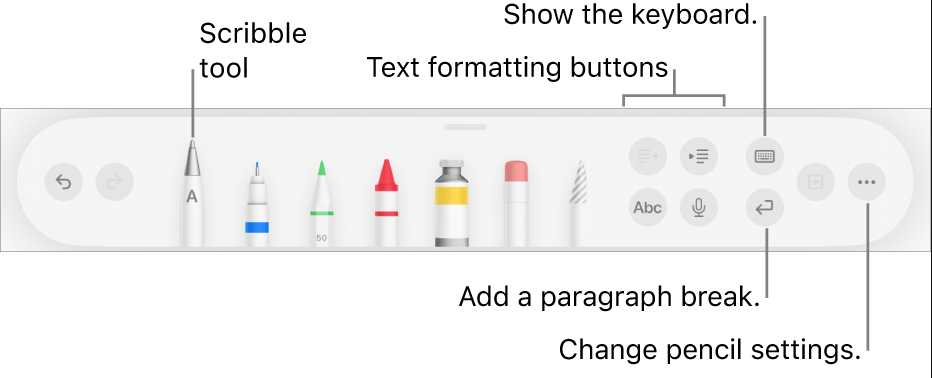
Tap the Scribble tool in the toolbar at the bottom of the screen, then start writing.
Scribble works even when your handwriting extends beyond the edges of the text area.
Note: If you turn off Scribble in Settings, or a language that supports Scribble isn’t in your language list, the Scribble tool does not appear in the toolbar.
As you enter text with Apple Pencil, you can do any of the following:
Delete a word: Scratch it out.
Insert text: Tap and hold in a text area, then start writing when a space opens.
Join or separate characters: Draw a vertical line between them.
Select text: Circle text or draw a line through it. Drag the selection handles with your finger to change the selection.
Start a new paragraph: Tap
 in the toolbar at the bottom of the screen.
Show a keyboard: Tap
 in the toolbar, then tap keyboard keys to correct text, delete characters, add spaces, and more.
Change to another supported language: Touch
 in the toolbar, then tap the language you want to use (you must have already added the keyboard in Settings > General > Keyboard > Keyboards). The button briefly shows the initials of the language selected (for example, EN for American English).
Undo the last action: Tap
 in the toolbar. Tap multiple times to undo all your recent actions.
Add a new text box: In a page layout document, start writing away from other text areas (such as another text box or a selected table or table cell). A new text box is created for your text.
When the Scribble tool is selected, the toolbar also contains buttons to indent text; change the font and apply bold, italics, or an underline to text; change the font size; align text; and insert page breaks, bookmarks, and other formatting.
For more space to write, drag the toolbar handle to any corner of the screen. To return the toolbar to full size, tap the minimized version. To set the toolbar to automatically minimize when you’re writing, tap ![]() , then turn on Auto-minimize.
, then turn on Auto-minimize.