Final Cut Pro User Guide
- Welcome
-
- What’s new in Final Cut Pro 10.6.2
- What’s new in Final Cut Pro 10.6
- What’s new in Final Cut Pro 10.5.3
- What’s new in Final Cut Pro 10.5
- What’s new in Final Cut Pro 10.4.9
- What’s new in Final Cut Pro 10.4.7
- What’s new in Final Cut Pro 10.4.6
- What’s new in Final Cut Pro 10.4.4
- What’s new in Final Cut Pro 10.4.1
- What’s new in Final Cut Pro 10.4
- What’s new in Final Cut Pro 10.3
- What’s new in Final Cut Pro 10.2
- What’s new in Final Cut Pro 10.1.2
- What’s new in Final Cut Pro 10.1
- What’s new in Final Cut Pro 10.0.6
- What’s new in Final Cut Pro 10.0.3
- What’s new in Final Cut Pro 10.0.1
-
- Intro to effects
-
- Intro to transitions
- How transitions are created
- Add transitions
- Set the default transition
- Delete transitions
- Adjust transitions in the timeline
- Adjust transitions in the inspector and viewer
- Merge jump cuts with the Flow transition
- Adjust transitions with multiple images
- Modify transitions in Motion
-
- Add storylines
- Use the precision editor
- Conform frame sizes and rates
- Use XML to transfer projects
-
- Glossary
- Copyright

Solo and mute audio clips in Final Cut Pro
The solo feature enables audio playback of only the selected clips in the timeline and temporarily disables audio playback for all other clips. It’s especially useful in audio editing if you have more than one audio clip layered in the timeline (dialogue and background music, for example) but need to listen and make edits to just certain clips.
Another way to mute clips is to disable them. Disabled clips are both invisible and silent and do not appear in any output.
Solo clips in the timeline
In Final Cut Pro, select one or more clips in the timeline that you want to listen to (in isolation from any other clips).
Do one of the following:
Choose Clip > Solo (or press Option-S).
Click the Solo button in the top-right corner of the timeline.

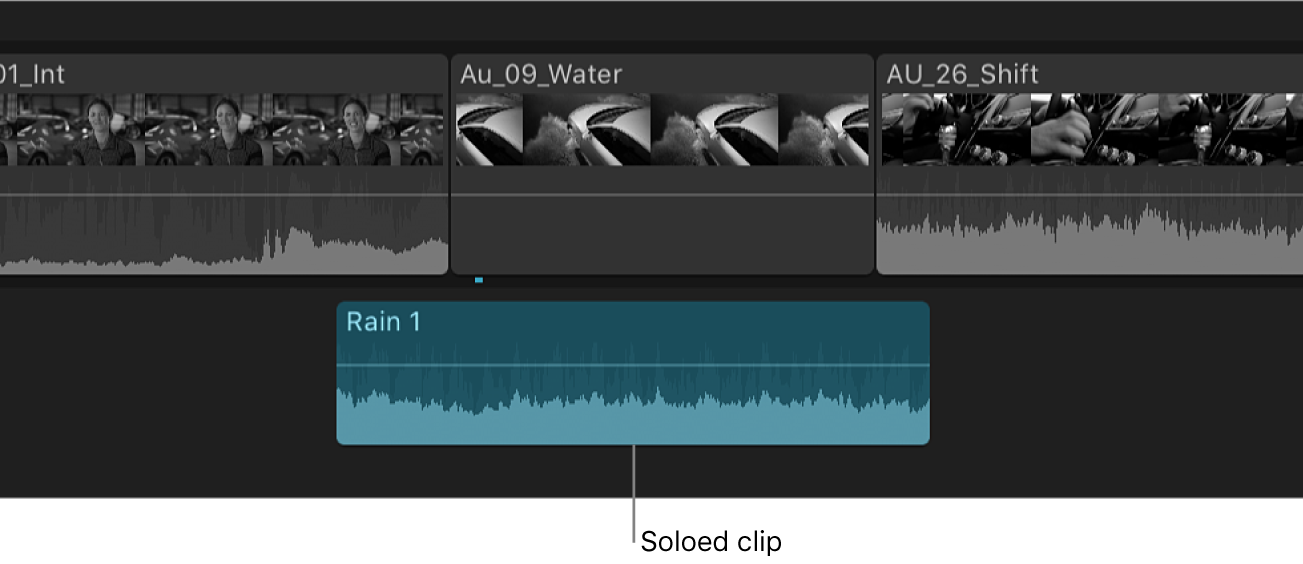
The soloed clip appears highlighted, and other clips appear dimmed.

To turn off solo, click the Solo button, or choose Clip > Solo (or press Option-S) again.
Disable clips or ranges
In Final Cut Pro, select one or more clips in the timeline.
Note: If the selected clips contain both video and audio, and you want to mute the audio only, choose Clip > Expand Audio or Clip > Expand Audio Components, then select the audio portion only (or drag to select a range).
Choose Clip > Disable (or press V).
Disabled clips are both invisible and silent and do not appear in the viewer or in any output. The filmstrips of disabled clips appear dimmed in the timeline.
To reenable the disabled clips, select them in the timeline and choose Clip > Enable (or press V).
Silence clips or ranges
You can silence a selected clip or range. This technique is simply a quick and easy way to adjust the volume.
In Final Cut Pro, select one or more clips in the timeline, or select a range.
Choose Modify > Adjust Volume > Silence (–∞).
The selection is silenced, and the volume control for the clip or range is set to –∞ dB. (You can confirm this level in the Audio inspector.)
To restore the original audio level for the selected clip or range, choose Modify > Adjust Volume > Reset (0dB).
Important: If you import clips with unwanted audio that you will never use, you can ensure the best playback performance by deselecting the audio components of these clips in the Audio inspector. See Disable a clip’s audio.
You can also solo or disable video clips. See Solo or disable clips in Final Cut Pro.
Download this guide: Apple Books | PDF