Prepare your Apple Vision Pro power cable, Audio Strap, or Enclosure for service
Ship your power cable, Audio Strap, or Enclosure
Prepare your Apple Vision Pro power cable
Turn the power cable counterclockwise to remove it from the Audio Strap.
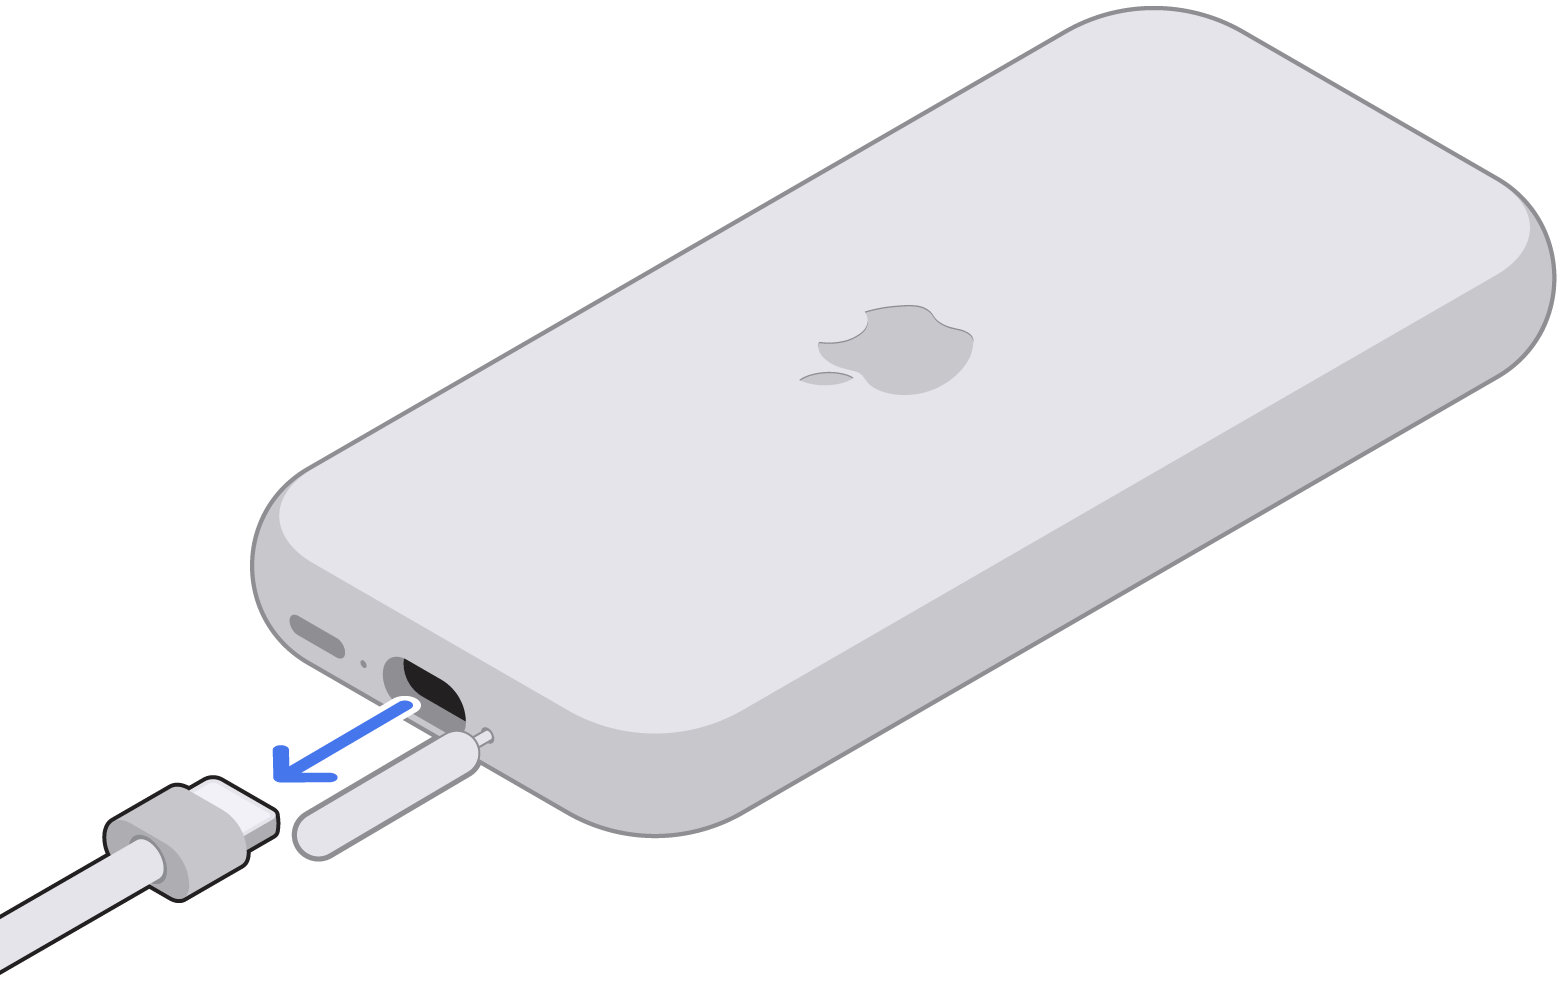
Unplug the USB-C Charge Cable from the battery.
Use the ejector tool included in the box to separate the power cable from the battery:
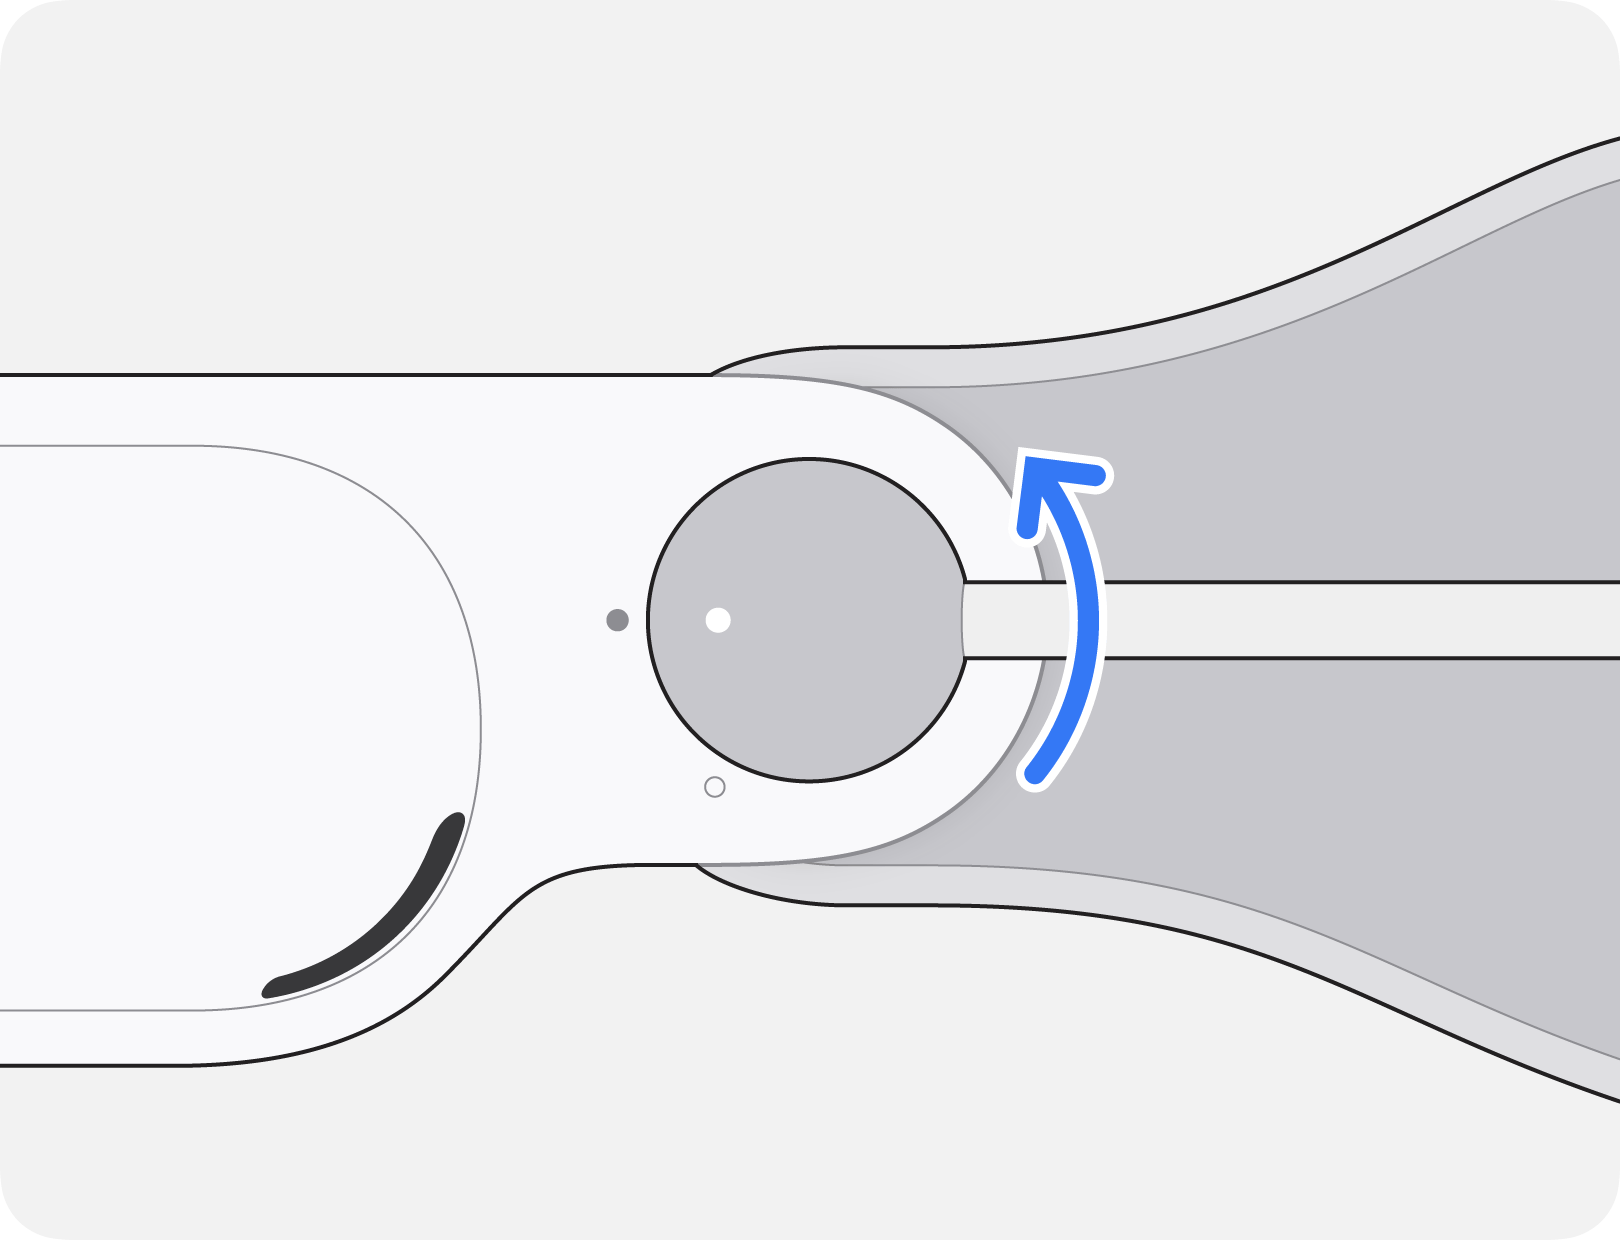
The eject hole is located on the opposite side of the plug as the LED indicator. Insert the tool into the hole.
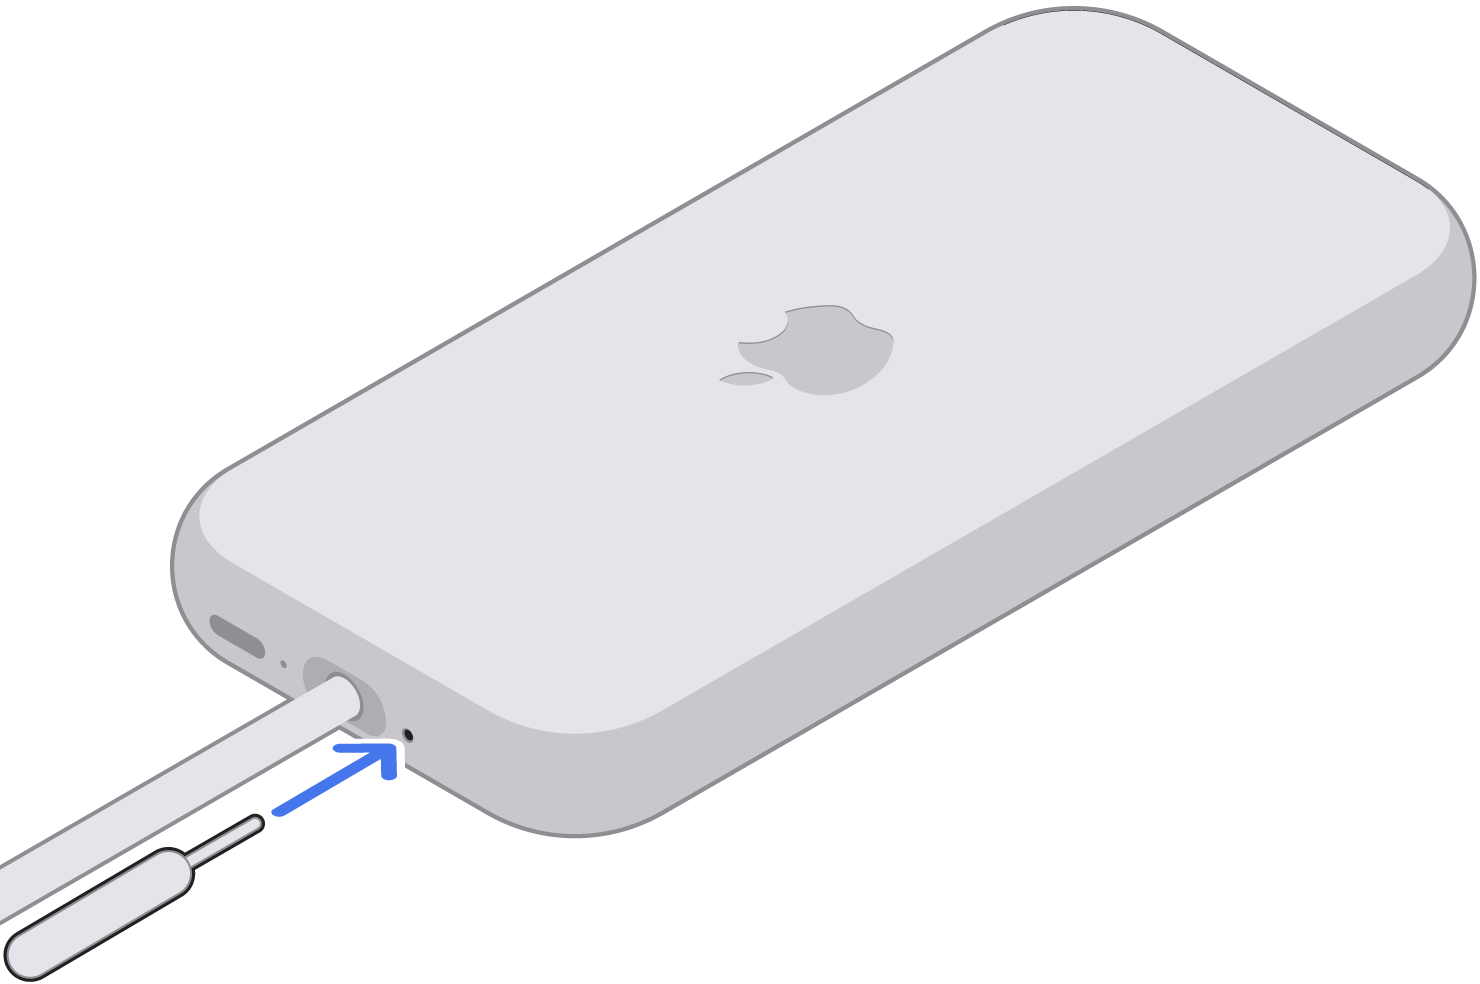
While pushing the extraction tool into the eject hole, pull the cable out. Remove the tool.
Put the power cable into the small box. Place your battery in a safe location. If you include extra items, they won't be returned to you.
Put the small box into the large shipping box and close it.
Seal the box with tape and mail the box to Apple.*
* Apple is not responsible for any damage during shipping.
Prepare your Apple Vision Pro Audio Strap
Place Apple Vision Pro inside its cover.
Turn the power cable counterclockwise to remove it from the Audio Strap.
Remove the head band from your Vision Pro.
Pull the Light Seal and Light Seal Cushion straight off the Enclosure.
If you have ZEISS Optical Inserts, remove your ZEISS Optical Inserts and place them in a safe location. If you're using a screen protector, remove it. Extra items included in the box won't be returned to you.
Place the Enclosure cover glass side-down on a flat surface.
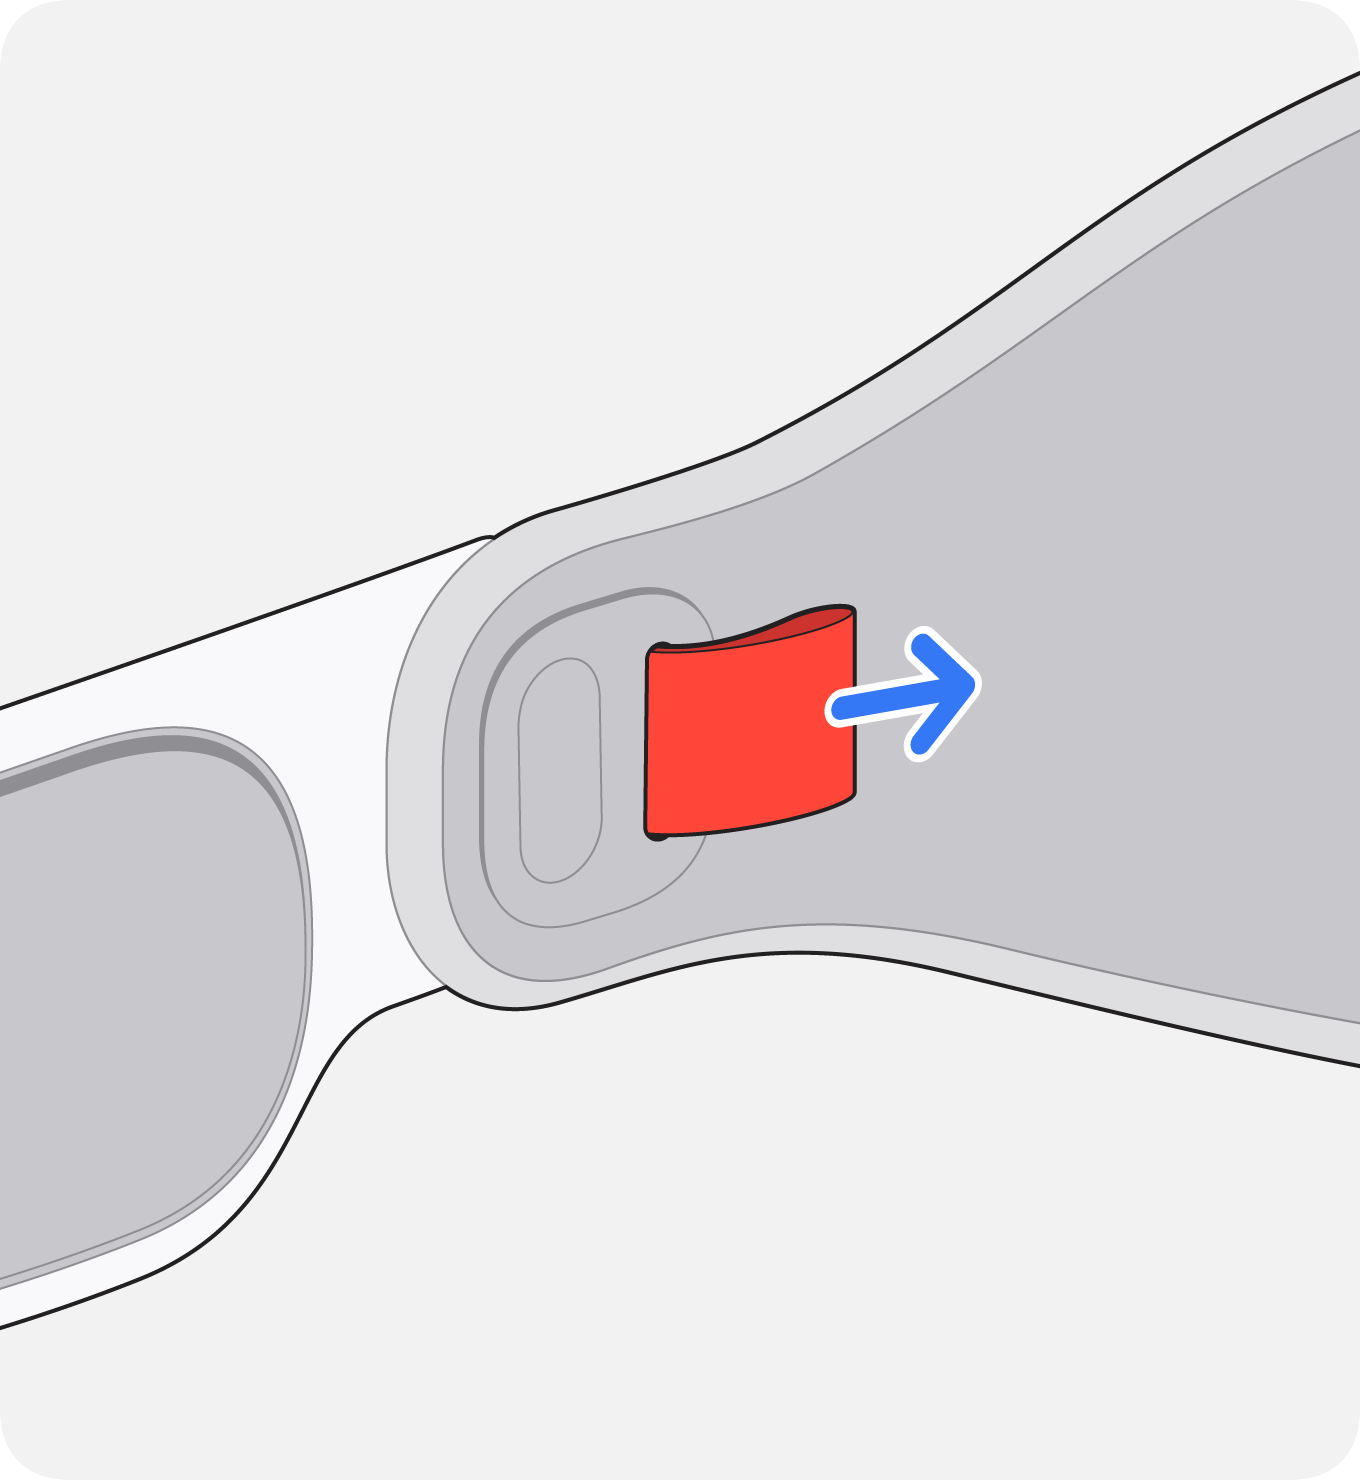
Locate the small eject holes next to each Audio Strap on the inside edge of the Enclosure.
Carefully insert the extraction tool into the eject hole on your Apple Vision Pro. Only use the included extraction tool — do not use a paper clip or SIM eject tool.

Slowly pull the Audio Strap outwards, keeping it straight and aligned, while continuing to press the extraction tool into the eject hole. Don't wiggle the strap or pull it off at an angle.
Remove the extraction tool from the eject hole.
Place both Audio Straps into the molded tray in the smaller box, and put the lid on the box.
Put the small box into the large shipping box and close it.
Seal the box with tape and mail the box to Apple.*
* Apple is not responsible for any damage during shipping.
Prepare your Apple Vision Pro Enclosure
Turn the power cable counterclockwise to remove it from the Audio Strap.
Remove the head band from your Apple Vision Pro and place it in a safe location.
Pull the Light Seal and Light Seal Cushion straight off the Enclosure, then place them in a safe location.
If you have ZEISS Optical Inserts, remove your ZEISS Optical Inserts and place them in a safe location. If you're using a screen protector, remove it. Extra items included in the box won't be returned to you.
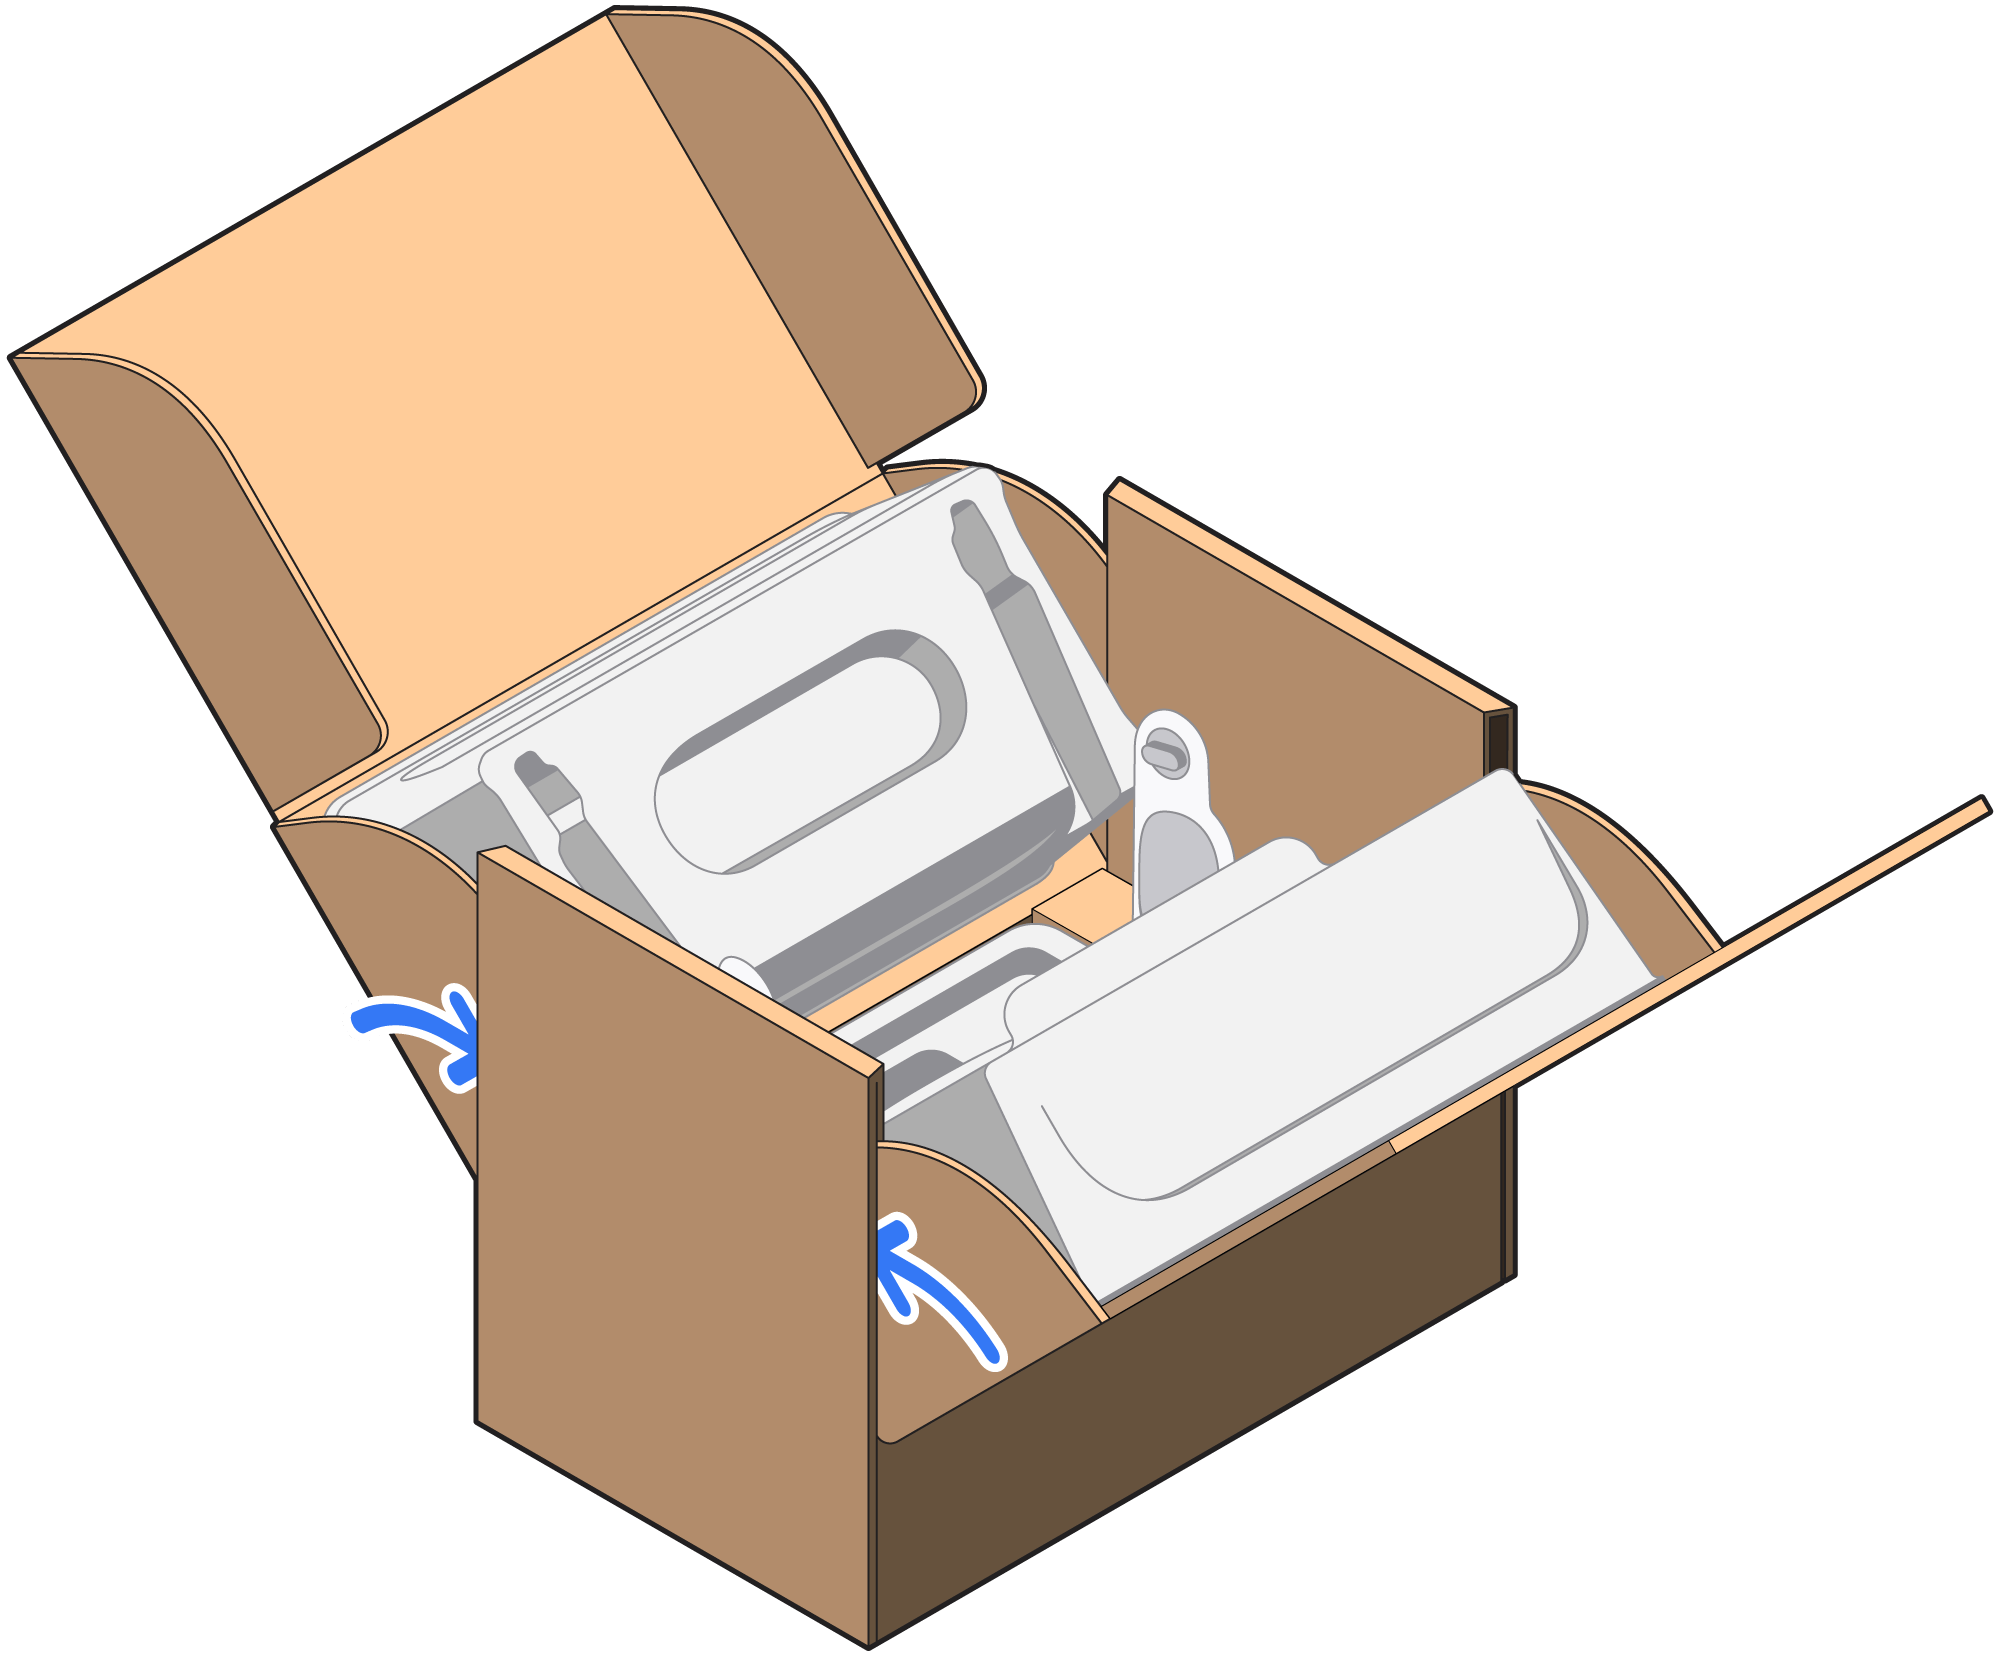
Open the box and set the removable molded inserts, tape, and shipping label aside for now.
Pick up the protective film from the bottom of the box and remove the backing.
Apply the protective film to the cover glass of your Enclosure.
Place the Enclosure cover glass-side down into the tray.

Place the secondary molded tray on top of the Enclosure.
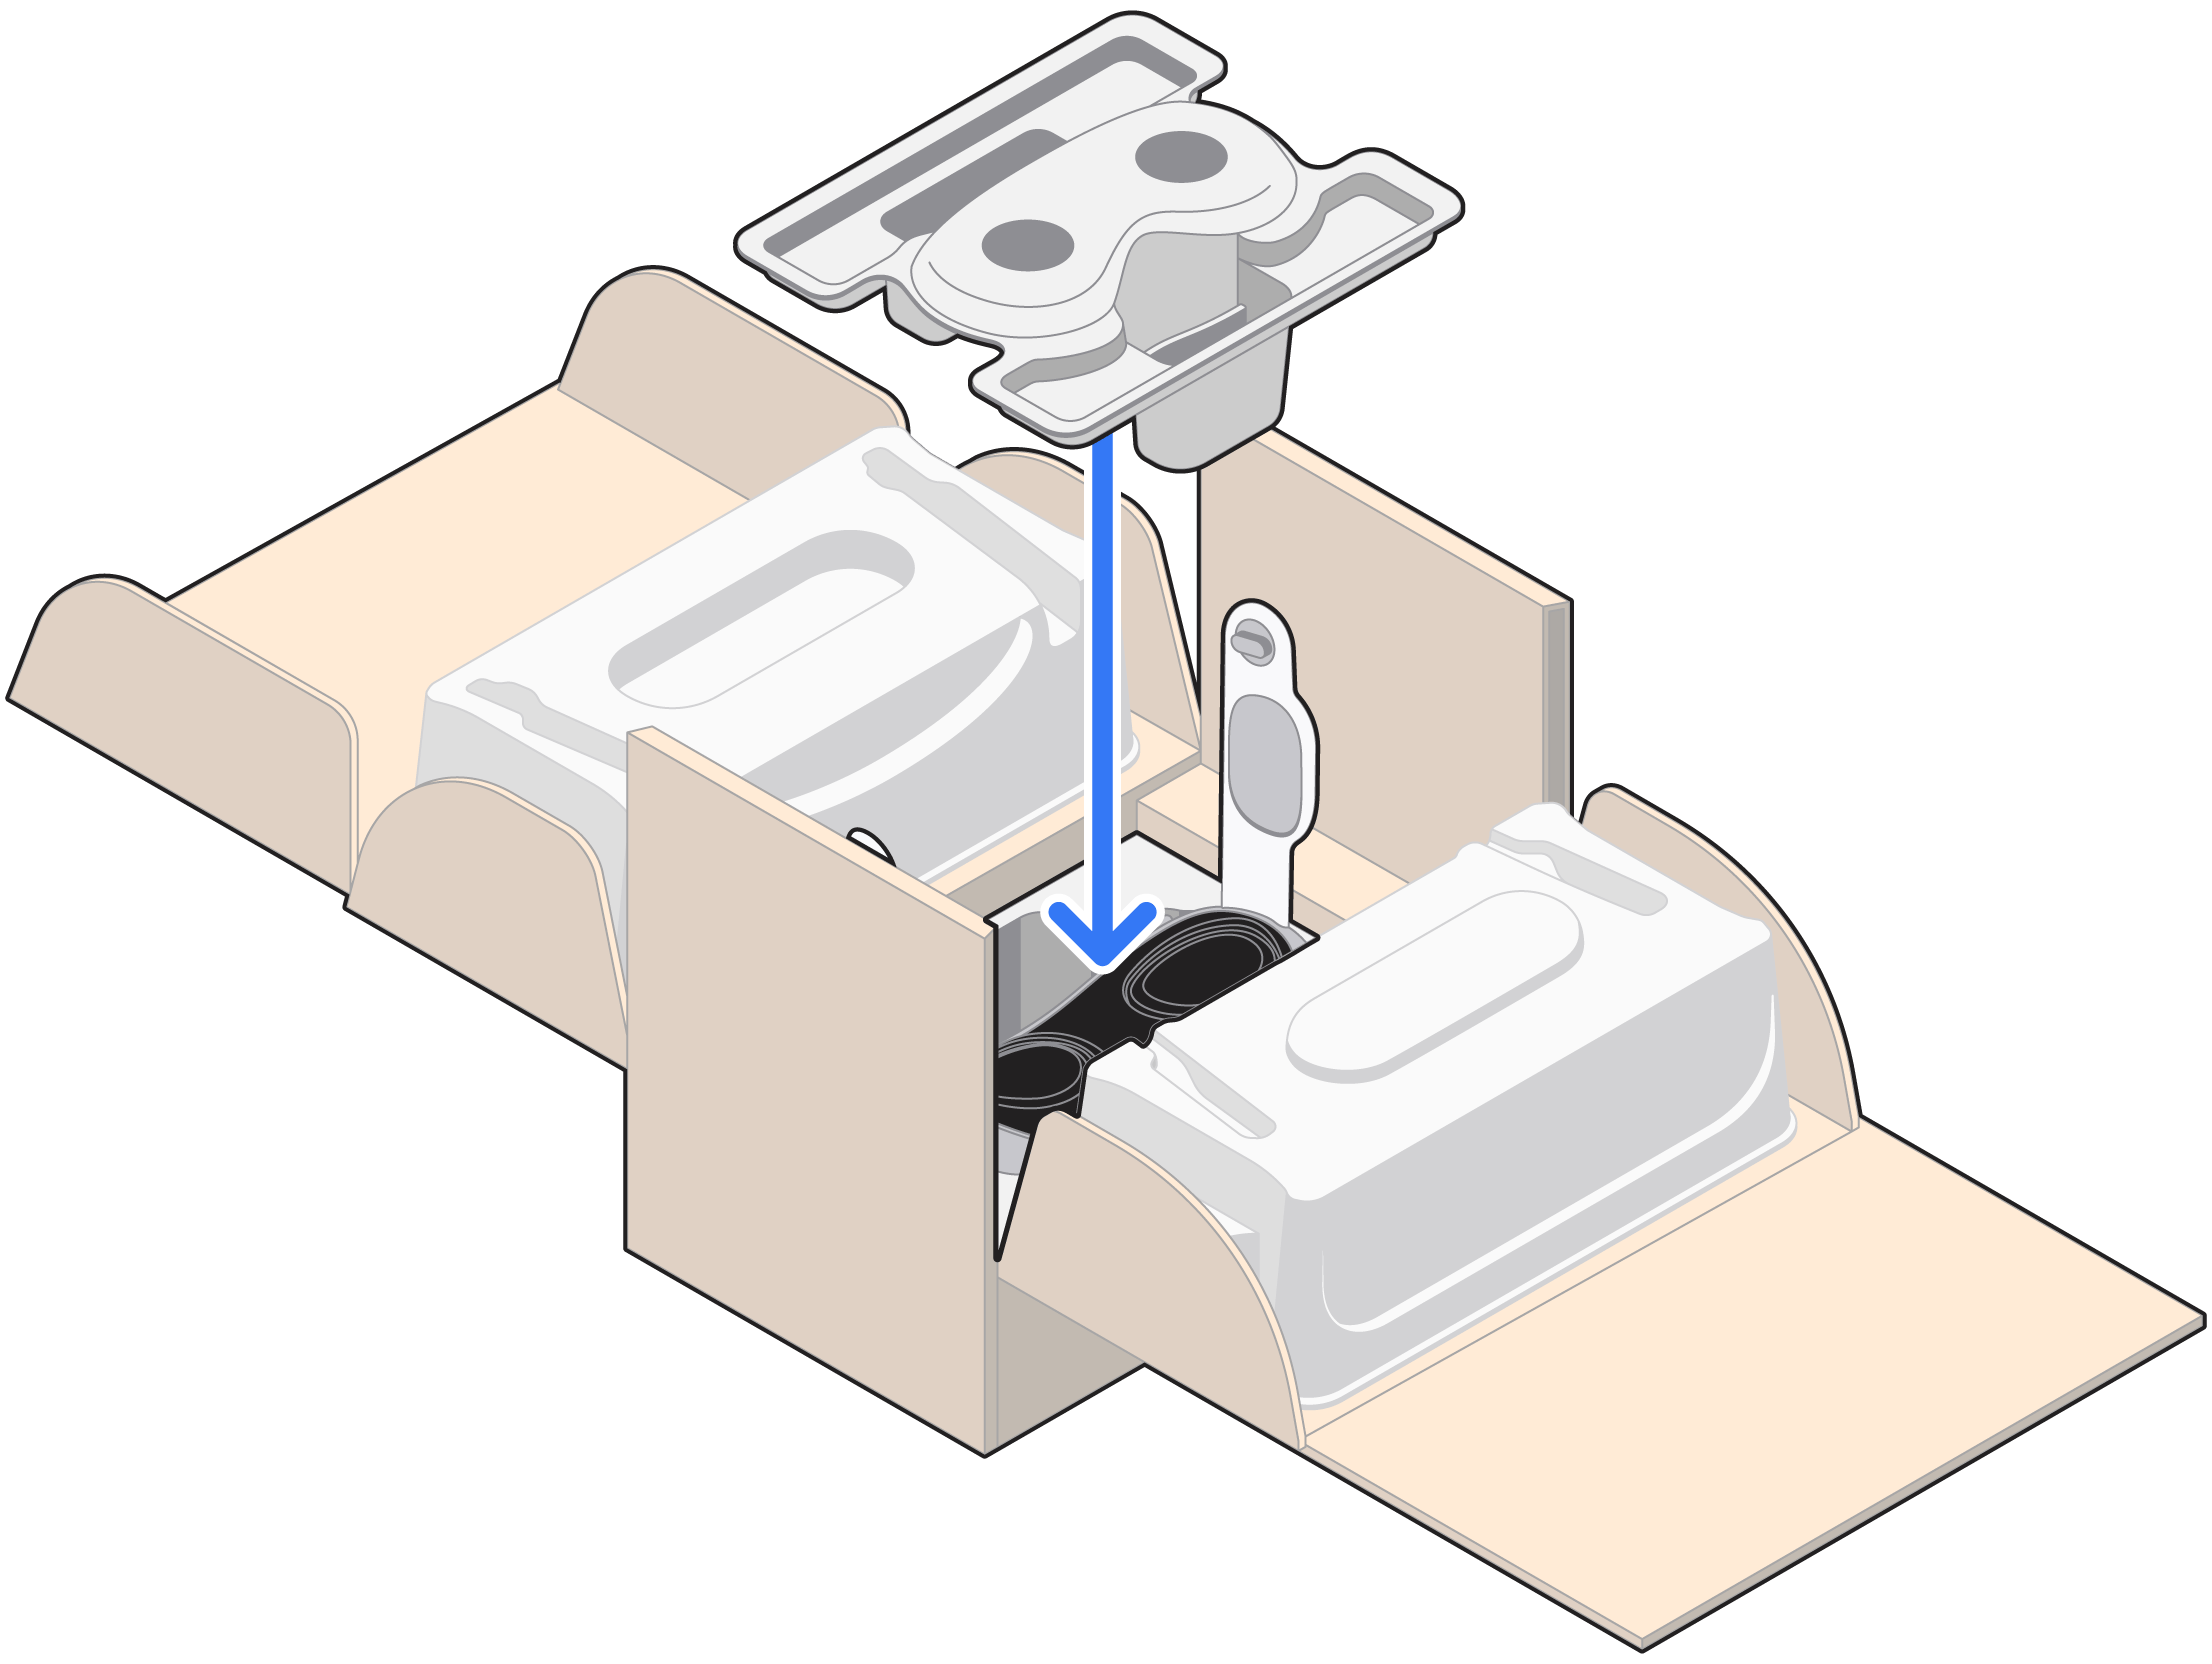
Fold the sides of the box upwards. The molded trays on each side will hold the Audio Straps upright.
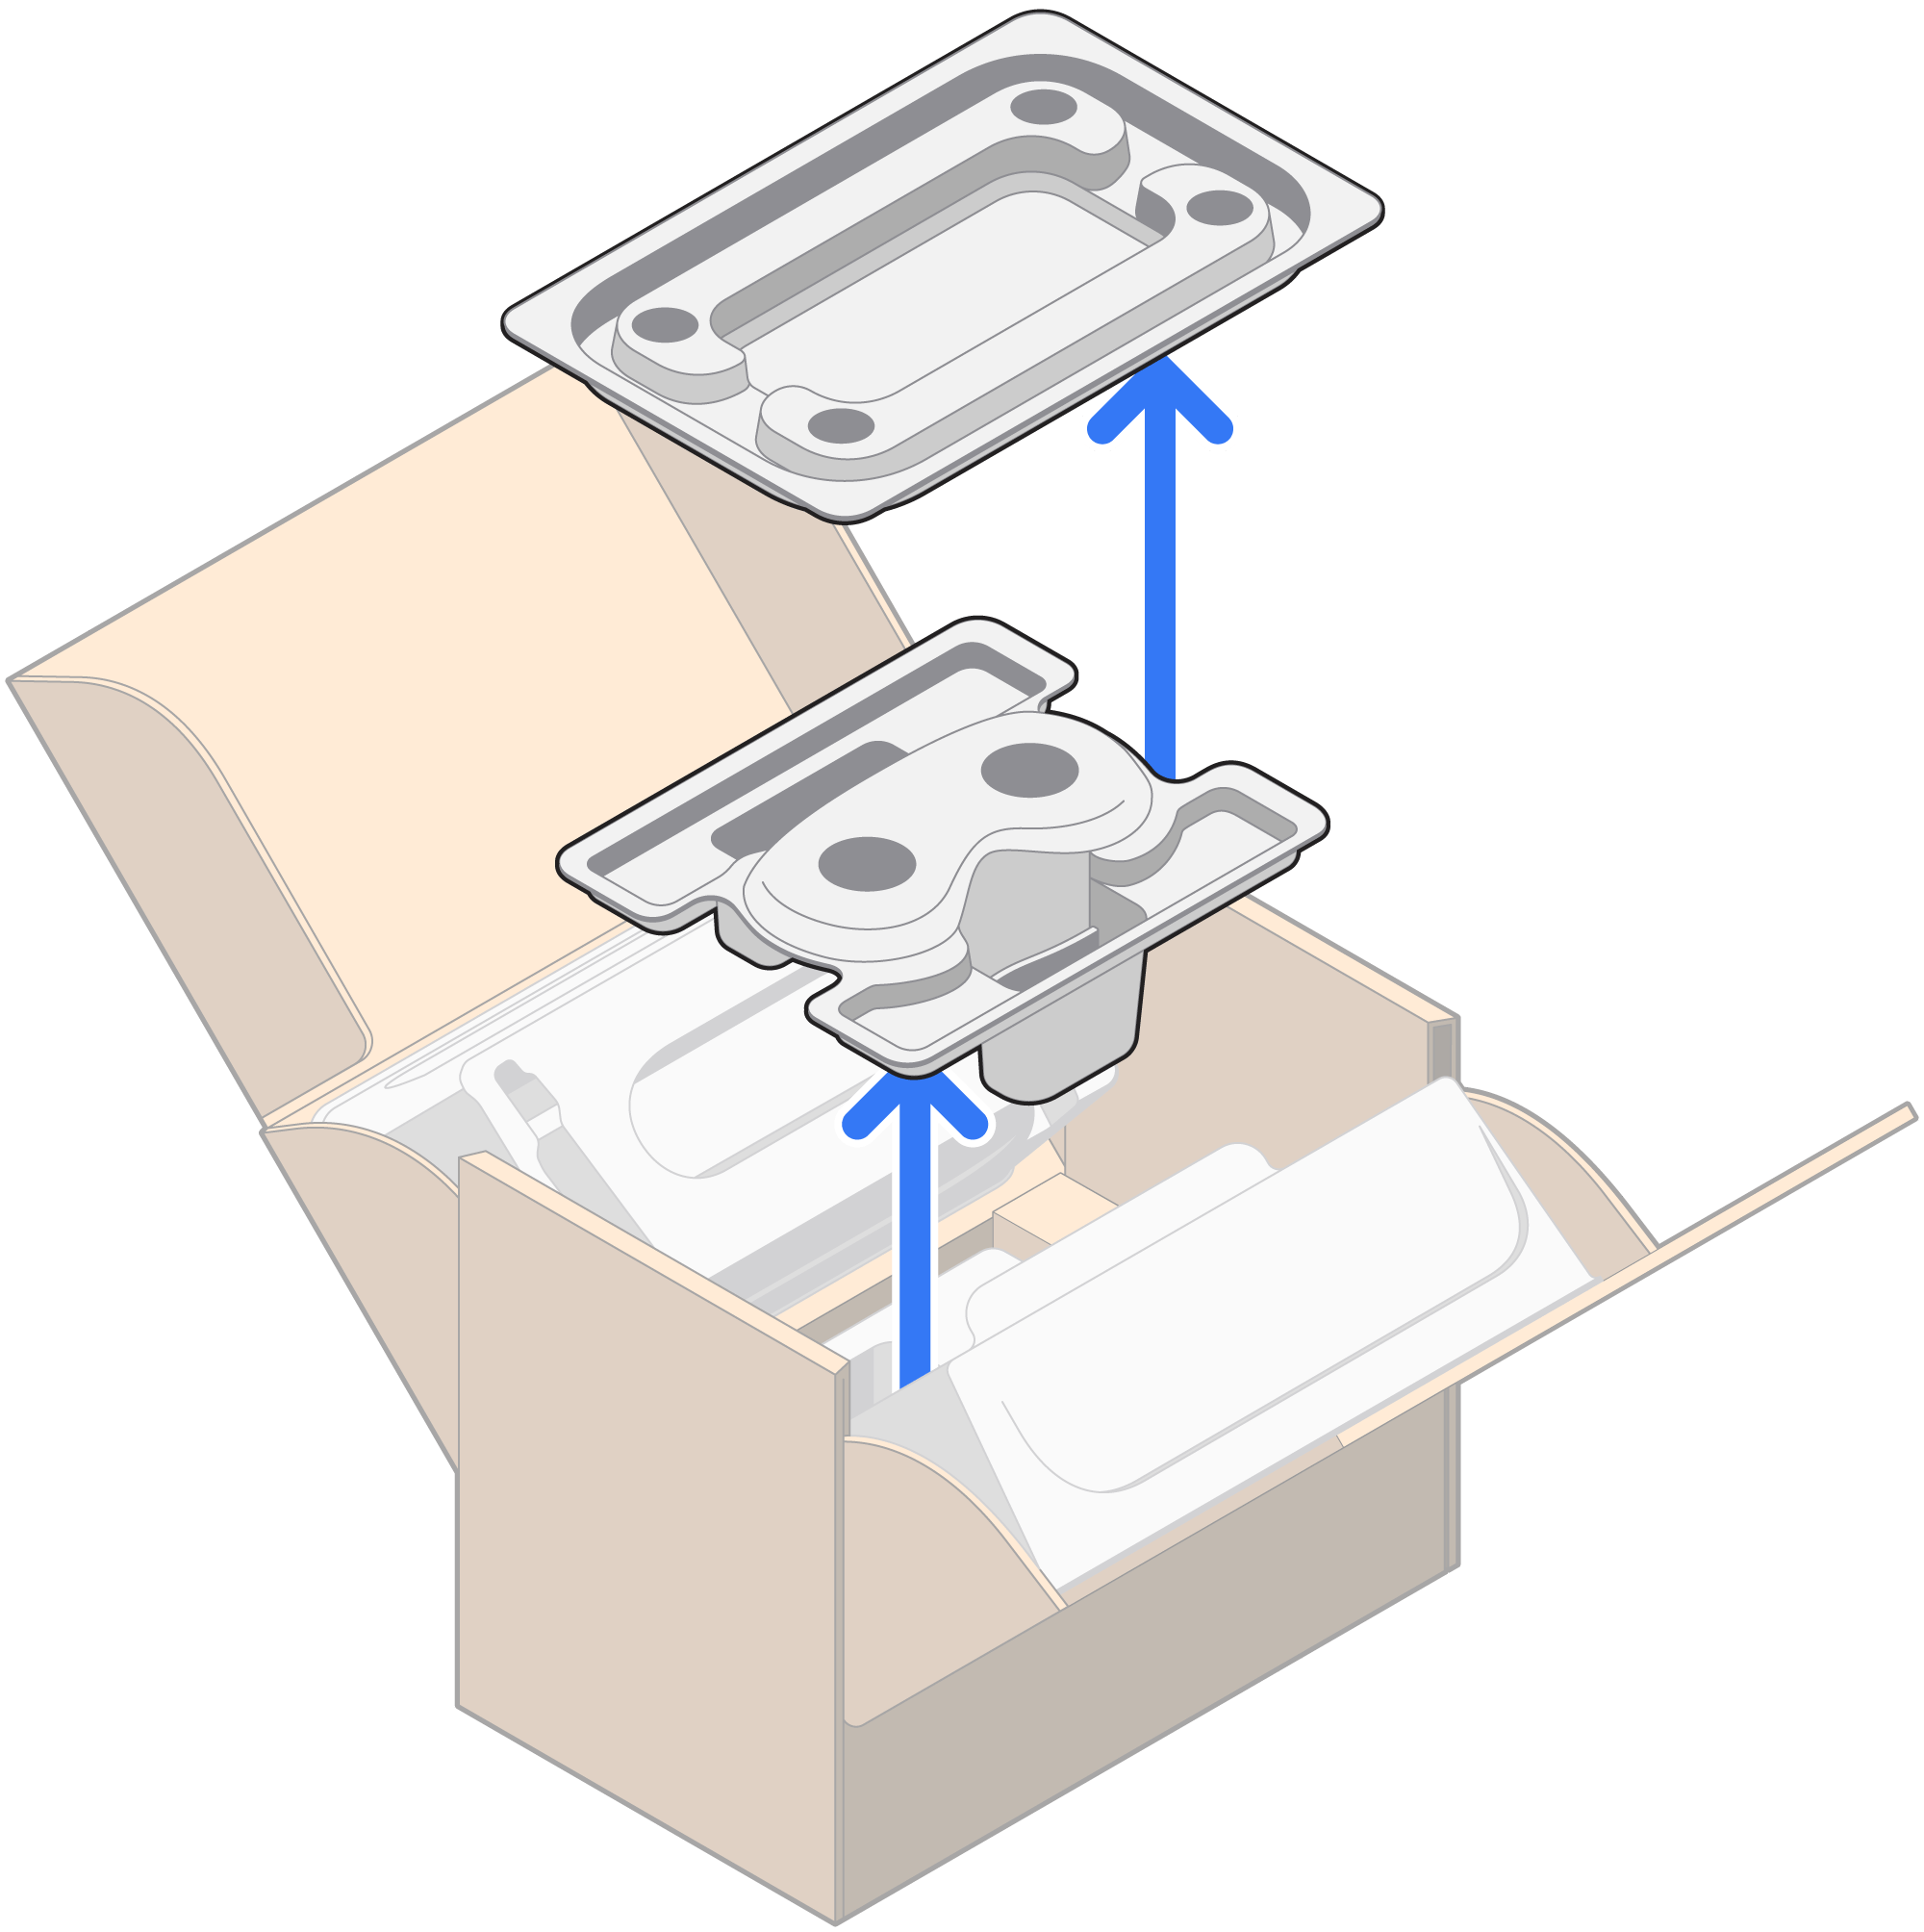
Place the empty tray on top of the inner cartons.
Slide the top flaps into the box and fold down the lid.
Remove the backing from the adhesive strip on the other lid, and fold it down.
Seal the box with the included pieces of tape, apply the shipping label, and mail the box to Apple.*
* Apple is not responsible for any damage during shipping.