Manage students’ app usage with Classroom
You can manage app usage on students’ devices, including opening, locking, and sharing information through various apps.
Open an app on multiple students’ devices
You can open an app on all the students’ devices. To complete this task, each student must have the app on their device.

In Classroom
 , select a class in the sidebar.
Do one of the following:
Select All Students in the sidebar.
Select a specific group in the sidebar.
Manually create a group, then select it in the sidebar.
Click Select in the upper-right corner of the screen, select specific students, then click Done.
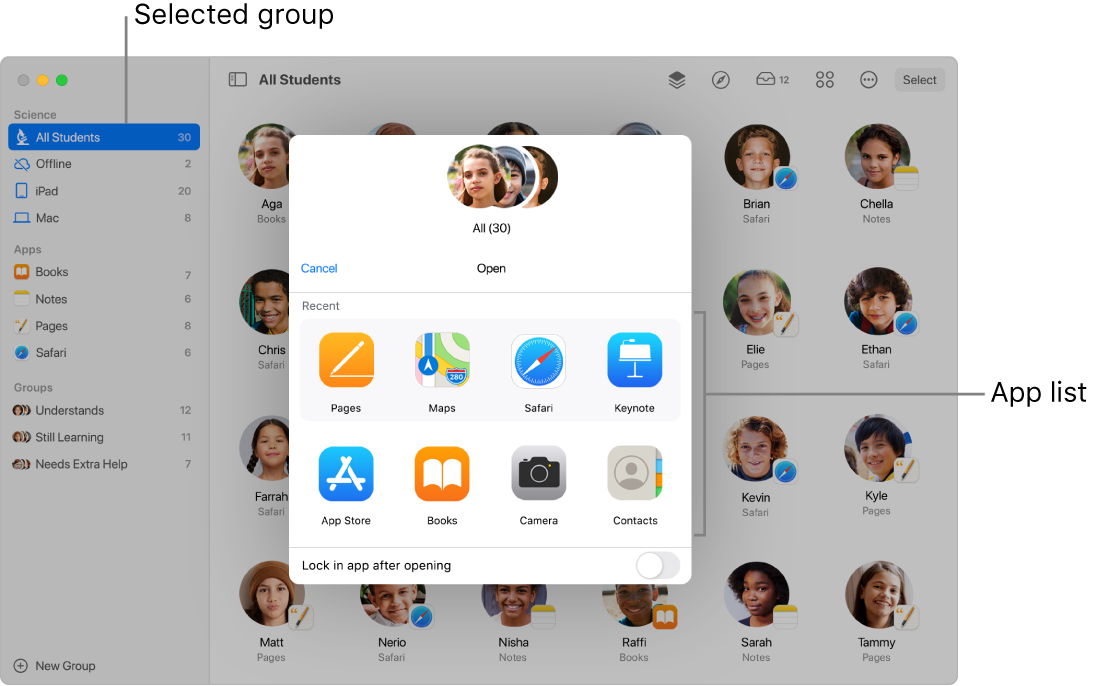
In the row of actions, click Open
 , then do one of the following to open an app on the devices of all selected students:
Select an app in the list.
Enter the name of an app in the search field, then select the app.
You can also choose to open the app on your own device.
Click Done.
Open an app on a single student’s device
You can open an app on a the student’s device. To complete this task, the student must have the app on their device.
In Classroom
 , select a class in the sidebar.
Select the student.
The Actions window appears.
Click Open
 , then do one of the following to open an app on the student’s device:
Select an app in the list.
Enter the name of an app in the search field, then select the app.
You can also choose to open the app on your own device.
Click Done.
Hide open apps on multiple students’ devices
To help keep students on task, you can hide open apps on students’ devices.
In Classroom
 , select a class in the sidebar.
Do one of the following:
Select All Students in the sidebar.
Select a specific group in the sidebar.
Manually create a group, then select it in the sidebar.
Click Select in the upper-right corner of the screen, select specific students, then click Done.
In the row of actions, click the Actions button
 , click Hide
  , then click Done.
Hide open apps on a single student’s device
To help keep a student on task, you can hide open apps on their device.
In Classroom
 , select a class in the sidebar.
Select the student.
The Actions window appears.
Click Hide
 , then click Done.
Lock an app open on multiple students’ iPad devices (nearby classes only)
You can lock an app open on students’ iPad devices and prevent the students from closing the app or opening up any other app. To complete this task, the students must all have the app on their iPad devices.

In Classroom
 , select a class in the sidebar.
Do one of the following:
Select All Students in the sidebar.
Select a specific group in the sidebar.
Manually create a group, then select it in the sidebar.
Click Select in the upper-right corner of the screen, select specific students, then click Done.
In the row of actions, click Open
 , then do one of the following to open that app on the iPad devices of all selected students:
Scroll to locate the app in the list.
Enter the name of the app in the search field.
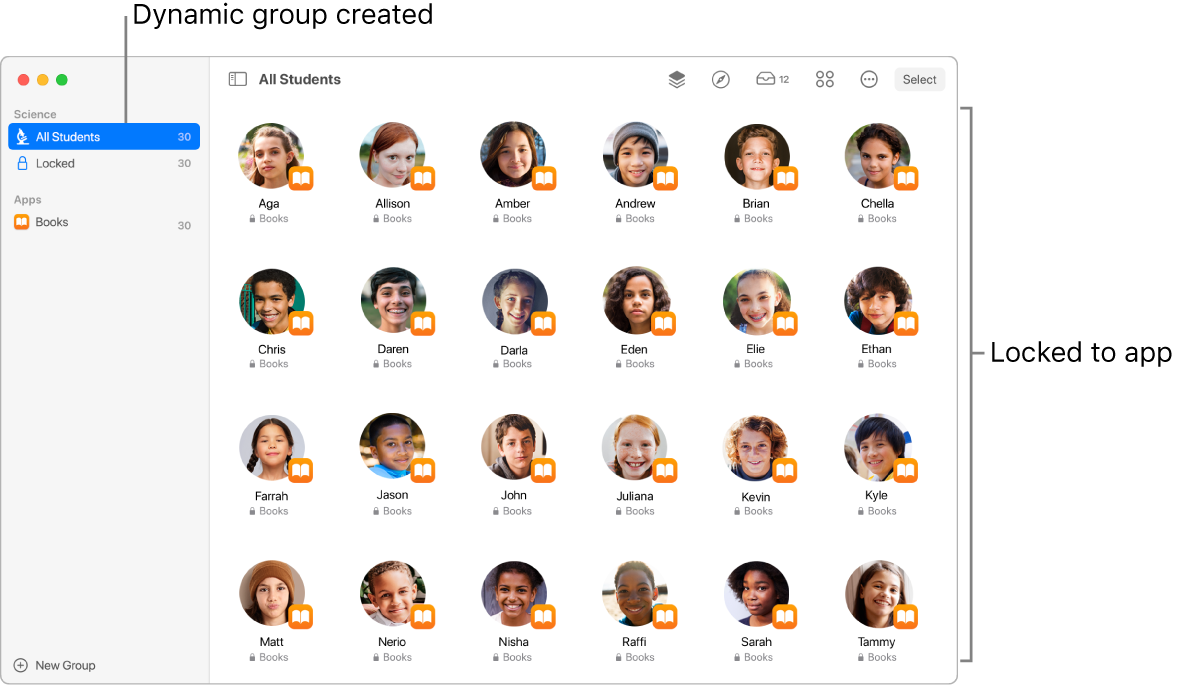
Check the box “Lock in app after opening,” then select the app to open it on the students’ devices.
You can also choose to open the app on your own device.
Click Done.
Lock an app open on a single student’s iPad (nearby classes only)
You can lock an app open on a student’s iPad and prevent the student from closing that app or opening up any other app. To complete this task, the student must have the app on their iPad.
In Classroom
 , select a class in the sidebar.
Select the student.
The Actions window appears.
In the row of actions, click Open
 , then do one of the following to open that app on the student’s iPad:
Scroll to locate the app in the list.
Enter the name of the app in the search field.
Check the box “Lock in app after opening,” then select the app to open it on the student’s iPad.
You can also choose to open the app on your own device.
Click Done.
Unlock multiple iPad devices locked to an app (nearby classes only)
If you locked an app open in a group of devices, you can easily turn off that feature for every iPad in the group. If some students have their devices locked, too, their screens become unlocked and the app you’ve unlocked stays active.
In Classroom
 , select a class in the sidebar.
Select the group that has “Lock in app after opening” enabled.
In the row of actions, click the Actions button
 , click Unlock
  to turn off “Lock in app after opening,” then click Done.
Unlock a single iPad locked to an app (nearby classes only)
If you locked an app open in an iPad, you can easily unlock it. If the student’s device is locked, too, the screen becomes unlocked and the app you’ve unlocked stays active.
In Classroom
 , select a class in the sidebar.
Select the student that has “Lock in app after opening” enabled.
The Actions window appears.
Click Unlock
 to turn off “Lock in app after opening,” then click Done.
Share documents directly from an app
You can also share a document from an app. For example, you can share a document from the Pages app.
In Classroom
 , select a class in the sidebar.
Click the Share menu, then select Send a Copy.
Select AirDrop.
With some apps, you may be able to select a document format.
Click Next, then select a student or group from the list.