Upload photos from your Mac to a website
You can use a web browser to upload photos and videos from your Photos library or a folder on your Mac.
If you need to upload photos or videos from your Mac to a website—such as a social media network or a photo printing service—you have a couple of options. You can upload items from your Photos library, or from any folder on your Mac. These methods work with Safari and other browsers.
How to upload photos and videos from your Photos library
If you have multiple Photos libraries on your Mac, first make sure that you designate a System Photo Library. You can only upload items from your System Photo Library. Then follow these steps:
Click the website's upload button. It might say something like Upload, Add, Select, Browse, or Share. A Finder dialog appears.
In the Finder dialog's sidebar, scroll down to the Media section and select Photos or Movies. The Media Browser shows the photo and video sources on your Mac. The Photos app shows your System Photo Library at the top; if you have libraries from other apps, such as iPhoto or Photo Booth, those also appear.
Click Photos. The Media Browser shows the newest items in your Photos library. If you want to browse your library by Moments, Years, Albums, and more, click the disclosure triangle
 next to Photos.*
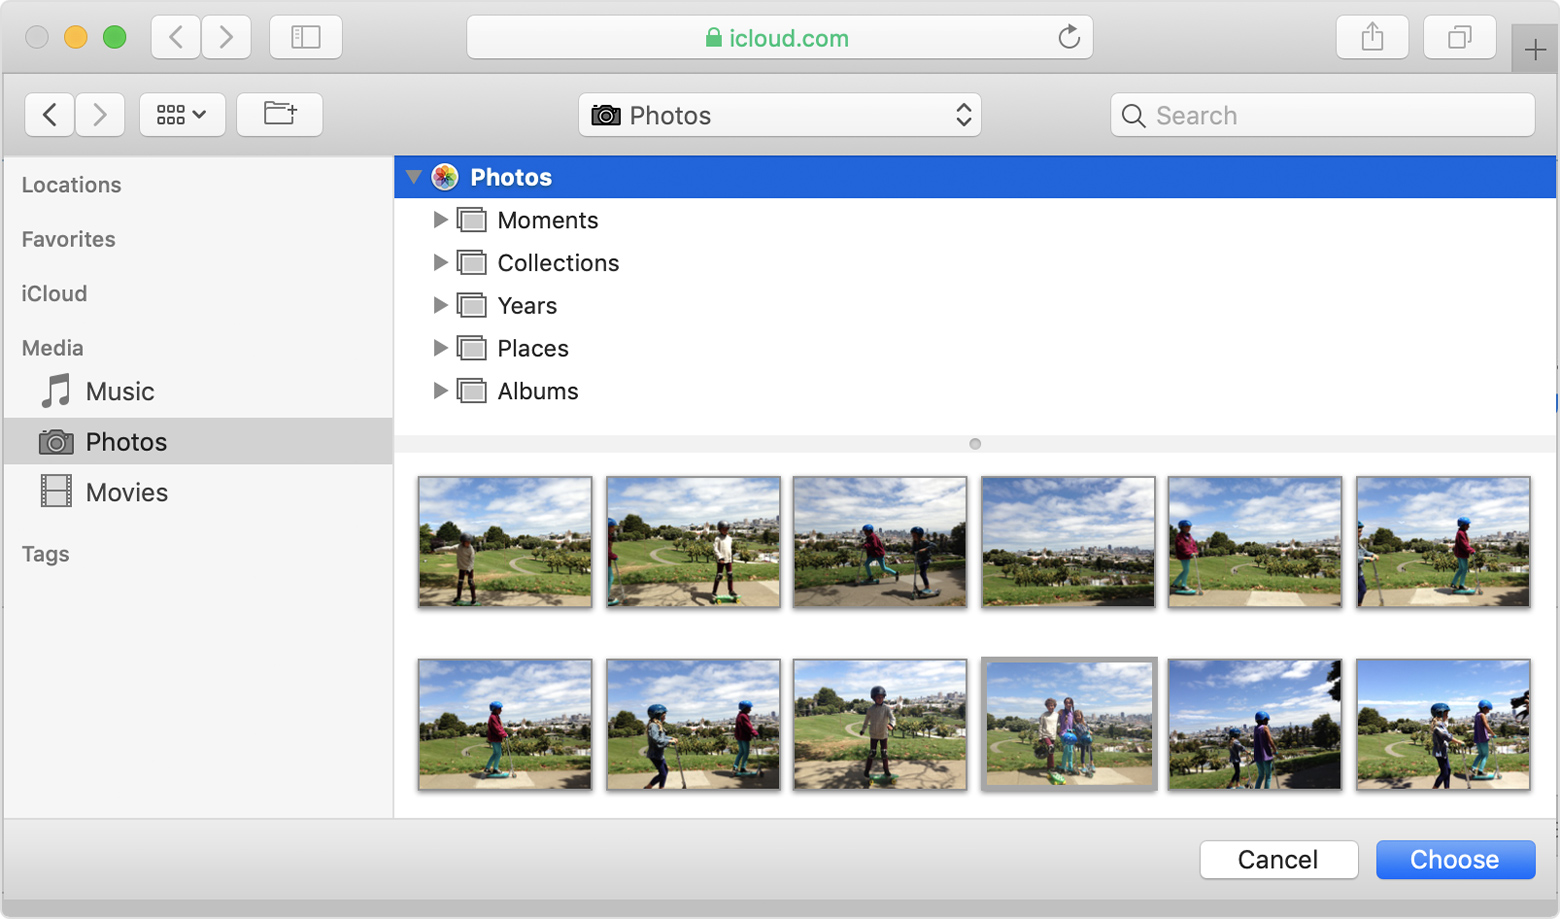
Click the photo or video that you want to upload. To select multiple items, press and hold the Command key while clicking each item.
Press Return, or click the button in the lower-right corner of the dialog (it might be labeled Choose or Open).
After selecting your files, you might need to take more steps within the website to complete its uploading or ordering process.
* If you have iCloud Photos turned on with the Optimize Mac Storage preference enabled, you might not see all your photos in the Media Browser.
How to upload photos and videos from a folder on your Mac
Click the website's upload button. It might say something like Upload, Add, Select, Browse, or Share. A Finder dialog appears.
Use the Finder dialog to navigate to the folder that contains your files. You can also use the Search field to find files or folders.
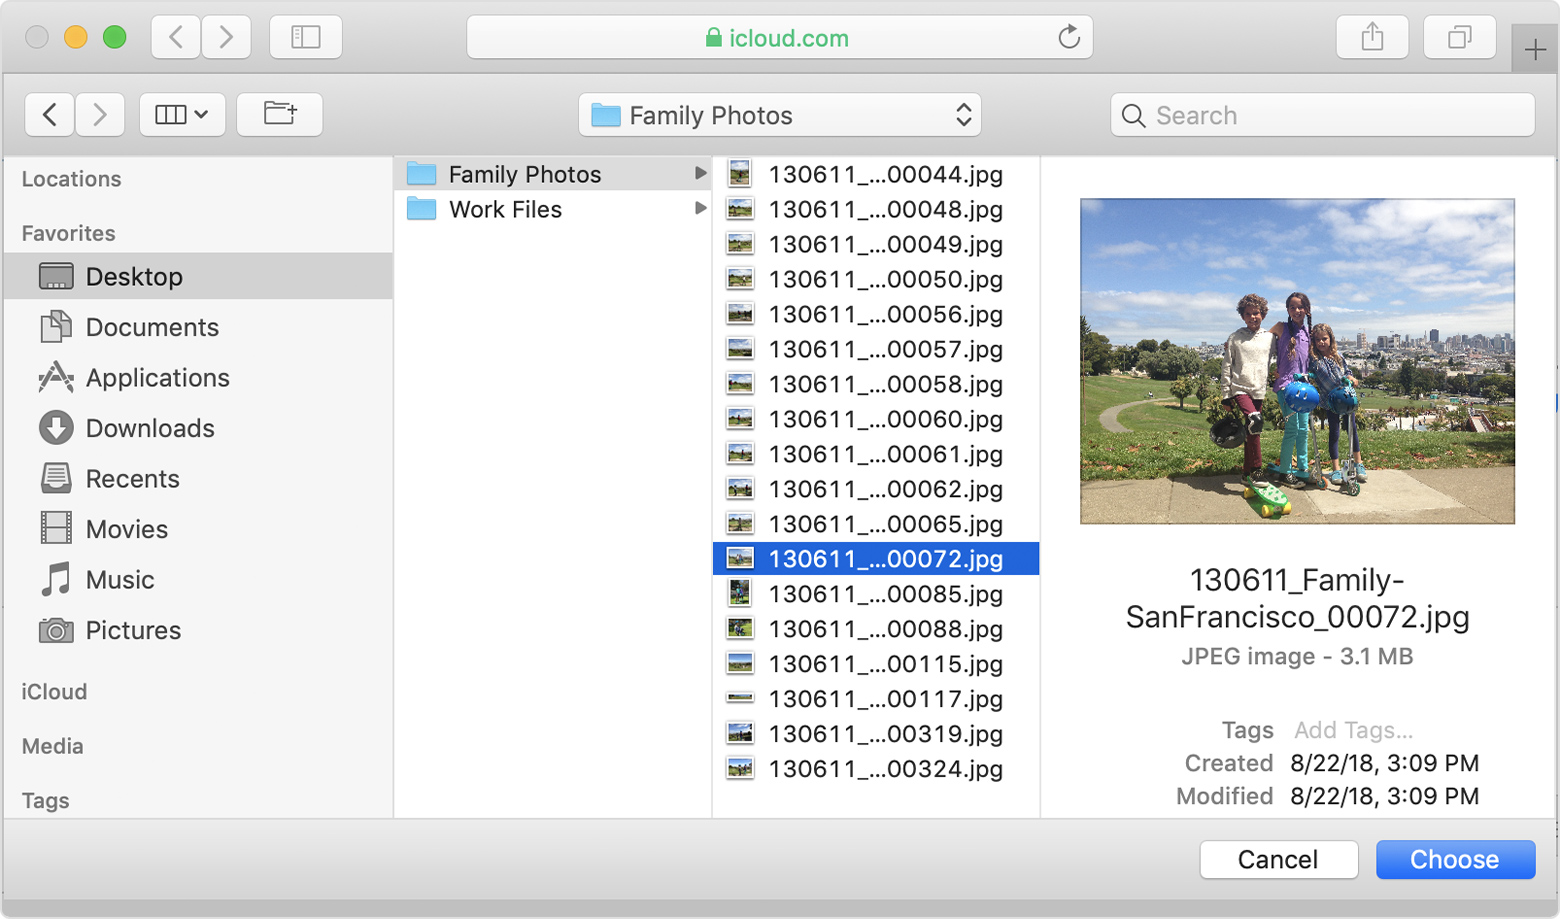
Click the photo or video that you want to upload. To select multiple items, press and hold the Command key while clicking each item.
Press Return, or click the button in the lower-right corner of the dialog (it might be labeled Choose or Open).
After selecting your files, you might need to take more steps within the website to complete its uploading or ordering process.
Learn more
You can also use Project Extensions to create and order print products, all from within the Photos app.
Information about products not manufactured by Apple, or independent websites not controlled or tested by Apple, is provided without recommendation or endorsement. Apple assumes no responsibility with regard to the selection, performance, or use of third-party websites or products. Apple makes no representations regarding third-party website accuracy or reliability. Contact the vendor for additional information.