Create sampler instruments with Sampler in Logic Pro for Mac
With Sampler in Logic Pro 10.5, quickly create your own expressive and unique sampler instruments by simply dragging samples to the Navigation Bar, which intelligently analyzes the samples and automatically maps them to keys.
You can still manually create sampler instruments the same way you could with EXS24—by creating zones and dragging or assigning files to them. You can also use Sampler to open and play the sampler instruments included with Logic Pro, as well as open and and edit custom sampler instruments you created with EXS24.
If you only want to work with one audio file like a drum loop, vocal part, or drum sound, try Quick Sampler, also included in Logic Pro 10.5.
Quickly create a sampler instrument
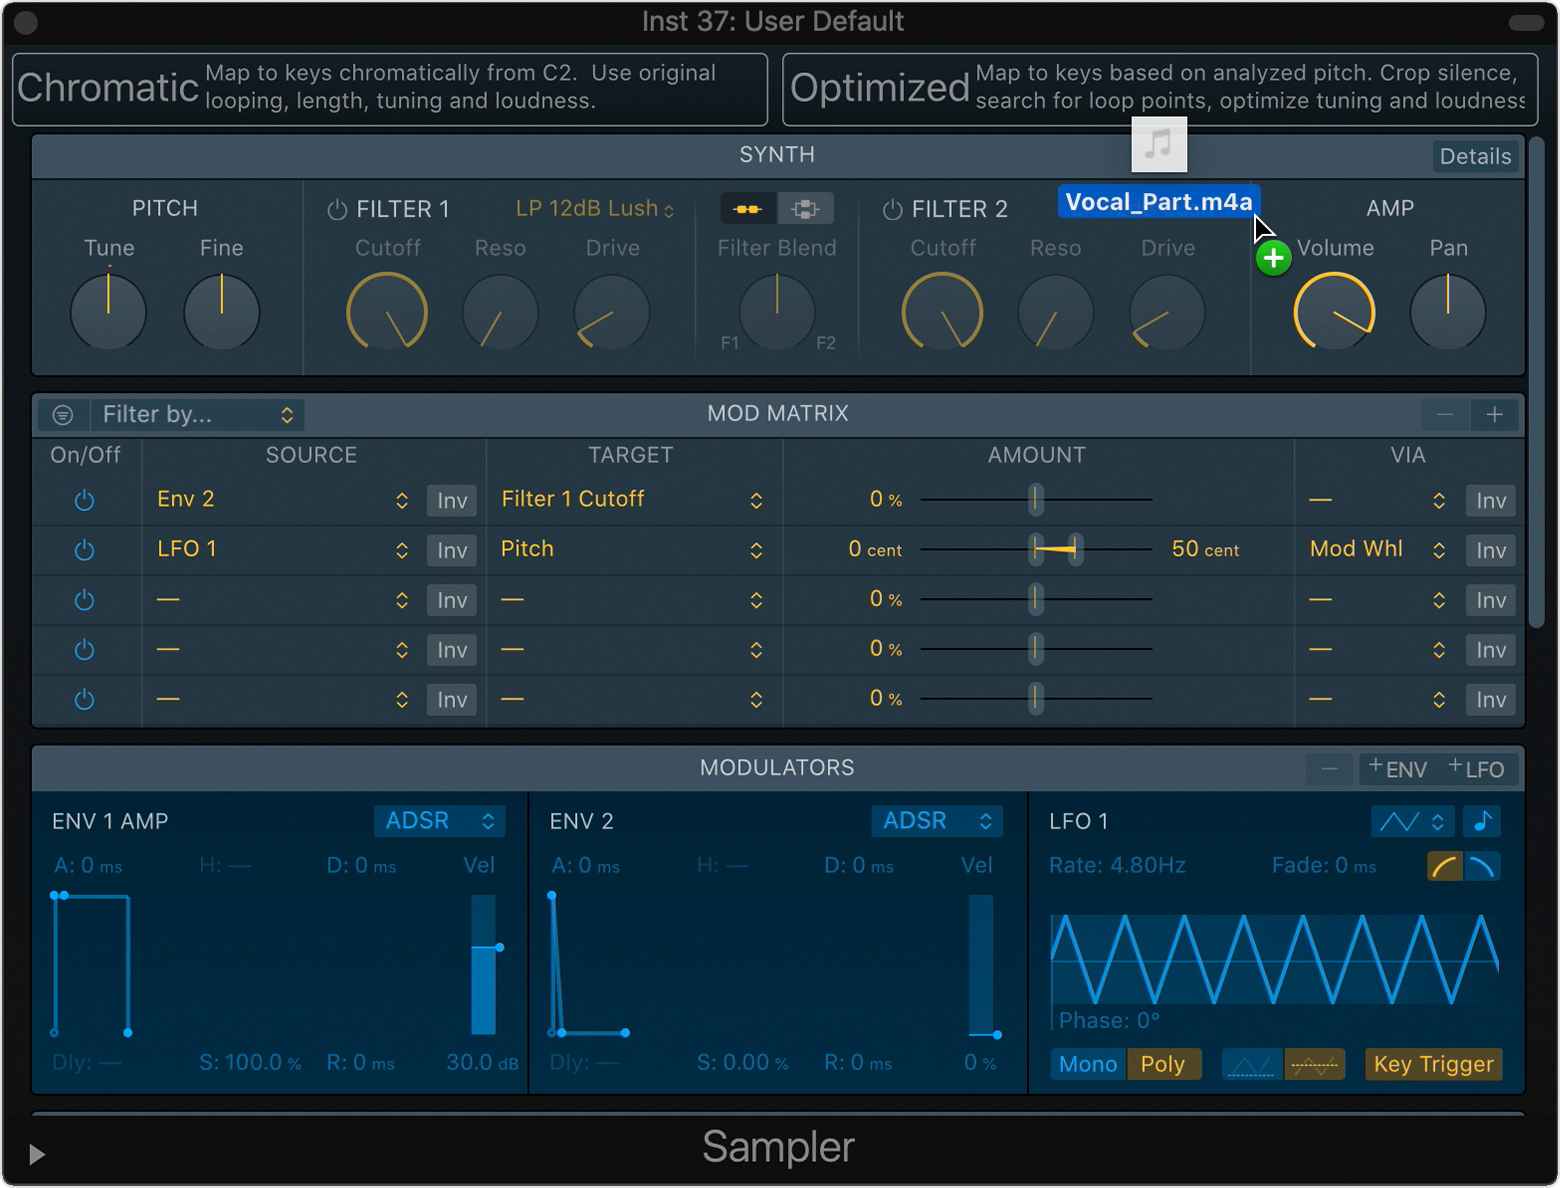
To quickly create a sampler instrument, just drag one or more samples to the Navigation Bar in Sampler. Sampler analyzes the samples, creates zones containing the samples, and then maps the zones to keys. To get started, create an Instrument track with Sampler:
Create a software instrument track with Sampler as the instrument. To make sure you have an empty sampler, don’t load a sampler instrument from the library.
Click the Sampler in the Instrument slot in the channel strip to open the Sampler window.
Drag samples from the Logic Pro browsers, the Finder, a region or cell, or even from a marquee selection on a region to one of the import options in Navigation Bar:
To make an instrument from multiple samples of pitched instrument notes, such as samples of different notes of the same piano, or if you have a single sample that has multiple notes in it like a vocal sample or a bass line, choose an Optimized drop zone.
If you have multiple samples of sounds that don't have a particular pitch that you want assigned to MIDI notes, like drum samples, choose a Chromatic drop zone.

You can also quickly create a sampler instrument by dragging audio files to the track header.
Use Optimized to create an instrument
The Optimized setting automatically determines the root notes of the zones and maps the zones across the keyboard. If there are multiple zones with the same root note, Sampler creates velocity layers—a different sample is triggered depending on how hard you strike the key—based on the perceived loudness of the samples. Sampler finds loop points, balances the volume levels of the zones based on their loudness, and automatically crops the zones. Choose the Optimized drop zone that works best for the samples you're using:
With Zone Per File, Sampler analyzes the pitch and places the samples on the right keys. If you add samples of the same pitch with different velocities, Sampler creates velocity zones. Use this if you're adding multiple samples of pitched instrument notes.
With Zone Per Note, Sampler creates a zone for each pitched note (of sufficient duration and harmonicity) detected in the file, and maps them to the right key. Use this if you have a single sample that has multiple notes in it like a vocal sample or a bass line, and you want each note in the sample on its own key.
Use Chromatic to create an instrument
When you drag a Chromatic option, Sampler chromatically maps samples as zones across the keyboard range, starting from C2. Each zone is mapped to a single key on the keyboard. The original file length, tuning, and volume are used. Looping data is read from the file header, if present. Choose the Chromatic drop zone that works best for the sample you're using:
With Zone Per File, Sampler creates one zone for each sample dropped on the dropzone, in one group.
With Split at Silence, Sampler creates a new group for each sample dropped on the dropzone. Each sample is split at extended periods of silence, with a zone created in the associated group for each of these segments.
Edit groups and zones
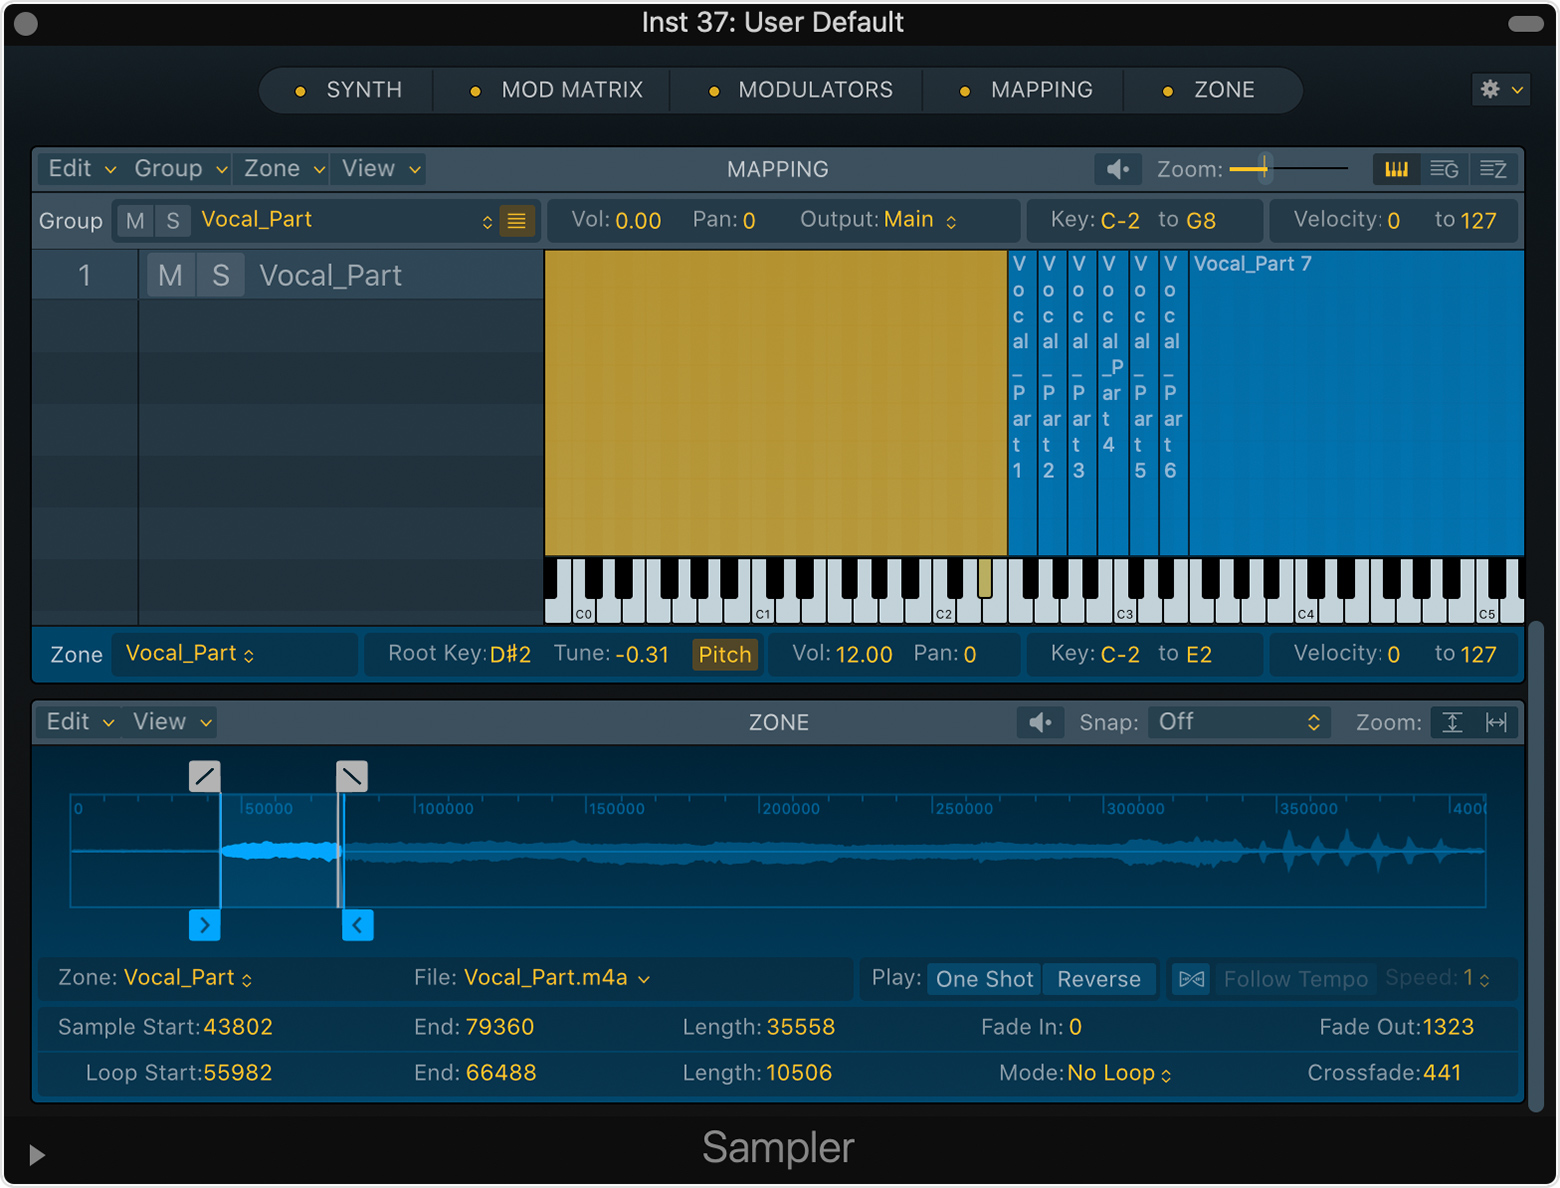
After you've created your sampler instrument, you have full access to edit functions in Sampler. Click Mapping in the Sampler toolbar to see and adjust how samples are mapped to keys. You can double-click Mapping to maximize the Mapping pane.

In the Mapping pane, use the keyboard view to graphically edit zones and groups. Or use the zone view to edit zones numerically in a table. You can also create empty zones and add samples to them, add multiple samples at once, and more. Click the Zone pop-up menu on the Mapping pane toolbar to access functions like auto-mapping, auto-looping, and more.
Set start and end markers, set loop points, and more
To set start and end markers, add fade ins and fade outs, set loop points, add loop crossfades, and more without leaving the Sampler, click Zone in the Sampler toolbar. In the Zone pane's waveform display, zoom in or out with pinch gestures, or scroll the waveform display using two-finger swipes or by dragging the scroll bar. You can use single-finger swipes if you're using a Magic Mouse.
To edit the sample in the Logic Pro Audio File Editor (or an external editor), Control-click the waveform display and choose Open in Audio File Editor.
Process your instrument
You can process your entire instrument using Sampler's powerful built-in synthesizer, mod matrix, and modulators.
Click Synth in the toolbar to control global and filter settings for the entire loaded sampler instrument. Click the Details button at the top right of the Synth pane to view or hide the Synth Details slide-out pane, which provides additional parameters.
Click Mod Matrix in the toolbar to route any modulation source to any modulation target. You can use up to twenty modulation routings simultaneously. Learn more.
Click Modulators in the toolbar to access the four identical LFOs (low frequency oscillators), which you can use to control and add animation to your instruments. All LFOs are available as sources and targets in the Mod Matrix pane. Learn more about Sampler's LFOs.
Open and play a built-in instrument
Logic Pro includes a large library of pre-designed sampler instruments like acoustic pianos, basses, strings, and horns, which you can play and record with Sampler.
In your project, create a new software instrument track.
In the new tracks dialog, click the Details triangle to open the bottom of the dialog, then choose Sampler from the Instrument pop-up menu.
Click the in the toolbar, then choose a sampler instrument to load. Or click the Sampler in the Instrument slot in the channel strip to open the Sampler window, then choose an instrument from the pop-up menu at the top of the Sampler window.
Play your sampler instrument with musical typing or a connected USB or MIDI keyboard.
Open an EXS24 sampler instrument
If you created custom sampler instruments using the EXS24 sampler, you can open them in the Sampler, play them, and edit them in the new interface. Any zones and groups you created transfer as you created them in EXS24. Parameters like playback mode, pitch, and velocities all transfer as well.
To load a sampler instrument created with EXS24, simply load the instrument from the Library or from the pop-up menu at the top of the Sampler window. Sampler uses the same file extension as the EXS24 (.exs) and stores custom software instruments in the same default location as the EXS24 (~/Music/Audio Music Apps/Sampler Instruments). If you have a large library of custom sampler instruments, you can use Search Filter to find particular software instruments.
Need more help?
Tell us more about what's happening, and we’ll suggest what you can do next.
