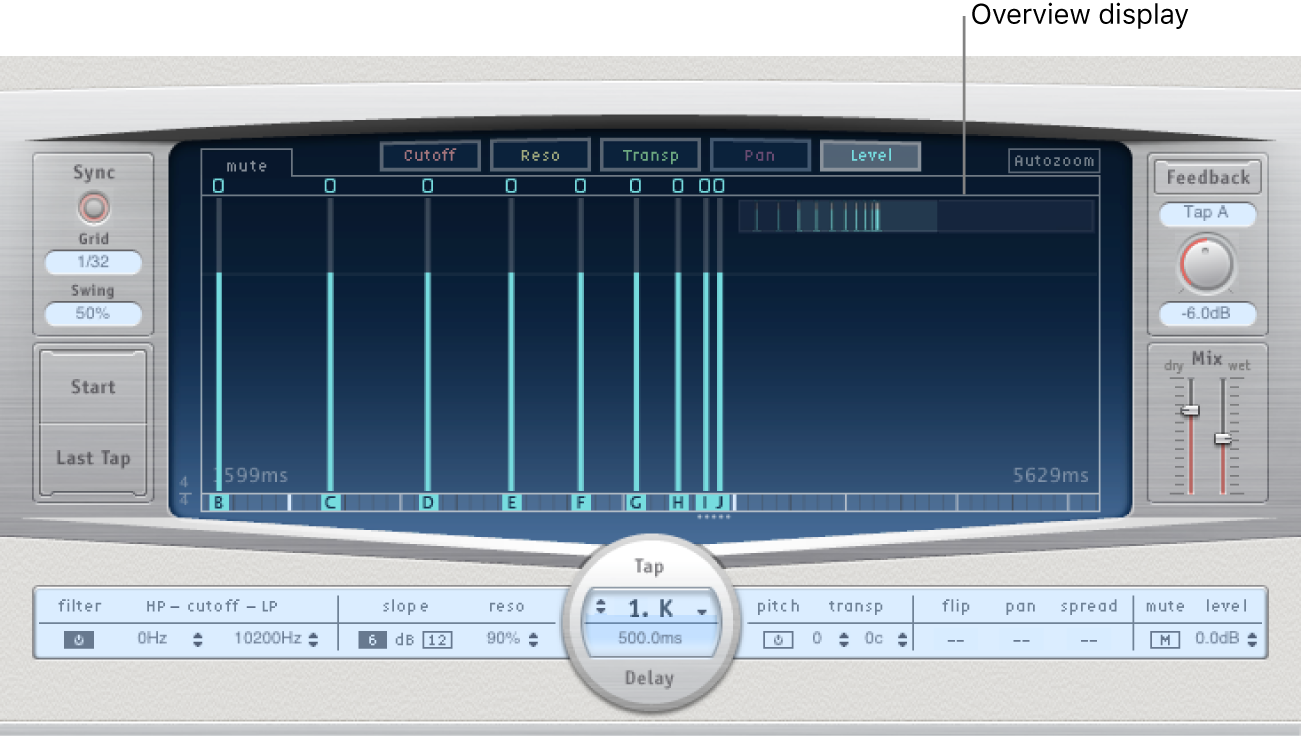
Navigate the Delay Designer Tap display in Final Cut Pro
You can use Delay Designer’s Overview display to zoom and navigate the Tap display area.

Tip: If the Overview display is hidden behind a tap, you can move it to the foreground by holding down Shift.
Zoom the Tap display
In the Final Cut Pro timeline, select a clip with the Delay Designer effect applied, then open the effect’s settings in the Audio inspector.
For information about adding the effect and showing its controls, see Add Logic effects to clips in Final Cut Pro.
Do one of the following:
Vertically drag the highlighted section (the bright rectangle) of the Overview display.

Horizontally drag the highlighted bars—to the left or right of the bright rectangle—in the Overview display.

Note: The Autozoom button needs to be disabled when manually zooming with the Overview display. When you zoom in on a small group of taps, the Overview display continues to show all taps. The area shown in the Tap display is indicated by the bright rectangle in the Overview display.
Move to different sections of the Tap display
In the Final Cut Pro timeline, select a clip with the Delay Designer effect applied, then open the effect’s settings in the Audio inspector.
For information about adding the effect and showing its controls, see Add Logic effects to clips in Final Cut Pro.
Horizontally drag the middle of the bright rectangle in the Overview display.
The zoomed view in the Tap display updates as you drag.