Trim and arrange videos and photos in iMovie
Fine-tune your movie by changing the length of clips, changing the sequence of clips, and splitting clips.
Trim and arrange clips on iPhone or iPad
After you add video clips and photos to the timeline of your project, you can make a clip longer or shorter, change the sequence of clips, or split a clip into two separate clips.
Trim clips
You can trim a video clip or a photo so it appears for a shorter or longer period of time in your project.

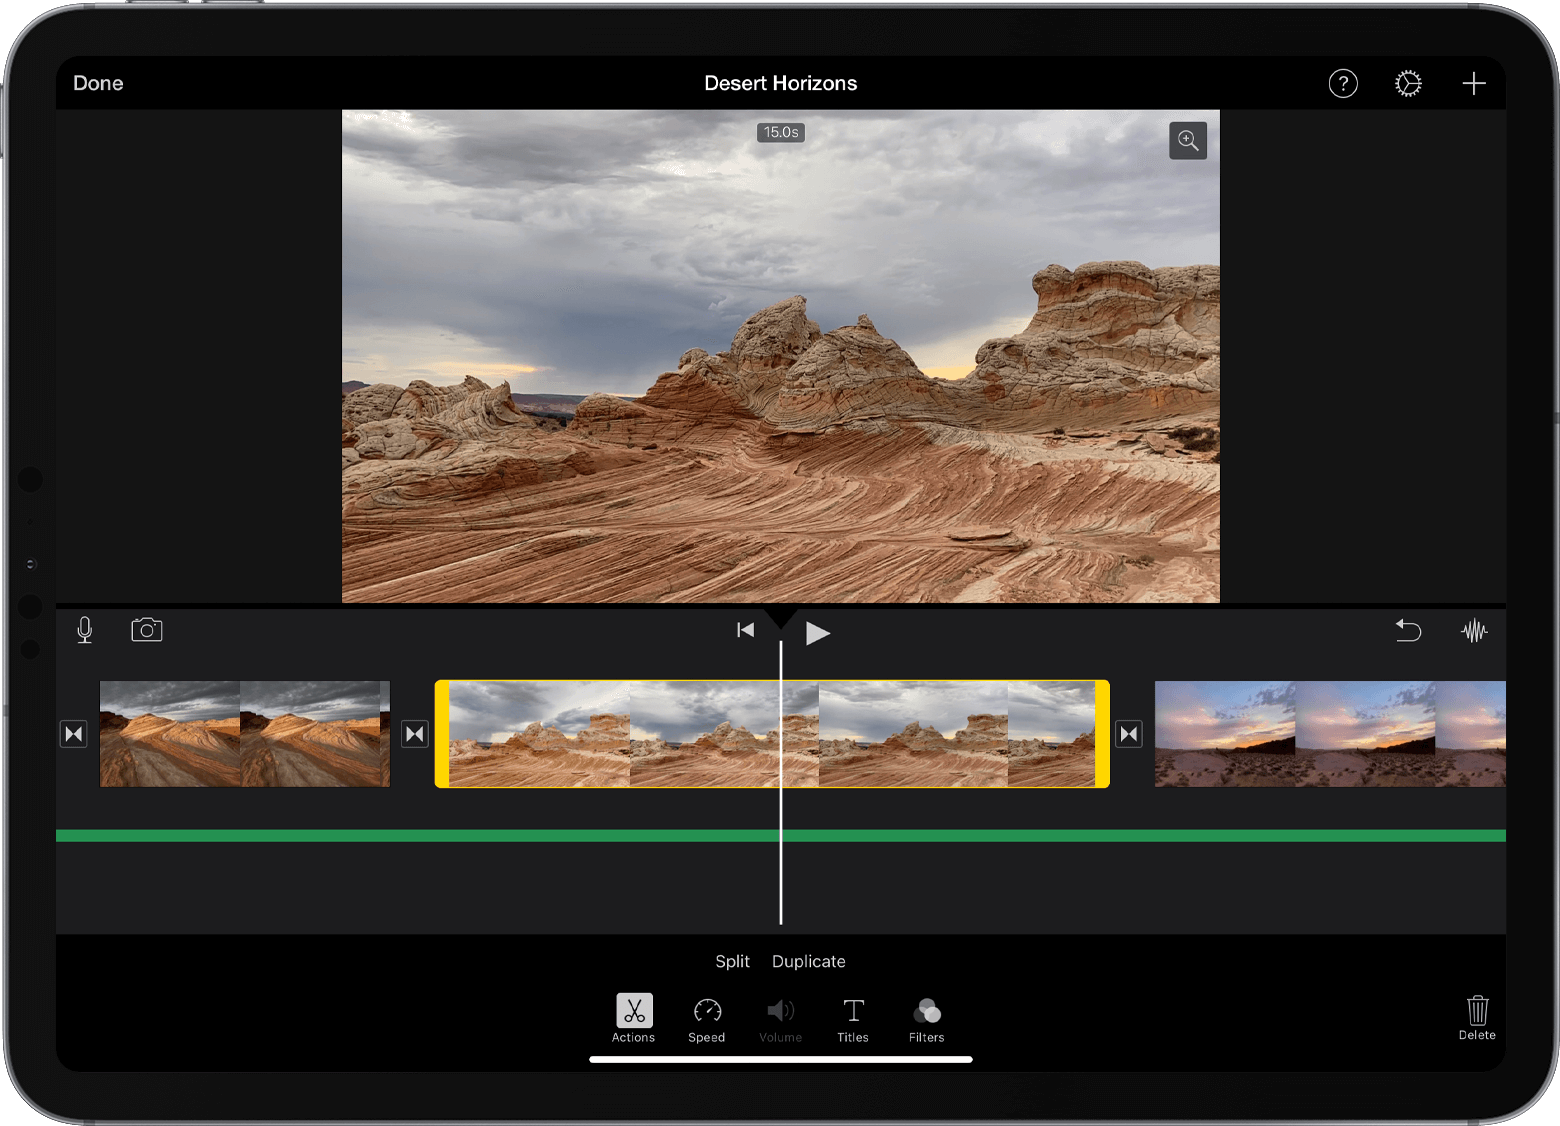
With your project open, tap the video clip or photo in the timeline. A yellow highlight appears around the selected clip.
To zoom in on the clip, pinch open in the center of the timeline. When you zoom in, you can see more detail in the clip, which can make it easier to edit.
Drag the beginning or end of the clip to make the clip shorter or longer:
To make the clip longer, drag the edge of the clip away from the center of the clip.
To make the clip shorter, drag the edge of the clip toward the center of the clip.
If you can't drag the edge of the clip, there might not be additional video at the beginning or end of that clip. For example, if you added a video clip that’s 20 seconds long, you can’t make it longer than 20 seconds. It might also mean the clip is at the shortest length allowed by iMovie, which is 0.3 seconds. If you still want to change the duration of a clip, try changing the speed of the clip.
Arrange clips
You can change the sequence of clips in the timeline to change when a particular clip appears in your movie. With your project open, touch and hold the video clip or photo in the timeline until it rises off the timeline, then drag the clip to a different location in the timeline.
Split clips
When you split a clip, you can adjust the duration of each section, remove unwanted sections, or add different titles to each section.
Scroll in the timeline to position the playhead (the white line) where you want to split the clip.
If necessary, pinch open in the center of the timeline to zoom in on the clip.
Tap the clip, tap the , then tap Split. Or tap the clip, then swipe down over the playhead on the clip, as if you were slicing through the clip with your finger.
iMovie places a None transition (also known as a cut) between the two newly created clips. You can change this transition to a cross-dissolve or other transition.
Trim and arrange clips on Mac
After you add video clips and photos to the timeline of your project, you can make a clip longer or shorter, change the sequence of clips, or split a clip into two separate clips.
Trim clips
You can trim a video clip or a photo so it appears for a shorter or longer period of time in your movie.

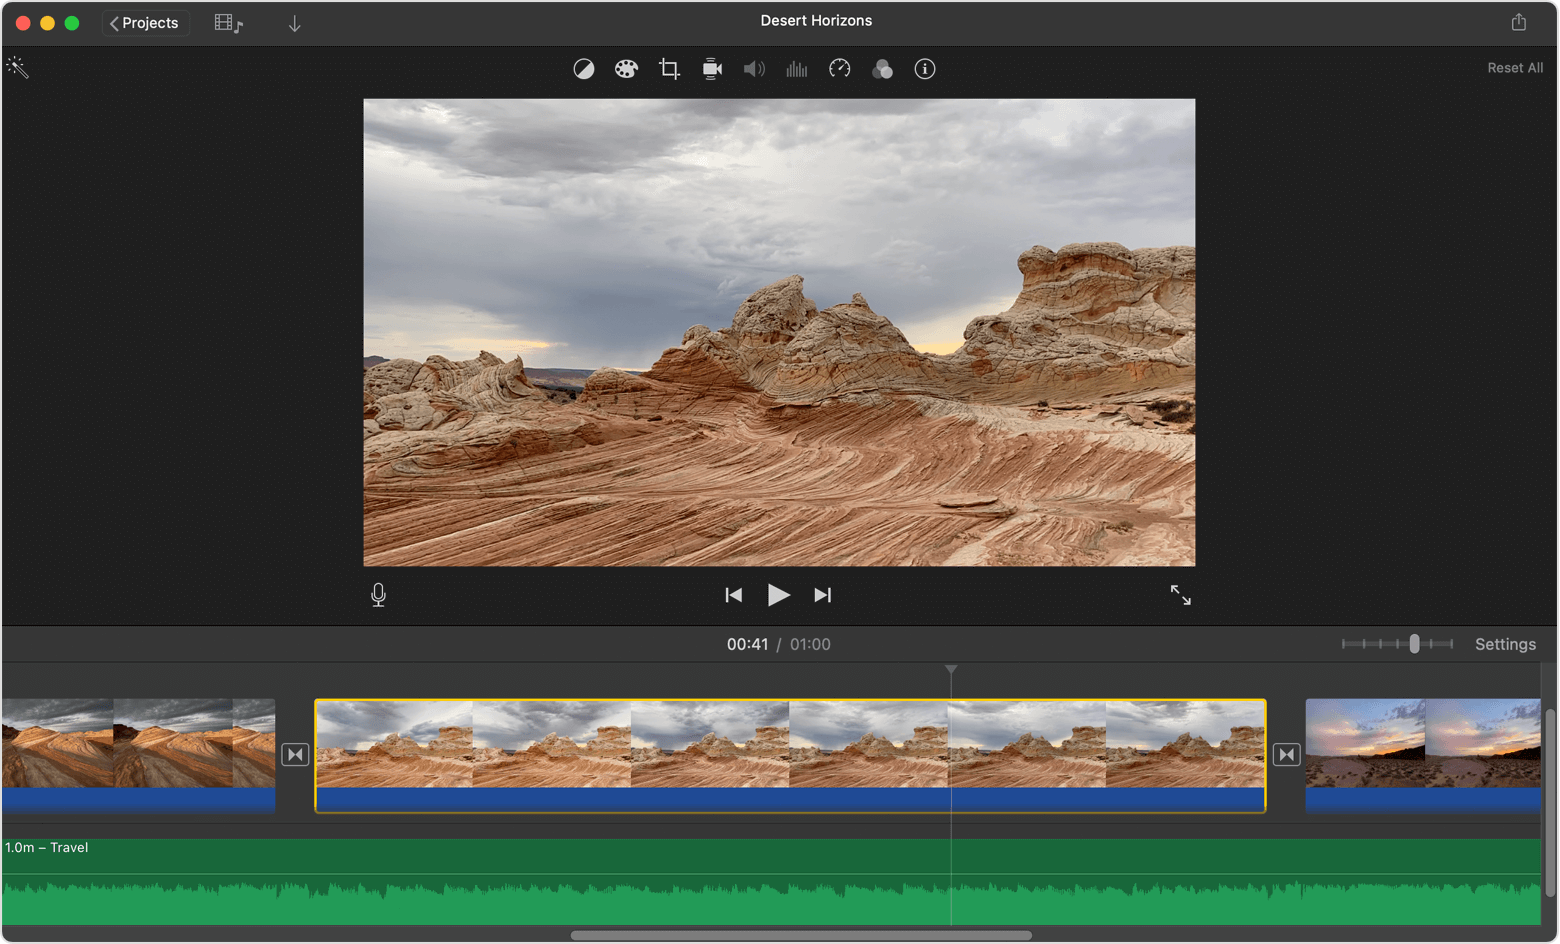
With your project open, scroll the timeline to locate the clip you want to trim.
To zoom in on the clip, choose View > Zoom In, press the Command–Plus sign (+), or pinch the trackpad. When you zoom in, you can see more detail in the clip, which can make it easier to edit.
In the timeline, hold the pointer over the beginning or end of the clip that you want to trim until your pointer becomes the clip . The arrows indicate which directions you can trim the clip:
To make the clip longer, drag the edge of the clip away from the center of the clip.
To make the clip shorter, drag the edge of the clip toward the center of the clip.
If you can't drag the edge of the clip, it means there is no additional video at the beginning or end of that clip. For example, if you added a video clip that’s 20 seconds long, you can’t make it longer than 20 seconds. It might also mean the clip is at the shortest length allowed by iMovie, which is 0.1 seconds. If you still want to change the duration of a clip, try changing the speed of the clip.
Add or remove frames with the clip trimmer
For more precise editing, you can use the clip trimmer to add or remove individual frames from a video clip. You can also see how much of your clip is being used in your movie.
In the timeline, select the clip you want to trim.
Choose Window > Show Clip Trimmer. The selected clip appears in the clip trimmer, above the timeline. The part of the clip that is visible in your movie appears between the two white lines, and the parts of your clip that don't appear in your movie are dimmed and outside the white lines.
Hold the pointer over the line at the beginning or end of the clip until the clip appears, then make the clip longer or shorter:
To make the clip longer by adding frames, drag away from the center of the clip.
To make the clip shorter by removing frames, drag toward the center of the clip.
You can use a different portion of the same clip while maintaining its length in the project:
In the clip trimmer, hold the pointer over the clip until the clip appears.
Drag the selected portion of the clip left or right.
To close the clip trimmer, press Return.
Arrange clips
You can change the sequence of clips in the timeline to change when a particular clip appears in your movie. With your project open, click the video clip or photo in the timeline, then drag the clip left or right depending on where you want the clip to appear in your movie:
If you want the clip to appear earlier, drag the video clip to the left, then release.
If you want the clip to appear later, drag the video clip to the right, then release.
You can also move multiple clips at once:
Hold the Command key as you click each clip you want to select, drag a selection rectangle around the clips, or hold the Shift key as you click each clip.
Drag the clips to a new location in the timeline.
Split clips
When you split a clip, you can adjust the duration of each section, remove unwanted sections, or add different titles to each section.
Scroll in the timeline to position the playhead (the white line) where you want to split the clip.
If necessary, choose View > Zoom In or press Command–Plus sign (+) to zoom in on the clip.
To split the clip, choose Modify > Split Clip or press Command-B.
After you split the clip, add a transition like a cross-dissolve between the clips.