Logic Pro User Guide for Mac
- Welcome
-
- What’s new in Logic Pro for Mac 10.8
- What’s new in Logic Pro for Mac 10.7.8
- What’s new in Logic Pro for Mac 10.7.5
- What’s new in Logic Pro 10.7.3
- What’s new in Logic Pro 10.7
- What’s new in Logic Pro 10.6
- What’s new in Logic Pro 10.5
- What’s new in Logic Pro 10.4
- What’s new in Logic Pro 10.3
- What’s new in Logic Pro 10.2
- What’s new in Logic Pro 10.0
-
- What is Logic Pro for Mac?
- Logic Pro project basics
- Use menu commands and key commands
- Use the complete set of Logic Pro features
- Undo and redo edits
- Manage Logic Pro content
- How to get help
-
- Projects overview
- Create projects
- Open projects
- Save projects
- Delete projects
-
- Play a project
- Set the playhead position
- Control playback with the transport buttons
- Use transport shortcut menus
- Use transport key commands
- Customize the control bar
- Change the LCD display mode in Logic Pro for Mac
- Monitor and reset MIDI events
- Use the cycle area
- Use the Chase Events function
- Use Apple Remote to control Logic Pro
- Use Logic Remote to control Logic Pro projects
- Preview projects in the Finder
- Close projects
- View project information
-
- Tracks overview
-
- Create tracks
- Create tracks using drag and drop
- Create tracks using existing channel strips
- Assign tracks to different channel strips
- Choose the default region type for software instrument tracks
- Select tracks
- Duplicate tracks
- Rename tracks
- Change track icons
- Change track colors
- Reorder tracks
- Zoom tracks
- Replace or double drum sounds
- Control timing with the groove track
- Use selection-based processing
- Edit track parameters
-
- Overview
-
- Before recording software instruments
- Play software instruments
- Record software instruments
- Record additional software instrument takes
- Overdub software instrument recordings
- Spot erase software instrument recordings
- Use Note Repeat
- Replace software instrument recordings
- Record to multiple software instrument tracks
- Record multiple MIDI devices to multiple tracks
- Record software instruments and audio simultaneously
- Use step input recording techniques
- Record MIDI messages from another music app
- Use the metronome
-
- Arranging overview
-
- Regions overview
- Select regions
- Select parts of regions
- Cut, copy, and paste regions
- Move regions
- Add or remove gaps
- Delay region playback
- Loop regions
- Repeat regions
- Resize regions
- Mute and solo regions
- Time stretch regions
- Reverse audio regions
- Split regions
- Demix MIDI regions
- Join regions
- Create regions in the Tracks area
- Change the gain of audio regions in the Tracks area in Logic Pro for Mac
- Normalize audio regions in the Tracks area
- Create aliases of MIDI regions
- Convert repeated MIDI regions to loops
- Change the color of regions
- Convert audio regions to samples for a sampler instrument
- Rename regions
- Delete regions
- Create groove templates
-
- Overview
-
- Add notes
- Select notes
- Snap items to the grid
- Move notes
- Copy notes
- Change the pitch of notes
- Resize notes
- Edit note velocity
- Quantize the timing of notes
- Quantize the pitch of notes
- Change note articulations
- Lock the position of events
- Mute notes
- Change note color
- View note labels
- Delete notes
- Time stretch notes
- View multiple MIDI regions
- Split chords
- Automation/MIDI area in the Piano Roll Editor
- Open other editors
-
- Logic Pro for Mac advanced editors overview
-
- Audio File Editor overview
- Play audio files in the Audio File Editor
- Navigate audio files in the Audio File Editor
-
- Audio File Editor edit commands
- Edit audio files with transient markers
- Use the Audio File Editor Pencil tool
- Trim or silence audio files
- Remove DC offset
- Set audio file levels
- Normalize audio files
- Fade audio files
- Reverse audio and invert phase
- Audio File Editor Loop commands
- Undo Audio File Editor edits
- Backup audio files
- Use an external sample editor
-
- Mixing overview
- Set channel strip input formats
- Set channel strip pan or balance positions
- Mute and solo channel strips
-
- Plug-ins overview
- Add, remove, move, and copy plug-ins
- Insert a plug-in on a track using drag and drop
- Activate plug-ins on inactive channels
- Use the Channel EQ
- Work in the plug-in window
- Work with plug-in settings
- Work with plug-in latencies
- Work with Audio Units in Logic Pro for Mac
- Support for ARA 2 compatible plug-ins
- Use MPE with software instruments
- Use the Plug-in Manager
- Work with channel strip settings
- Surround panning
- Use the I/O Labels window
- Undo and redo Mixer and plug-in adjustments
-
- Smart Controls overview
- Show Smart Controls for master effects
- Choose a Smart Control layout
- Automatic MIDI controller assignment
- Map screen controls automatically
- Map screen controls
- Edit mapping parameters
- Use parameter mapping graphs
- Open the plug-in window for a screen control
- Rename a screen control
- Use articulation IDs to change articulations
- Assign hardware controls to screen controls
- Compare Smart Control edits with saved settings
- Use the Arpeggiator
- Automate screen control movements
-
- Live Loops overview
- Start and stop cells
- Work with Live Loops cells
- Change loop settings for cells
- How the Live Loops grid and Tracks area interact
- Edit cells
- Edit scenes
- Work in the Cell Editor
- Bounce cells
- Record a Live Loops performance
- Change Live Loops grid settings
- Control Live Loops with other devices
-
- Global changes overview
-
- Tempo overview
-
- Smart Tempo overview
- Use free tempo recording
- Choose the Project Tempo mode
- Choose the Flex & Follow setting
- Use Smart Tempo with multitrack audio
- Work in the Smart Tempo Editor
- Improve the tempo analysis using hints
- Correct tempo analysis results using beat markers
- Protect Smart Tempo edits by locking a range
- Match audio recordings to the project tempo
- Match the tempo to an audio region
- Use audio file tempo information
- Record tempo changes
- Use the Tempo Interpreter
- Use the tempo fader
- Control project volume
-
- Overview
- Add notes
-
- Part box overview
- View score symbols
- Select score symbols
- Add notes and rests
- Add notes and symbols to multiple regions
- Add key and time signature changes
- Change the clef sign
- Add dynamic marks, slurs, and crescendi
- Change note heads
- Add symbols to notes
- Add trills, ornaments, and tremolo symbols
- Add sustain pedal markings
- Add chord symbols
- Add chord grids and tablature symbols
- Add bar lines, repeats, and coda signs
- Add page and line break symbols
-
- Select notes
- Move and copy notes
- Change note pitch, duration, and velocity
- Change note articulations
- Quantize the timing of notes
- Restrict note input to the current key
- Control how ties are displayed
- Add and edit tuplets
- Override display quantization using tuplets
- Add grace notes and independent notes
- Delete notes
- Use automation in the Score Editor
-
- Staff styles overview
- Assign staff styles to tracks
- Staff Style window
- Create and duplicate staff styles
- Edit staff styles
- Edit staff, voice, and assign parameters
- Add and delete staffs or voices in the Staff Style window in Logic Pro for Mac
- Copy staffs or voices in the Staff Style window in Logic Pro for Mac
- Copy staff styles between projects
- Delete staff styles
- Assign notes to voices and staffs
- Display polyphonic parts on separate staffs
- Change the staff assignment of score symbols
- Beam notes across staffs
- Use mapped staff styles for drum notation
- Predefined staff styles
- Share a score
-
-
- Key commands overview
- Browse, import, and save key commands
- Assign key commands
- Copy and print key commands
-
- Global Commands
- Global Control Surfaces Commands
- Various Windows
- Windows Showing Audio Files
- Main Window Tracks and Various Editors
- Various Editors
- Views Showing Time Ruler
- Views Showing Automation
- Main Window Tracks
- Live Loops Grid
- Mixer
- MIDI Environment
- Piano Roll
- Score Editor
- Event Editor
- Step Editor
- Step Sequencer
- Project Audio
- Audio File Editor
- Smart Tempo Editor
- Library
- Sampler
- Drum Machine Designer
- Step Input Keyboard
- Smart Controls
- Tool Menu
- Control Surface Install Window
- Touch Bar shortcuts
-
-
- Working with your control surface
- Connect control surfaces
- Add a control surface to Logic Pro for Mac
- Automatic assignment for USB MIDI controllers
- Grouping control surfaces
- Control Surfaces settings overview
- Modal dialog display
- Tips for using your control surface
- Supported control surfaces
- Software and firmware for Logic Pro for Mac
-
-
- Environment overview
- Common object parameters
- Customize the Environment
-
-
- Fader objects overview
- Use fader objects
- Play back fader movements
- Work with object groups
- Fader styles
- Fader functions: MIDI events
- Fader functions: range, value as
- Fader functions: filter
- Vector fader
- Special faders overview
- Cable switchers
- Meta event faders
- SysEx faders
- Work with SysEx messages
- Special functions
- Ornament objects
- MMC record buttons
- Keyboard objects
- Monitor objects
- Channel splitter object
- Physical input objects
- Physical input objects
- MIDI click objects
-
-
- Use MIDI plug-ins
-
- Arpeggiator overview
- Arpeggiator control parameters
- Note order parameters overview
- Note order variations
- Note order inversions
- Arpeggiator pattern parameters overview
- Use Live mode
- Use Grid mode
- Arpeggiator options parameters
- Arpeggiator keyboard parameters
- Use keyboard parameters
- Assign controllers
- Modifier controls
- Note Repeater controls
- Randomizer controls
-
- Use Scripter
- Use the Script Editor
- Scripter API overview
- MIDI processing functions overview
- HandleMIDI function
- ProcessMIDI function
- GetParameter function
- SetParameter function
- ParameterChanged function
- Reset function
- JavaScript objects overview
- Use the JavaScript Event object
- Use the JavaScript TimingInfo object
- Use the Trace object
- Use the MIDI event beatPos property
- Use the JavaScript MIDI object
- Create Scripter controls
- Transposer controls
- Record MIDI to Track
-
-
- Alchemy overview
- Alchemy interface overview
- Alchemy Name bar
- Alchemy file locations
-
- Alchemy source overview
- Source master controls
- Import browser
- Source subpage controls
- Source filter controls
- Source filter use tips
- Source elements overview
- Additive element controls
- Additive element effects
- Spectral element controls
- Spectral element effects
- Pitch correction controls
- Formant filter controls
- Granular element controls
- Sampler element controls
- VA element controls
- Source modulations
- Morph controls
- Alchemy master voice section
- Alchemy Extended parameters
-
- ES2 overview
- ES2 interface overview
- ES2 integrated effects processor controls
- Use ES2 in Surround mode
- Extended parameters
-
-
- Sample Alchemy overview
- Interface overview
- Add source material
- Edit mode
- Play modes
- Source overview
- Synthesis modes
- Granular controls
- Additive effects
- Additive effect controls
- Spectral effect
- Spectral effect controls
- Filter module
- Low and highpass filter
- Comb PM filter
- Downsampler filter
- FM filter
- Envelope generators
- Mod Matrix
- Modulation routing
- Motion mode
- Trim mode
- More menu
-
- Sculpture overview
- Sculpture interface
- Global parameters
- Amplitude envelope parameters
- Use the Waveshaper
- Filter parameters
- Output parameters
- Use surround range and diversity
- Define MIDI controllers
- Extended parameters
-
-
- Ultrabeat overview
- Ultrabeat interface
- Synthesizer section overview
- Filter section controls
- Distortion circuit controls
- Glossary
- Copyright

Alchemy morph use and tips for Logic Pro for Mac
Source components are shown only in advanced view. Click the Advanced button to switch to advanced view, then click the Morph button to view and use the morph controls. See Alchemy morph controls in Logic Pro for Mac.
It is important to choose the same analysis mode for all morphed sources. See Alchemy Import browser in Logic Pro for Mac.
Though you can morph with any synthesis type, the best morphing results are achieved with the spectral or additive engines. Spectral is the most suitable import method to use for the majority of audio material. Use Additive or Add + Spec import mode if dealing with pitched, monophonic sounds. Make sure the Formant button is turned on when importing sounds because this generally results in a higher quality morph.
If you are not creating a pitched instrument that requires the root note to remain at the default pitch, irrespective of the morph position, turn off the Fixed Pitch button, because this will result in a higher quality morph.
The time alignment of sounds is crucial to achieving a good morph. Selecting sounds with similar timing and loop characteristics tends to deliver the best results. Aim to have a similar loop duration and loop location within the selected samples. If the sounds you are morphing are comprised of more than single note samples or the timing of your sources doesn’t align as you would like, adjust the warp marker positions. See the Manually time-aligning morphed sounds task in this section.
Morphs that move from 100% of all elements in a sound to 100% of another sound can often be suitable for sound effects but may be more difficult to shape into new playable instruments. You may find it better to mix the levels of individual elements for this type of use.
Note: Images shown in tutorials are not specific to presets used in tasks. They are included as a guide to help you find areas and parameters in the Alchemy interface.
Manually time-aligning morphed sounds in Alchemy
This task covers manual alignment of sources. Alchemy features an auto align function (see Alchemy morph controls in Logic Pro for Mac) that can make this an automatic process, but in some cases you may need to manually intervene to achieve the best results.
When morphing is turned on for a source, warp markers are displayed in the zone waveform editor. See Alchemy zone waveform editor in Logic Pro for Mac.
When you morph from a sound with a fast attack to one with a slow attack, Alchemy smoothly adjusts the attack time according to the morph all position, or the envelope position if in elements mode. Warp markers define the attack phase boundaries of each sound. More generally, warp markers define the boundaries of a series of time-aligned segments when two or more sounds are morphed together.
In Alchemy in Logic Pro, click the source select field for the active source, then choose Import Audio from the pop-up menu.
In the Import browser, click the Additive, Spectral, or Granular import mode button.
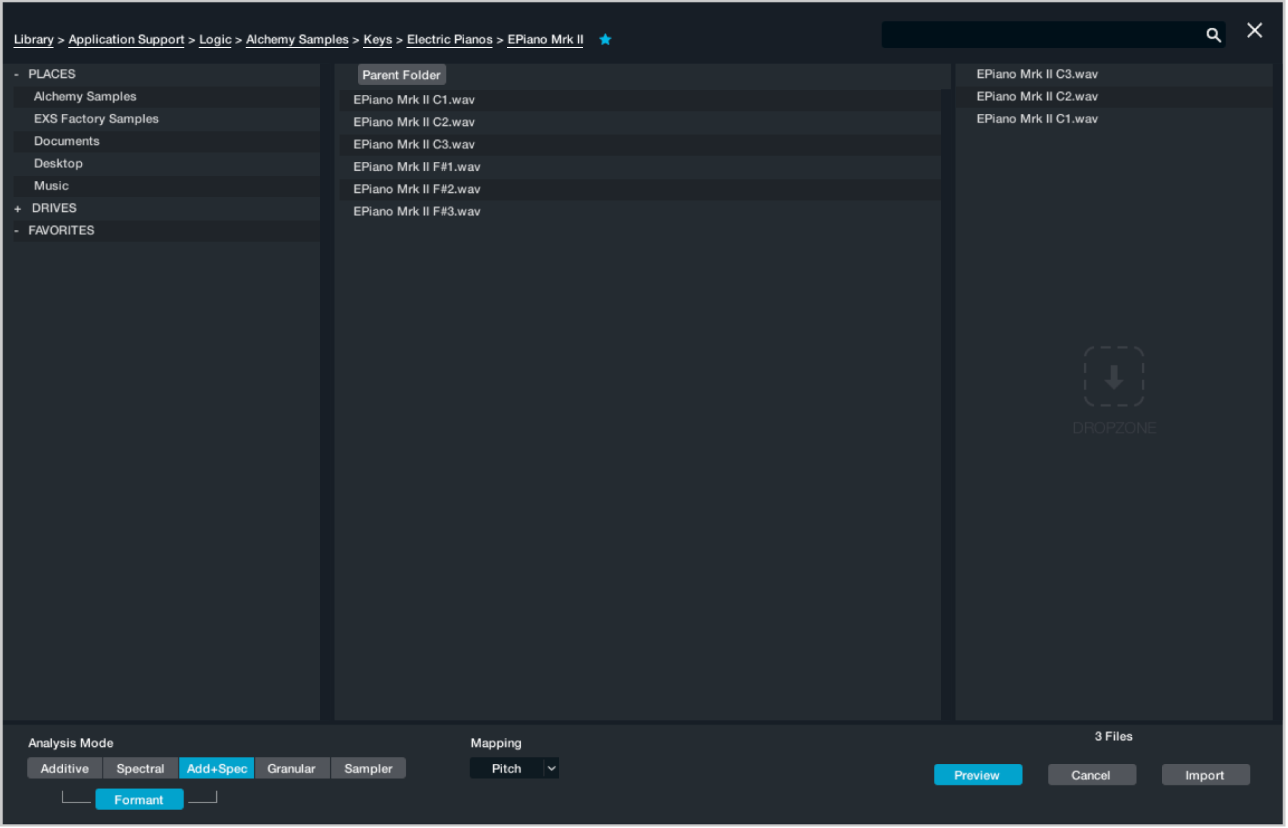
Select the files you want to use, then click the Import button.
When you import additive, spectral, or granular data, Alchemy automatically sets warp markers at the following positions:
The absolute start point of the sound.
The end of the attack portion.
The loop start point. If a sample does not have loop points, loop points are automatically chosen.
The loop end point. If a sample does not have loop points, loop points are automatically chosen.
The absolute end point of the sound.
If you need to edit warp markers, shown as light gray lines, click the source Edit button to open the main edit window. Depending on the source material and active morph mode, light blue lines may appear on the background between the start and end markers. These can help with manual alignment of warp markers. The Time ruler indicates.
Do any of the following in the zone waveform editor:
To move a warp marker, including the loop start and end, drag the marker handle left or right.
Note: The loop start and loop end markers also double as warp markers. You cannot position the loop start later than the loop end. However, it is possible to drag both the loop start and loop end markers to the same position, creating a sustain point rather than an extended loop region.
To insert a new warp marker, double-click a position in the waveform editor.
The number associated with each existing warp marker, inclusive of the loop markers, is updated accordingly.
To delete an existing warp marker, double-click its handle.

If your sounds are single notes, the placement of the five default warp markers usually delivers good results when morphing. You may want to change the position of marker 2, placing it at the point where it sounds like the end of the attack for each sound. This can produce a more convincing morph between sounds with contrasting attack qualities.
If your sounds consist of multiple events such as musical phrases, drum loops, or a spoken sentence, you may find it useful to create additional warp markers. If you are morphing between two voices speaking the same sentence, placing a warp marker at the start of each word helps to preserve the integrity of each word during the morph. You must make sure the same numbered warp marker is at the start of the same word in each sentence.
If you are morphing between musical phrases or drum loops with different grooves or timing nuances, placing a warp marker on every beat, half beat, or quarter beat helps you to achieve a smoother morph.
Explore source morphing options and controls in Alchemy
This tutorial makes use of the Morph Example preset, which you should load from the Name bar. The preset contains acoustic guitar, kalimba, a sustained solo vocal, and synth brass samples. Additive + formant was used as the import method because the content contains more pitched info than noise, and this also allows access to the additive harmonic controls. This basic material provides enough scope to go in a number of directions.
Play the keyboard while changing parameters to get a feel for what each does.
In Alchemy in Logic Pro, click the Advanced button to view all parameters. Click the A/B/C/D buttons, in turn, to look at parameter settings for all four sources.
Note that PVar is set to zero for all sources. This isn’t always useful, but for this particular preset, no pitch variations are required.
Solo each source, in turn, and play a few notes, then unsolo before moving to the next source. This will give you a better understanding of the way the sound is constructed.
Click the Morph button at the left, and note the active Morph XY and Elements buttons. Experiment with the X and Y parameters, using either the points in the display or the X and Y knobs for the Additive, Pitch, Formant, and Envelope parameters.
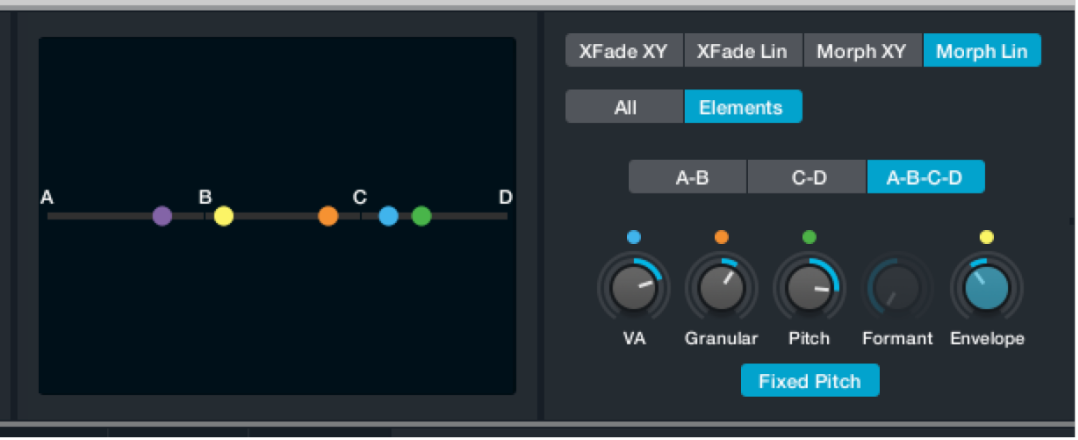
Click the XFade XY, XFade Lin, and Morph Lin buttons to hear the impact each type of crossfade or morph has on the sound. Experiment with the All, Elements, X and Y, A-B, C-D, and A-B-C-D parameters available in each morph or crossfade mode.
In the Perform section, drag the Transform pad framing box to the “Bold Pluck,” “Glassy,” and other snapshots, repeating step 3 and playing as you audition each variation. You’ll see movements in the Transform pad update the other Perform section controls.
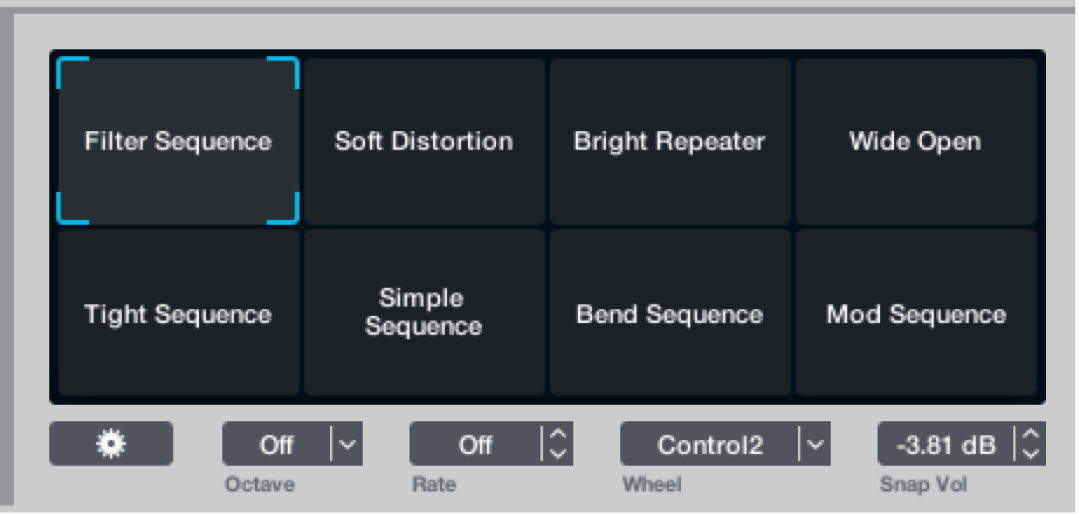
Click the Show Target button at the right of the modulation section and hover the pointer over the Perform menu item. Take a look at the number of, and the choice of, parameters assigned to each performance control.
As you can see, the preset is far more complex than it appears on the surface. The morphing controls are not simply used to crossfade between sources, but between modulators, filter and effect parameters, mix settings, harmonic levels, and much more. Morphing can be viewed and used to blend the sounds of each element as well as aspects of each synthesis type into a hybrid of synthesis methods.
Crossfade all four sources using an X/Y pad performance control in Alchemy
Follow these steps to use the left X/Y pad in the performance controls section instead of the X/Y pad in the morph section. This allows you to control crossfades between sources in simple view and also allows you to include these modulations in Transform pad snapshots.
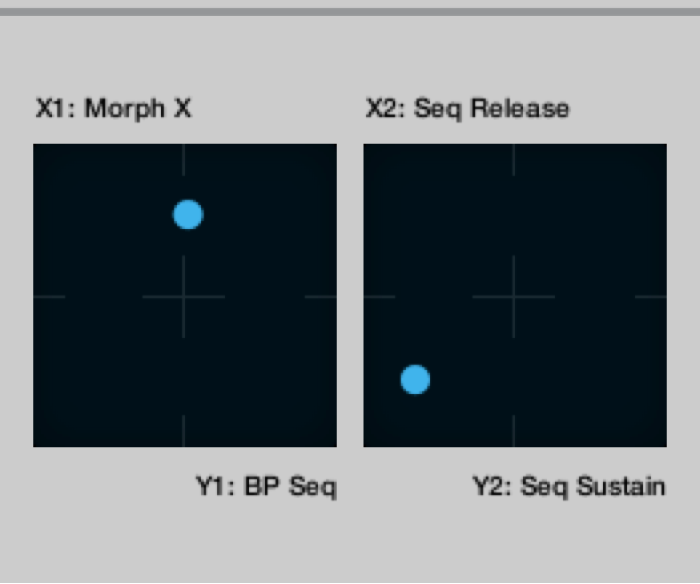
In Alchemy in Logic Pro, click the File button in the Name bar and choose Initialize Preset from the pop-up menu to reset all Alchemy parameters to default settings.
Switch to advanced view, and set up each of the four sources with a different, but complementary sound.
Feel free to use any of the synthesis engines for each source or to blend multiple engines within one source.
Click the Morph button at the left to view morphing parameters, then click the XFade XY button.
Make sure the X knob is set to zero, then Control-click the X knob and choose Add Modulation > Perform > XYPad1X from the shortcut menu.
Make sure the Y knob is set to zero, then Control-click the Y knob and choose Add Modulation > Perform > XYPad1Y from the shortcut menu.
Morph four spectral sources using an X/Y pad performance control in Alchemy
Follow these steps to use the left X/Y pad in the performance controls section instead of the X/Y pad in the morph section. This allows you to control crossfades between sources in simple view and also allows you to include these modulations in Transform pad snapshots.
In Alchemy in Logic Pro, click the File button in the Name bar and choose Initialize Preset from the pop-up menu to reset all Alchemy parameters to default settings.
Switch to advanced view, then click the Morph button at the left to show morphing parameters.
Click the source A select field, and choose Import Audio.
Select Spectral mode in the Import browser, choose a suitable sample, and import it. Turn on Formant mode before importing.
Repeat steps 3 and 4 for each of the other three sources. Make sure Spectral mode is chosen and the Formant button is on when importing to sources B, C, and D.
Click the Morph button at the left to view morphing parameters, then click the Morph XY button.
You can now morph between the four sources using the X and Y knobs. Follow steps 7 and 8 to assign the X and Y knobs to the left X/Y pad in the Perform section.
Double-click the X knob to set it to zero, then Control-click the X knob and choose Add Modulation > Perform > XYPad1X from the shortcut menu.
Double-click the Y knob to set it to zero, then Control-click the Y knob and choose Add Modulation > Perform > XYPad1Y from the shortcut menu.
Create a linear morph between two speech samples in Alchemy
In Alchemy in Logic Pro, click the File button in the Name bar and choose Initialize Preset from the pop-up menu to reset all Alchemy parameters to default settings.
Switch to advanced view, then click the Morph button to show morphing parameters.
Click the source A select field, and choose Import Audio.
Locate the first of your speech samples and import it, using Additive, Spectral, or Add+Spec mode. Turn on Formant mode before importing.
Repeat steps 3 and 4 for source B and your second speech sample. Use the same import mode as for the first sample, and make sure Formant mode is active.
Click the Morph button at the left to view morphing parameters, then click the Morph Lin button to view linear morphing parameters.

Click the A-B button to change the linear morphing mode.
You can now use the X knob to morph between the two speech samples. Each resynthesis method creates different sounding results even before morphing, and the results halfway through the morph are dramatically different. Experiment with each sample import method to determine which delivers the best outcome.
Control-click the X knob, then choose Add Modulation > Perform > Control 1 from the shortcut menu.
Click the Perform button to view performance controls, then click the Wheel pop-up menu under the Transform pad, and choose Control 1.
You can now use the mod wheel to move performance control 1.

As optional steps, click the source A button, then click the Edit button to view the main edit window for this source.
If necessary, drag the S and E handles (start and end point markers) in the waveform display to trim the file.
Double-click above the waveform display to place additional warp markers at important syllables in your speech samples.
Click the B button in the main edit window to view source B parameters.
Double-click to create additional warp markers. Existing warp markers already correspond with those created for source A. The syllable tagged with warp marker n in source B is time-aligned with the syllable tagged with warp marker n in source A at the halfway point of the morph.
Morph four additive sources using a pair of MSEG envelopes in Alchemy
In Alchemy in Logic Pro, click the File button in the Name bar and choose Initialize Preset from the pop-up menu to reset all Alchemy parameters to default settings.
Switch to advanced view, then click the Morph button to show morphing parameters.
Click the source A select field, and choose Import Audio.
Select Additive mode in the Import browser, choose a suitable sample, and import it. Turn on Formant mode.
Repeat steps 3 and 4 for each of the other three sources. Make sure Spectral mode is chosen and the Formant button is on when importing to sources B, C, and D.
Click the Morph button at the left to view morphing parameters, then click the Morph XY button.
You can now morph between the four sources using the X and Y knobs. Follow the steps below to assign the X and Y knobs to MSEG 1 and MSEG 2, respectively.
Double-click the X knob to set it to zero, then Control-click the X knob and choose Add Modulation > MSEG > MSEG1 from the shortcut menu.
You can now define morphing on the X axis with the MSEG1 envelope in the modulation section.

Double-click the Y knob to set it to zero, then Control-click the Y knob and choose Add Modulation > MSEG > MSEG2 from the shortcut menu.
You can now define morphing on the Y axis with the MSEG2 envelope in the modulation section.